Breakfast Zucchini Bread

This bread is easy to make and super tasty. A yummy quick breakfast treat, but hey, if you want to have this for lunch or dinner I won’t judge!

Is best served warmed up with unsalted butter! Enjoy!

Breakfast Zucchini Bread

(This is called ‘Breakfast Zucchini Bread’ because it’s best to make in the evening and allow to sit overnight.)

Makes one small 8 x 4 loaf

Bake at 350 for 50 minutes or until toothpick comes out clean.

What You Need:

1 large zucchini or 2 small ones finely shredded

1 beaten egg

1 1/2 cups of flour

1 teaspoon cinnamon

1/4 teaspoon plus a sprinkle of nutmeg

1/4 teaspoon baking powder

1/2 teaspoon baking soda

1/2 teaspoon salt

1 cup of sugar

1/4 cup of vegetable oil

Steps:

1. In one small bowl whisk together the flour, salt, baking powder, cinnamon, nutmeg, and baking soda.

2. In a separate medium/large size bowl mix the beaten egg, sugar, vegetable oil, and shredded zucchini with an electric mixer.

3. Begin adding the dry ingredients (the flour and spices) to the wet ingredients (the egg and oil) slowly till batter is consistent.

4. Generously butter up the loaf pan and pour batter into pan. Bake at 350 for 50 minutes or until toothpick comes out clean.

5. When bread is complete, allow to cool completely. Cover and let it sit overnight.

And then, enjoy for breakfast!

Mix all the dry ingredients in separate bowl.
Then, mix your wet ingredients.
Combine flour mixture and zucchini mixture together and bake at 350.

3 Steps To A Perfect Hard Boiled Egg

What came first, the chicken or the egg?

3 Steps To A Perfect Hard Boiled Egg

Step 1: Fill a small to medium size pot of water, then, place desired amount of eggs into water. Turn stove top to medium high (to about a 7 or 8 on stove)

Step 2: When water comes to a rolling boil, turn heat down to medium (About a 5 or 4). You want to keep the rolling boil going but you don’t want it to be an aggressive boil. Set timer for 18 minutes.

Step 3: Once the timer goes off remove pot from stove immediately and place eggs into an ice bath (a bowl of water with ice). Let sit for about 5 to 10 minutes.

After removing from ice bath, cut in half, and your eggs should look like this.

PERFECT AND DELICIOUS.

That’s it!! Place in fridge to enjoy later or eat right away.

4 Ingredient Baked Pop-Tarts

Easy, yummy, and quick!

Once you figure out how easy this is the possibilities are endless!

I’m so excited to try more flavors and to really get creative!

Let’s just get to it shall we.

All You Need Is (for this specific pop-tart)

• premade pie crust

• smuckers natural strawberry fruit spread

• The egg white of ONE egg (all you do is brush this over the pastry before popping into the oven)

• Cookie Icing

(Sprinkles optional)


Maybe one of these days I’ll try making these with homemade dough and icing but I don’t have time! Do you!? This method of using store bought and pre-made makes this super easy, especially with your kids!

This is something fun then can make by themselves too! With adult supervision with the oven of course.


4 Ingredient Baked Pop-Tarts with pictures

Steps:

Step 1. Follow steps on the pre-made dough, on the box of dough I bought it said to roll out and let rise for 20 mins.)

– once dough is ready, cut out the size of rectangles you want and as many as you want (doesn’t need to be perfect).

– in this picture there are 6 rectangles which will make 3 pop -tarts.

Step 2:

Put a dollop amount of strawberry spread onto the rectangles. However many you are making you want to make sure each rectangle has a plain one to go on top.

Step 3.

Place a plain rectangle of dough onto each rectangle with strawberry spread. And seal each pastry with a fork. Poke some holes on top with a toothpick.

Brush egg white wash all over the pastries. (whisk egg white a little before brushing)

(I made these with my girls so they aren’t the prettiest but I’m sure if you have time you can do a nicer job!)

Step 5.

Bake at 400 degrees for 10 to 12 minutes (oven time may vary) allow to cool

Step 6.

Add cookie icing and sprinkles!

Enjoy! See, simple!

Now go get creative and Wild with this!!!

You Should Be Cleaning Your Fridge Every 3 Months – 5 Tips To Get You Started

When I read that I should be cleaning the inside of my fridge every 3 to 4 months my response was oops…..

It had definitely been awhile since our fridge had a good cleaning. And honestly the only reason it got cleaned recently was because my husband asked me to do it.

Being the good wife that I am (haha) I went ahead and did it for him.

It was disgusting.

When I actually pulled out the drawers I was embarrassed and thankful no one was here to witness the grossness of our fridge. Is grossness a word? Anyways it was gross.

But here is our fridge now. Clean, sanitized, and organized. Isn’t it lovely!

Nothing expired, nothing sticky on any surfaces, and everything is pretty much visible to prevent anything going to waste.

Hopefully this blog inspires or motivates you to clean out your fridge too.

Happy cleaning! Read below friends!


You Should Be Cleaning Your Fridge Every 3 months – 5 Tips To Get You Started

  1. Make The Time

The fridge gets put off from cleaning because it doesn’t feel like much of a priority. That’s okay to admit that. Other things feel way more important then cleaning your fridge. However this is also the home to your food that you put into your body.

Make the time. It really won’t take you too long to clean, unless it’s been awhile. And if you’re scared or dreading to really deep clean your fridge then that’s a sign that you really need to clean it. Skip the Netflix or social media for a little bit to get this done.

2. Make Everything As Visible As You Can

If you can rearrange your fridge to where just about everything is visible less things will go to waste in your fridge. Everything in your fridge will be taken advantage of and no more throwing things away because it was forgotten.

3. If You’re Going To Clean it, Then Clean It

Not only do you need to make the time but you need to take out those drawers and take it on full throttle. Clorox wipes work great! Some of those drawers though may require a good scrub in the sink with some soap and water.

Either way, clean it and be proud of your work.

4. If You Have Kids Place Your Healthy Snacks At Arms Reach

Doing this simple thing will encourage your kids to go for the healthier options when they are hungry vs. wanting the junk food.

5. Don’t Overstock It

There’s no need to overstock. Unless maybe you have a party or a get together coming up. If you continuously overstock your fridge it may lead to you throwing more food out then it actually getting eaten. And if you’re throwing away food then you’re really throwing away money.

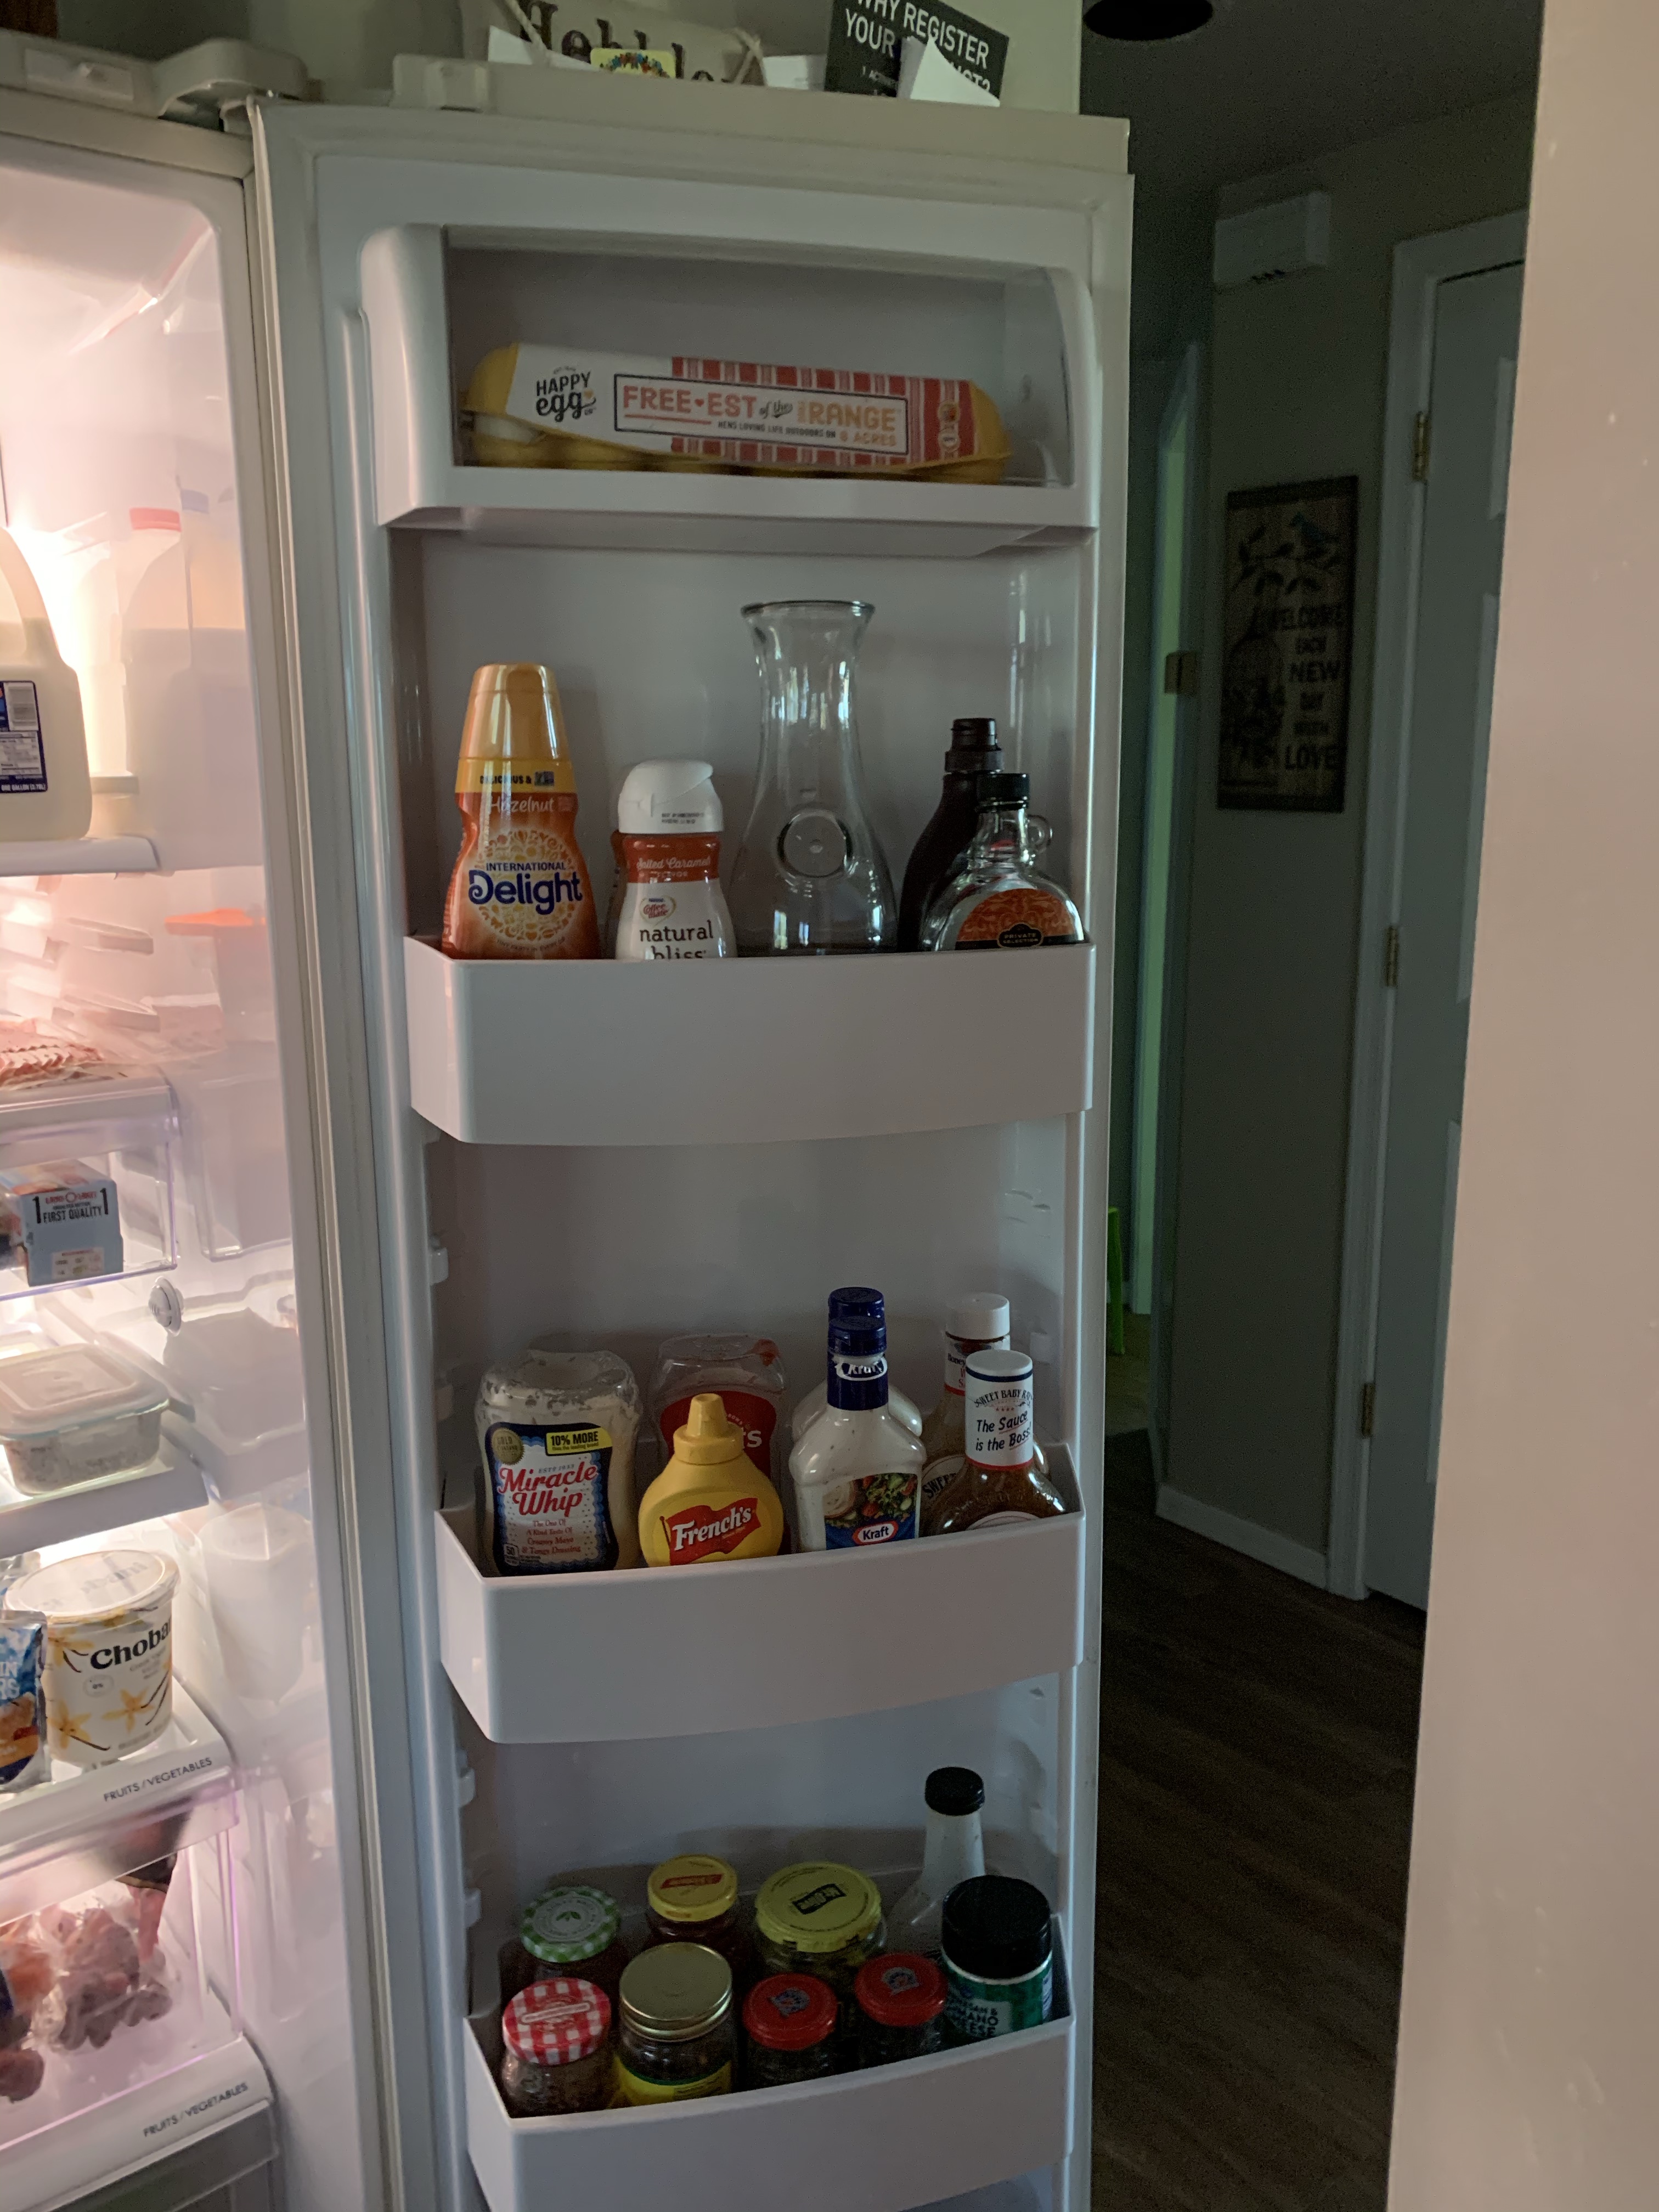
As you can see everything is pretty visible. It’s not overstocked and I have my healthy snacks for the kids at the bottom.

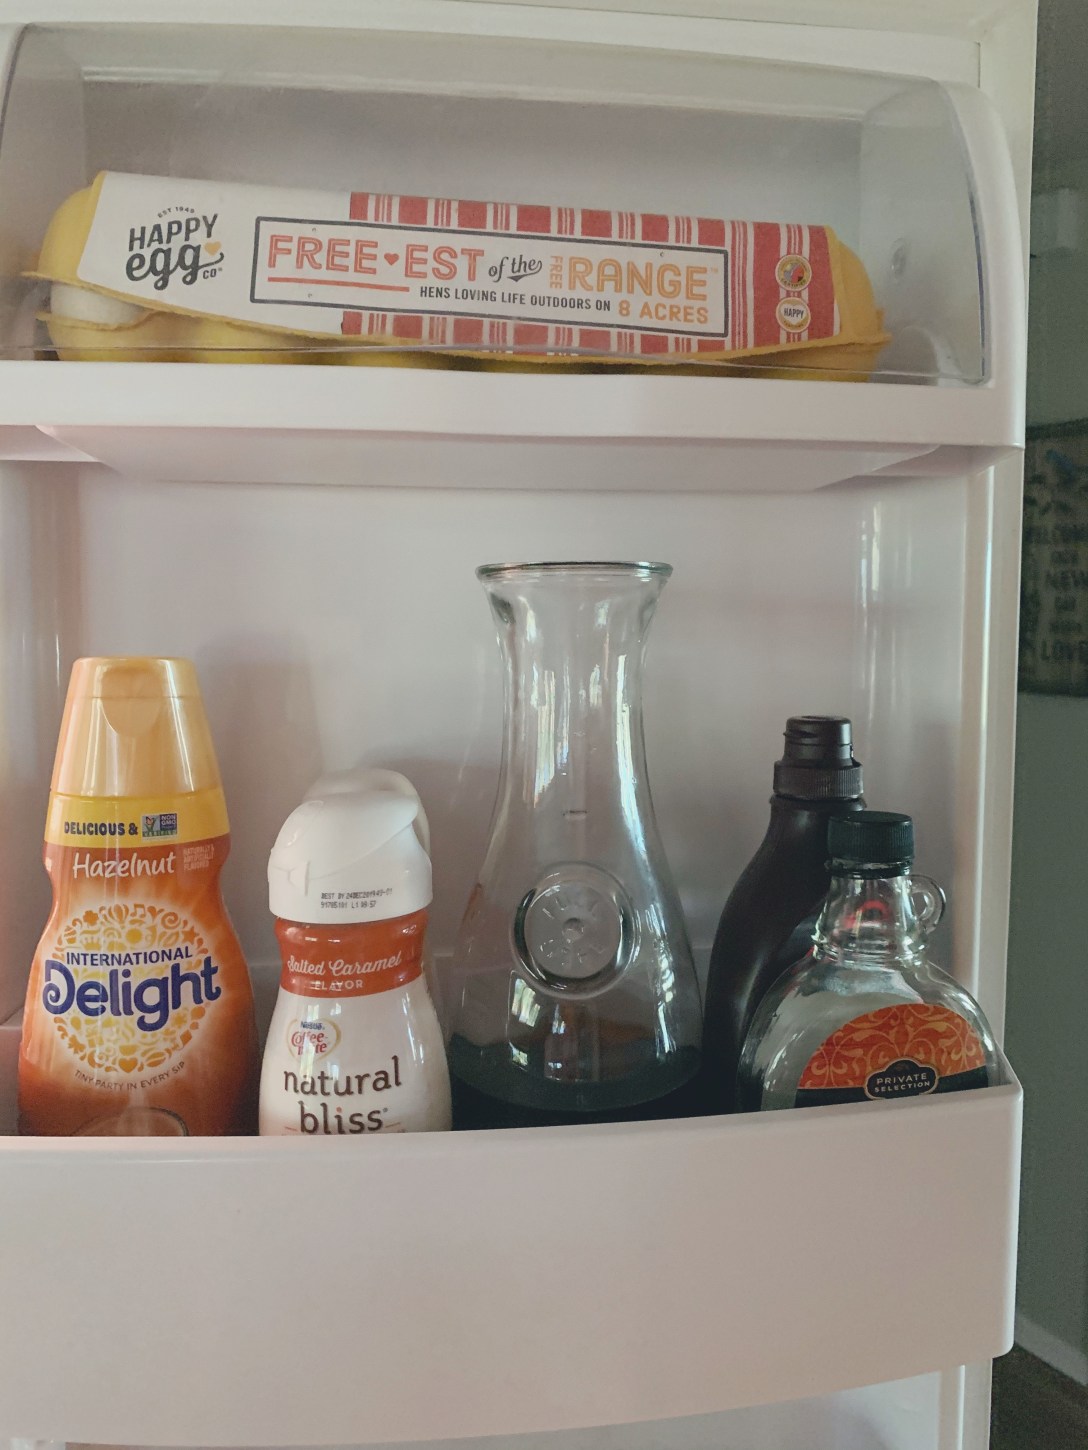
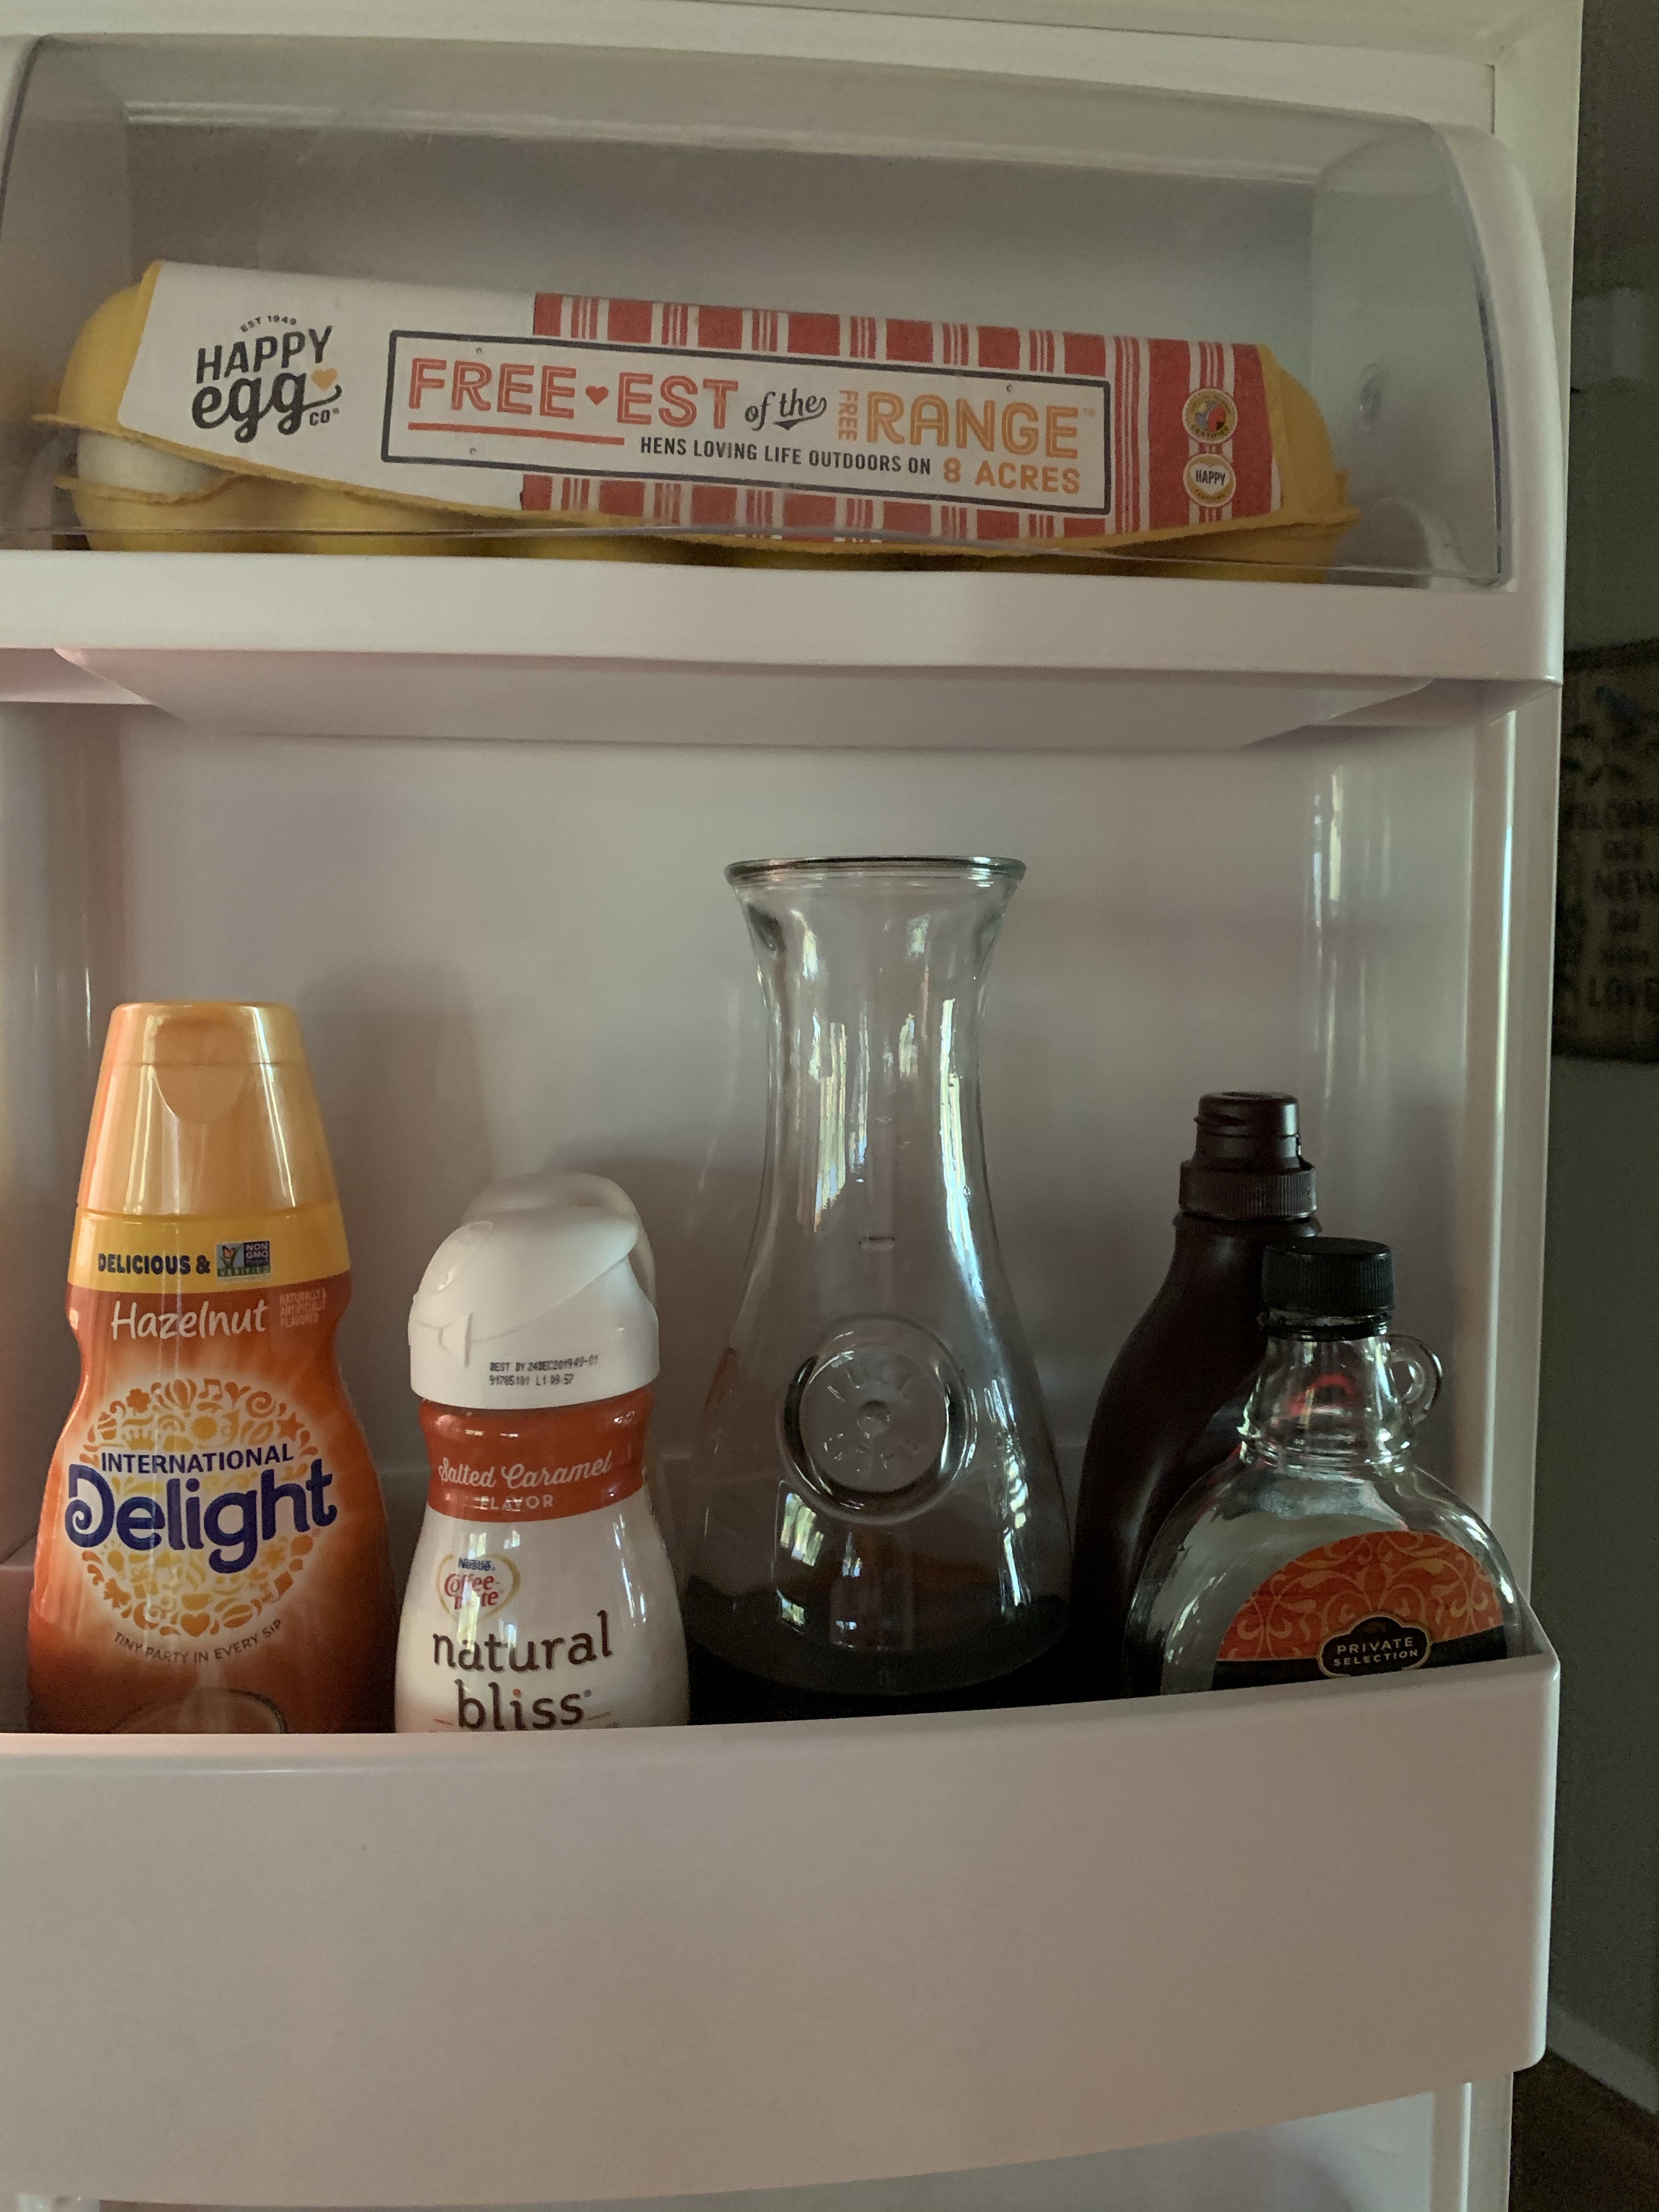
On the inside of the door I have my little coffee area with iced coffee and creamers/syrup. The next holder is condiments and the next is jarred stuff like pickles, olives, jellies, salsa, etc. And the last holder (that’s not pictured) held a box of chicken broth and carrots for our horse.

In this little drawer I keep the deli meat, cheese, butter, hotdogs, etc in here. I keep the cheese hidden because if my girls can see it that’s all they want…..ALL.DAY. lol

When my daughters are hungry and open the fridge this is all they can reach. They love sweets and chips but this is the only food I have accessible to them.

Because……. iced coffee. I just need to buy caramel and whipped cream and it will be the perfect area for my iced coffee needs.

So there you have it! We do have another fridge in our sun room and in that we only keep drinks. Water, soda, my boxed wine lol.

I hope you feel inspired or motivated to clean your fridge now!!!

Happy cleaning folks!

Coconut Almond Chia Seed Pudding

Talk about creamy, light, and refreshing! Especially when you add fresh fruit!

I love this flavor because it’s not overly sweet but it’s satisfying enough when you want to indulge in something sweet.

Especially if you’re trying to limit your intake on the super sugary stuff.

The coconut milk is what provides that creamy texture while the almond extract supplies the flavor.

Hope you enjoy it!


Coconut Almond Chia Seed Pudding

Servings: 4-6

What you need:

  • 2 cups Coconut milk
  • 1/3 cup Chia seeds
  • 1/2 tsp Almond extract
  • 1 Tbsp Honey

(Side note: a can of coconut milk is only 1 and 1/3 cup so if don’t feel like opening a new can of coconut milk just add regular milk. As long as it equals 2 cups)

Steps:

  1. Mix all ingredients into a bowl
  1. Store chia mix into an airtight container and allow the pudding to sit overnight
  1. Serve with fresh fruit

Enjoy!

NO BAKE Coconut Almond Oatmeal Bites

This is the perfect pick me up snack!

Full of energy, protein, and it’s enough when you’re craving something sweet but you want something healthy!

Husband and kid approved and extremely easy to make!

(This is also something very fun to make with your kids! They will enjoy being involved and helping you in the kitchen!)


NO BAKE Coconut Almond Oatmeal Bites

Makes 12 Bites

What you need:

1 cup dry oatmeal

1/2 cup chocolate chips

1 tsp of almond extract

2/3 cup coconut flakes

1/2 cup almond butter or peanut butter

1/3 cup honey

Optional – you can add chia seeds, ground flaxseed, or protein powder

Steps:

– Combine ALL ingredients in a medium sized bowl and mix with hands till throughly mixed.

– store in fridge for 1 hour

– roll into small/medium balls

– store in container and keep in fridge

Enjoy!