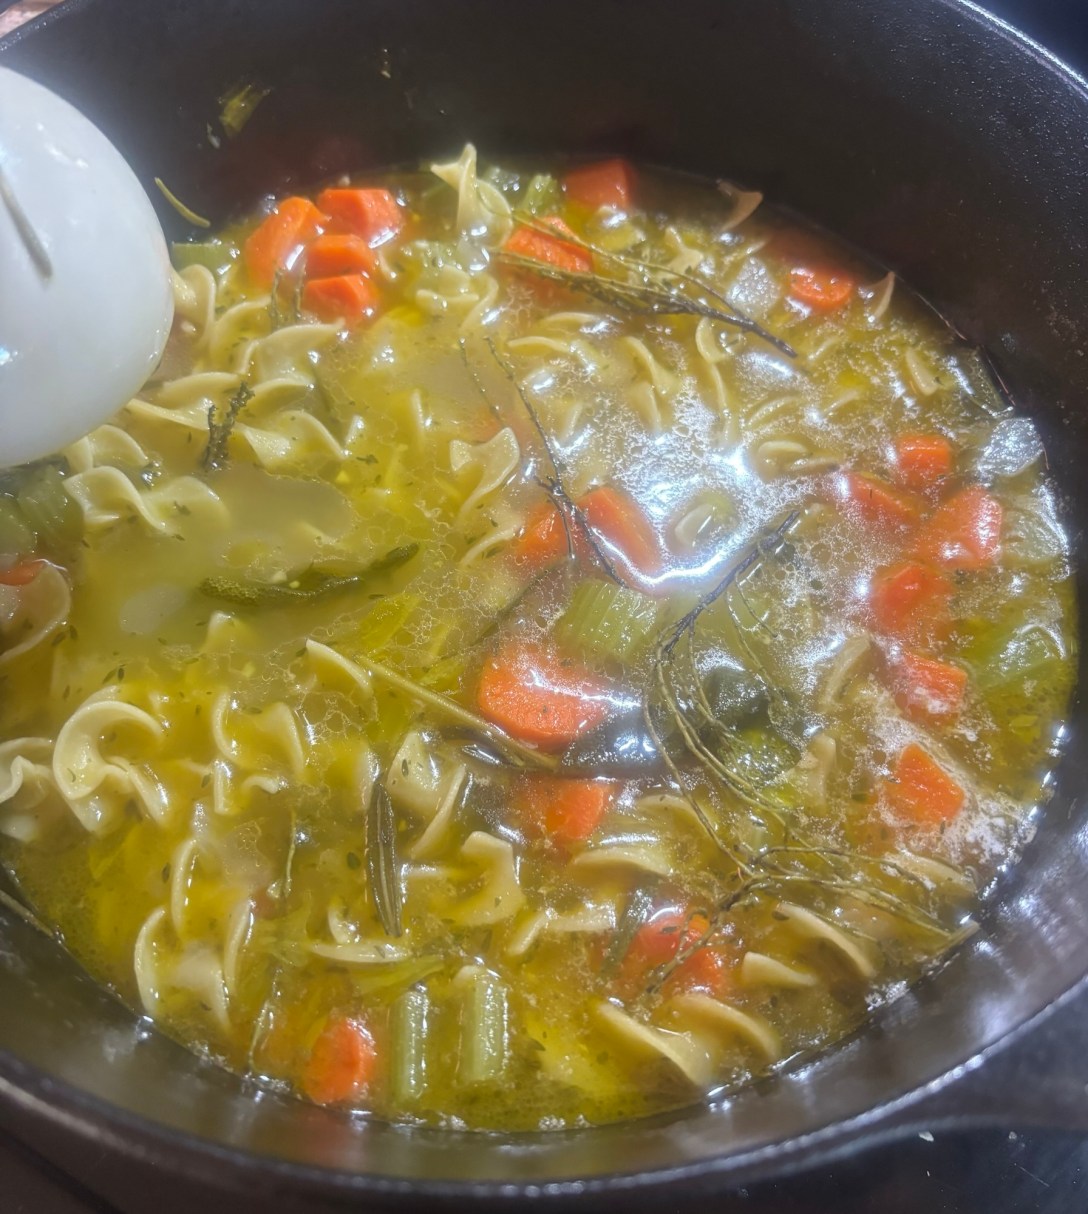
Vegetable Noodle Soup

What You Need:

6-8 carrots peeled and chopped

4-5 pieces of celery chopped

1 small onion finely chopped

1 tablespoon of minced garlic

A fresh poultry herb pack (found in produce – I also only added about 3/4 of the pack)

Egg noodles (3/4 of a 1 lb bag)

1 stick of salted butter

2 cans of chicken broth

Chicken bouillon for taste

Steps:

1. Sauté vegetables: add your butter stick in your Dutch oven over medium heat. Add onion, carrots, and celery. Cook for 5–7 minutes until softened.

2. Add garlic: Stir in garlic and cook for another 2 minutes.

3. Build the broth: Pour in vegetable or chicken broth. Add bay leaves, thyme, parsley, salt, and pepper (or add your fresh poultry herb pack here)

4. Simmer: Bring to a gentle boil, then reduce heat and simmer for 15–20 minutes until the vegetables are tender. Taste the broth, add a little bit of salt or I prefer chicken bouillon for flavor.

5. Add noodles: Stir in egg noodles and cook according to package directions, usually 6–8 minutes.

6. Remove bay leaves/rosemary stems and add lemon juice if desired and sprinkle with fresh parsley or Parmesan cheese.

Serve with warm bread rolls and crusty bread with butter. Enjoy!

Miso Soup Recipe

What You Need:

4 cups water

1 teaspoon hondashi powder or can use onion powder

¼ cup seaweed cut or broken into smaller ½ inch pieces

8 ounces tofu drained and cut into ½ inch cubes or smaller

4 tablespoons of miso paste

1 stalk green onion thinly sliced (optional)

Steps:

  • Heat the water to a boil and add the hondashi powder, wakame seaweed, and tofu cubes. 
  • Bring the soup back up to a boil, then reduce the heat to a high simmer. Let the soup simmer for about 3 minutes or until the wakame seaweed is rehydrated.
  • Turn off the heat and use a strainer to dissolve the miso paste into the soup.*If you don’t have a strainer, you can scoop out a small amount of soup to dissolve the miso paste, then add it back into the soup.*
  • Add the sliced green onions and serve the miso soup while hot and enjoy!

Coconut Milk & Sun-Dried Tomato Sauce

This sauce is creamy, slightly tangy, and works really well with pasta, chicken, shrimp, gnocchi, or even over roasted vegetables.

What You Need:

  • 1 tablespoon olive oil
  • 3–4 cloves garlic, minced
  • ½ cup sun-dried tomatoes, chopped plus 2-3 tablespoons of the oil from jar
  • 1 can (13.5 oz) full-fat coconut milk
  • 1 teaspoon Italian seasoning or oregano
  • ½ teaspoon salt (adjust to taste)
  • ¼ teaspoon black pepper
  • ¼ teaspoon red pepper flakes (optional for heat)
  • 1 tablespoon tomato paste (optional for a richer flavor)
  • 2 cups fresh spinach (optional)
  • Fresh basil for serving

Instructions

  1. Heat olive oil in a skillet over medium heat.
  2. Add garlic and cook for about 30 seconds until fragrant.
  3. Stir in the sun-dried tomatoes and cook for 1–2 minutes to release their flavor.
  4. Add tomato paste if using and cook for another minute.
  5. Pour in the coconut milk and stir well.
  6. Add Italian seasoning, salt, pepper, and red pepper flakes.
  7. Simmer gently for 5–8 minutes until slightly thickened.
  8. Stir in spinach and cook until wilted.
  9. Taste and adjust seasoning as needed.

Delicious Add-Ins

  • Chicken: Add cooked sliced chicken breast.
  • Shrimp: Add shrimp during the last 4–5 minutes of cooking.
  • Chickpeas: Stir in a can of drained chickpeas for a vegetarian meal.
  • Mushrooms: Sauté with the garlic for extra depth.

Serving Ideas

  • Toss with fettuccine or penne.
  • Spoon over grilled chicken or salmon.
  • Serve with gnocchi.
  • Use as a sauce for baked vegetables or stuffed peppers.

Enjoy!

Roasted Tomato And Garlic Bisque

What You Need:

20 oz of cherry tomatoes

1/2-3/4 of a large yellow or white onion cut in chunks

3/4 to 1 cup of heavy cream

1-2 handfuls of fresh basil

2 whole head of garlic cut in half

6-7 tablespoons of olive oil roughly (don’t be shy with the olive oil)

Salt and pepper for taste

Steps:

1. In a 9×13 glass dish place your tomatoes, fresh basil, onion, and garlic heads face down. Drizzle a generous amount of olive oil back and forth a few times. Dash a few times with salt and pepper.

2. Bake at 400 for 40 to 45 mins. Or until tomatoes are soft.

3. Squeeze out your garlic in a medium sized bowl and add the rest of the contents. Add your chicken broth and blend with a hand mixer.

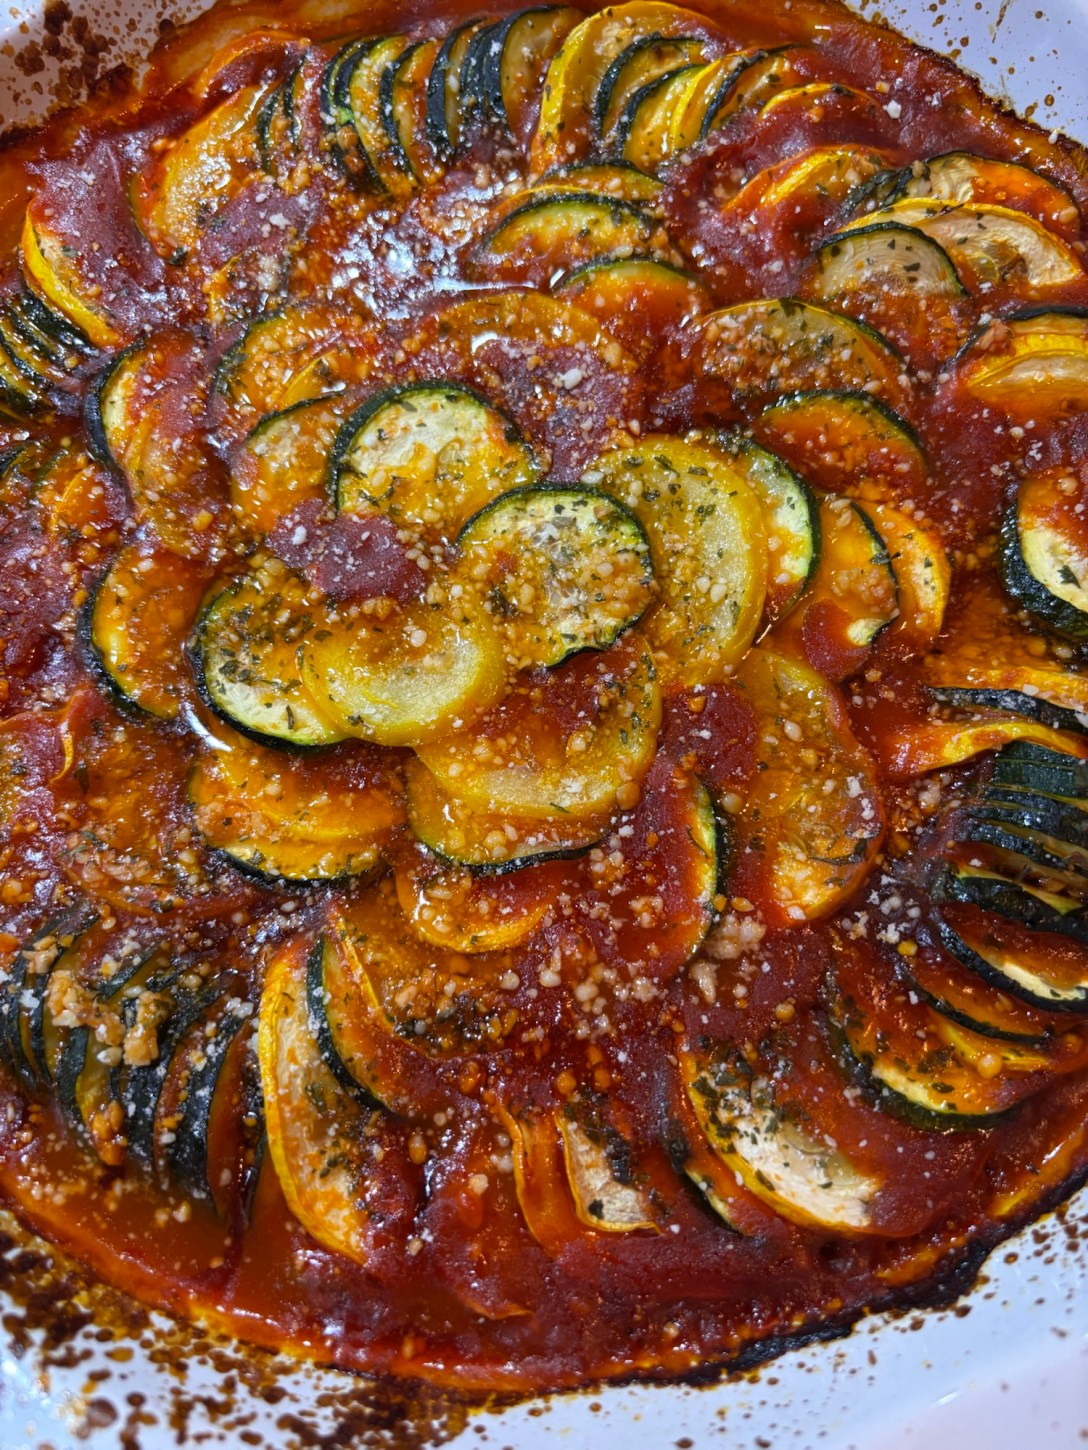
Easy Ratatouille (with Jarred Sauce)

Sometimes the best meals aren’t complicated—they’re just made with what you already have, a little intention, and a whole lot of ease. This ratatouille is exactly that. Simple, nourishing, and quietly beautiful.


What You Need:

  • 1 jar marinara sauce
  • 2 green zucchini
  • 2 yellow squash
  • 1 small eggplant (optional)
  • 2–3 tomatoes (optional)
  • 2–3 cloves garlic (jarred minced garlic works)
  • Olive oil
  • Salt + pepper
  • Italian seasoning
  • Optional: parmesan or mozzarella

And:

  • A ceramic pie dish (or any baking dish you have)
  • A knife + cutting board
  • A little time to slow down

Steps:

  1. Start with your base
    Pour your jarred marinara into a sauce pan and mix in:
  • Garlic
  • A splash of olive oil
  • Salt, pepper, and Italian seasoning

This is where you quietly turn something store-bought into something that feels like your own.


  1. Slice your vegetables
    Thinly slice:
  • Zucchini
  • Squash
  • Eggplant
  • Tomatoes

There’s no rush here. Let this part feel calm.


  1. Build your dish
  • Spread a layer of sauce on the bottom of your dish
  • Arrange your veggies in a spiral or rows
  • Sprinkle a little seasoning on top
  • Drizzle with olive oil

It doesn’t have to be perfect to be beautiful.


  1. Bake
  • Cover with foil
  • Bake at 375°F for 40–45 minutes
  • Remove foil and bake another 10–15 minutes

Your kitchen will start to smell like comfort.


  1. Finish with intention
  • Add a little more olive oil
  • Sprinkle fresh herbs or cheese if you’d like
  • Let it sit for 10 minutes before serving

This is where everything comes together.


A gentle reminder:

This dish isn’t about perfection—it’s about creating something warm, simple, and nourishing with what you already have.

Just like most things in life.

Don’t Lock Up Your Inner Child

Sometimes “becoming a grown-up” makes us a little too serious. We tend to overthink things, replay unnecessary scenarios, and censor ourselves. I look at my children—they say what’s on their minds, do what they feel, wear what they want, and laugh every day with little concern for what the rest of the world thinks. There’s a freedom in their joy that reminds me of what it feels like to be fully present and unburdened.

When we get too caught up in the grown-up lifestyle, that inner child can get lost, often without us even realizing we’ve locked that part of ourselves away. But it’s important to keep that side alive, to let it out and have fun. So ask yourself: what did you enjoy as a child? Let those answers guide you in reconnecting with that playful, authentic part of you.

Today, give yourself permission to embrace a little bit of that freedom. Laugh at something silly, try something new, or revisit a simple joy from when you were young. Releasing your inner child can bring a lightness that balances the weight of adulthood, reminding you that fun and spontaneity are just as important as responsibility.

Whatever It Is, Just Start – You’ll Figure It Out Along The Way

Honestly, what holds many of us back is the fear of what our peers might think. It’s wild, really—because they’re probably not as concerned as we imagine!

How someone views you often says more about them than it does about you. If someone mocks or criticizes, consider how they treat themselves. Those who truly love and support you will always be there, regardless.

Remember, you don’t need to please everyone, and you don’t have to. You know your reasons, and that’s enough. Keep that close to avoid the noise and stay true to your path.

And here’s the thing: You don’t need all the answers to start. Taking the first step is what sets the journey in motion. Trust that clarity and confidence will grow as you go. Every step forward brings insight, and before you know it, you’ll be far beyond where you started—proud that you chose to begin.

m.g.

Easy Pork Loin Crockpot Recipe

What You Need:

  • 3-4 Pounds boneless pork loin
  • 1 large onion
  • 2 tablespoons olive oil
  • 1 teaspoon granulated garlic
  • 1 teaspoon onion powder
  • 1 teaspoon black pepper
  • 1 teaspoon salt
  • ½ teaspoon paprika
  • 2 cups broth – I prefer chicken broth
  • cooking spray or unsalted butter

Instructions

1. Spray the bottom and sides of your crock pot with cooking spray or you can substitute with butter.

2. Slice your onion into round circle slices.

3. Lay your pork loin on top of the onions, fat side up.

4. Drizzle olive oil over the top of the pork loin.

5. Sprinkle garlic, onion powder, black pepper, salt and paprika over pork loin. Give it a quick rub to ensure that the spices are distributed evenly.

6. Add two cups of broth to the bottom of the crock pot.

7. Close and cook the pork loin in your crock pot on LOW for 6 hours or on HIGH for four hours. Your meat should register at an internal temperature of 145 with a meat thermometer.

Enjoy!

Chocolate Chip Zucchini Bread

What You Need:

1 large zucchini or 2 small ones finely shredded 

1 beaten egg

1 1/2 cups of flour

1 handful of dark chocolate chips

1/4 teaspoon baking powder

1/2 teaspoon baking soda 

1/2 teaspoon salt

1 cup of sugar 

1/4 cup of vegetable oil

Steps: 

1. In one small bowl whisk together the flour, salt, baking powder, and baking soda.

2. In a separate medium/large size bowl mix the beaten egg, sugar, vegetable oil, and shredded zucchini with an electric mixer.

3. Begin adding the dry ingredients (the flour and spices) to the wet ingredients (the egg and oil) slowly till batter is consistent. Add in the chocolate chips.

4. Generously butter up the loaf pan and pour batter into pan. Bake at 350 for 45-50 minutes or until toothpick comes out clean.

5. Allow bread to cool for a moment and enjoy!