Meat And Cheese Charcuterie Board Inspiration – Visual Layouts And Pairings

Get started! Charcuterie Boards short cut!

#ad as an Amazon associate I earn from qualifying purchases


Charcuterie boards are so much fun! They are kind of like snowflakes, they are each unique in their own way. And what a way to display your creativity! I love it! This blog is specifically meat and cheese but I see myself sharing a sweets charcuterie board blog too in the future. So many possibilities!

I went to a wine tasting last weekend to celebrate a friends 35th birthday. There was a total of 5 of us and we all met because of our daughters. Our girls all met last year in kindergarten and now our little beauties are in first grade. It’s been so much fun developing these types of friendships and I’m so grateful.

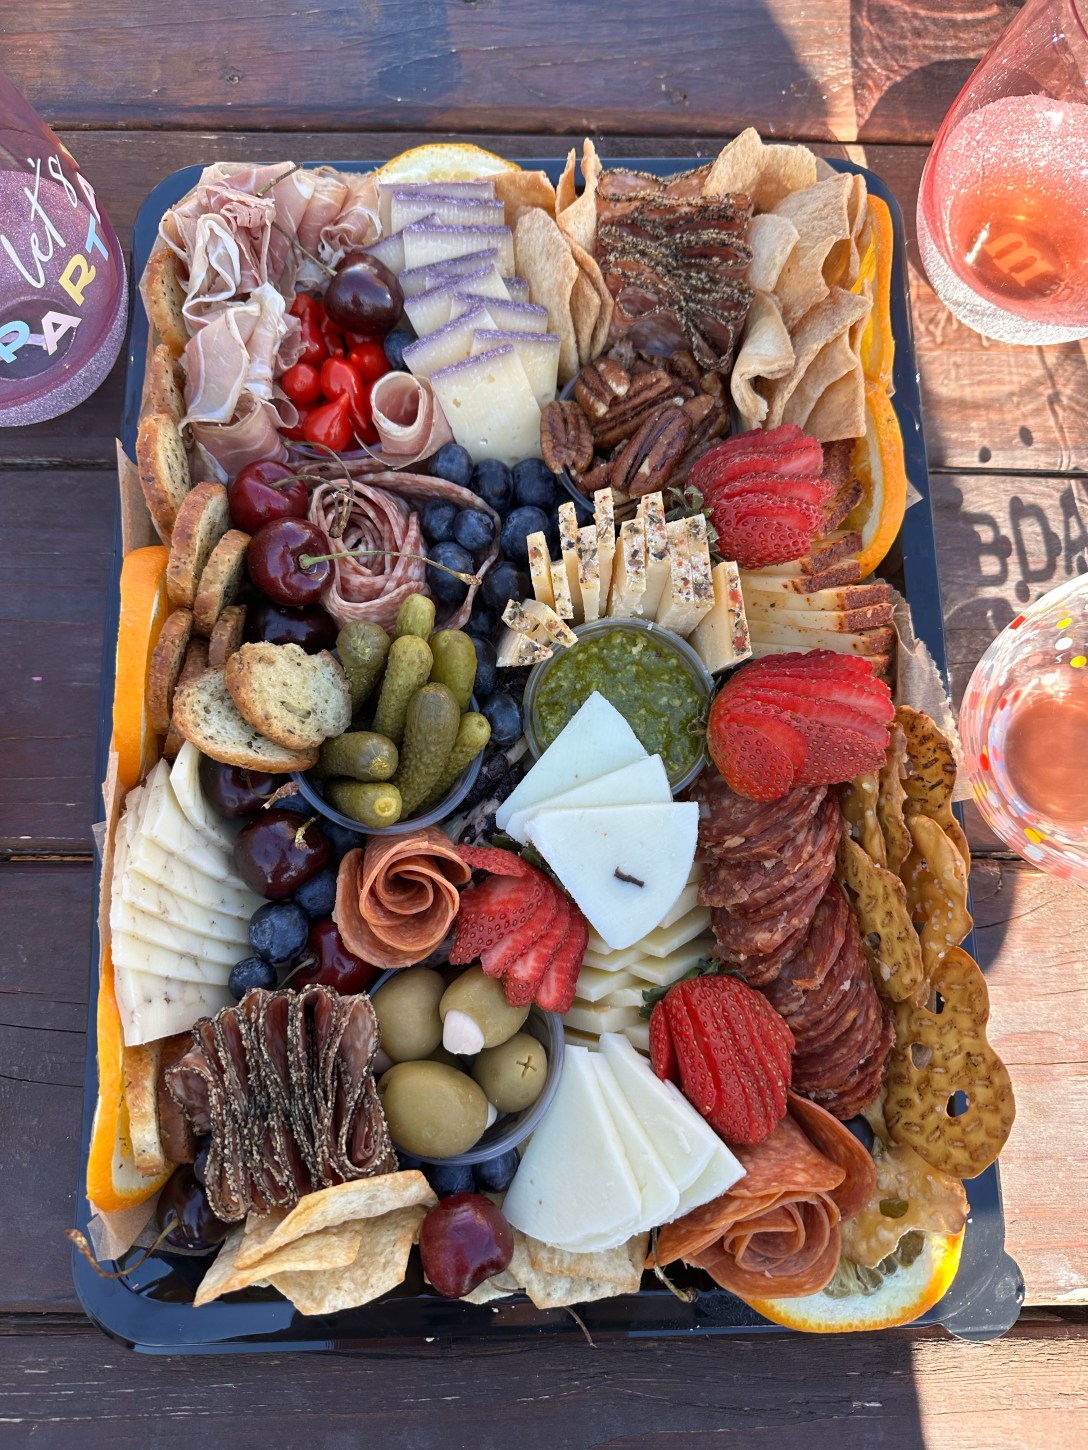
Back to the wine tasting, one of the girls brought a prepared charcuterie board that we all got to enjoy and indulge in. A friends of hers actually creates them as a business!

Just sitting with the girls drinking some wine in the vineyards while snacking was pure bliss. If you’re a mom you know how badly you have to take some time for yourself to recharge your batteries.

The board we snacked on. My favorite is the spicy meat paired with a flavored goat cheese and crispy cracker. So yummy!

We all get excited about having a charcuterie board party. Maybe the wine was kicking in or we were just really hungry which resulted in this charcuterie board being the best thing ever. But this charcuterie board inspired this blog.

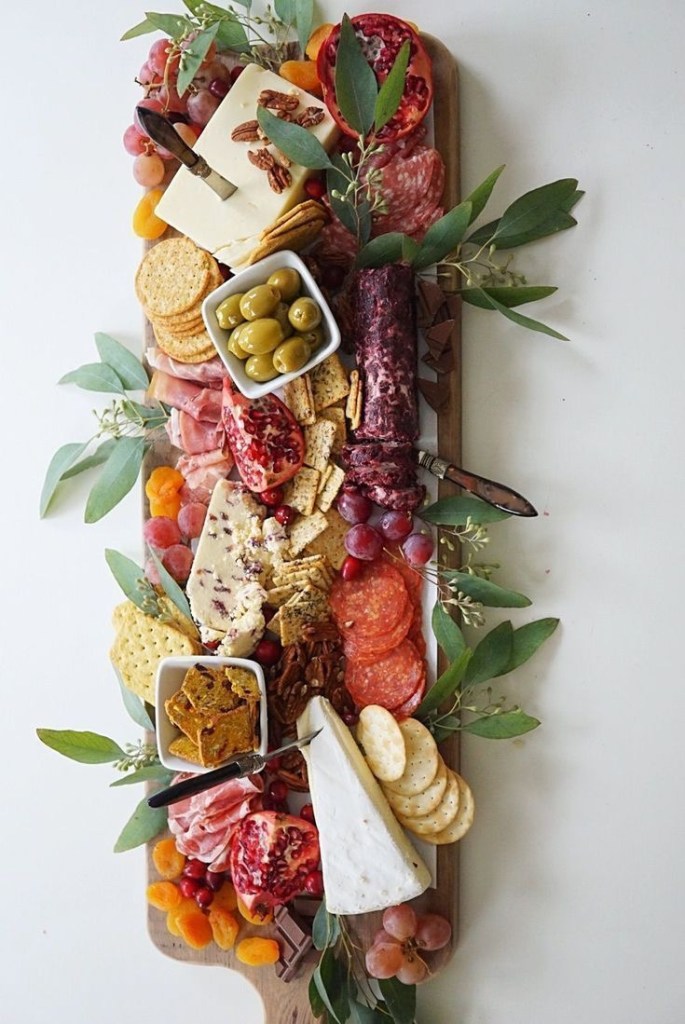
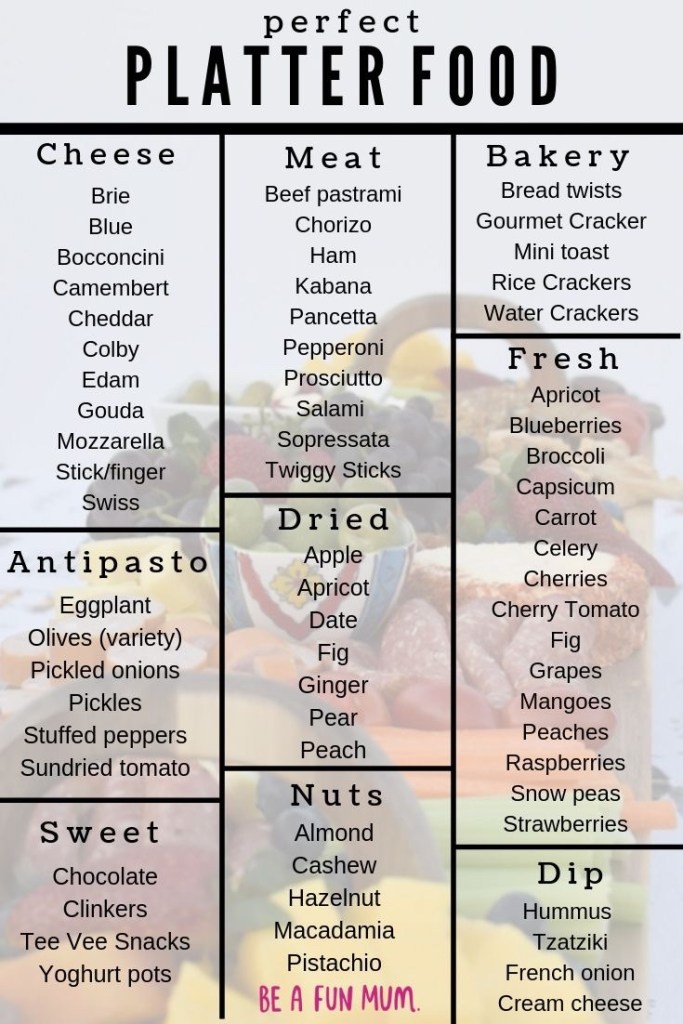
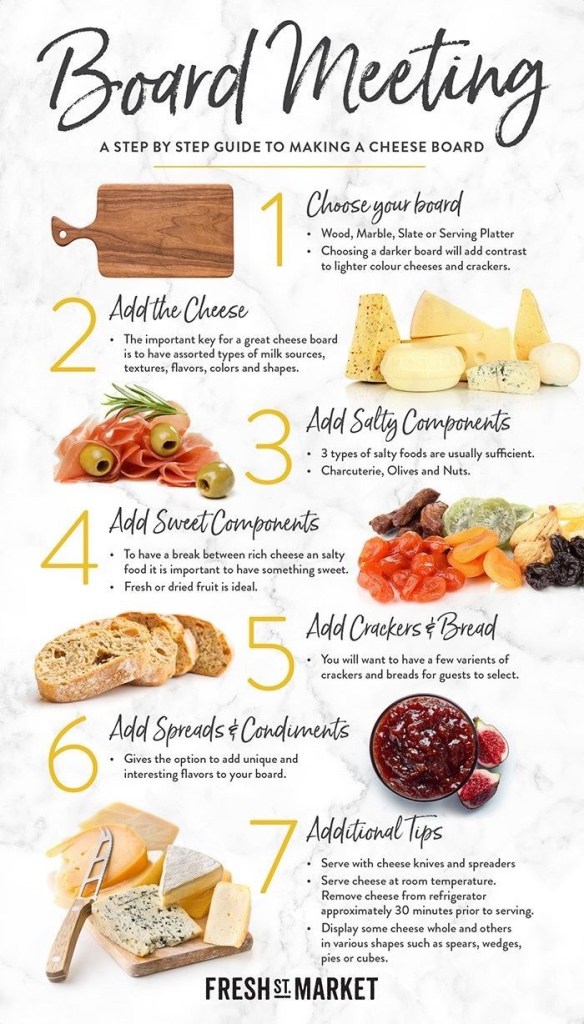
I share some layouts to help you with your charcuterie board party that you may be planning and some common pairings. You don’t have to follow it exactly but use this more as a guide and have some fun with it!

Thank you for reading and have fun charcutering! (I just made that up)

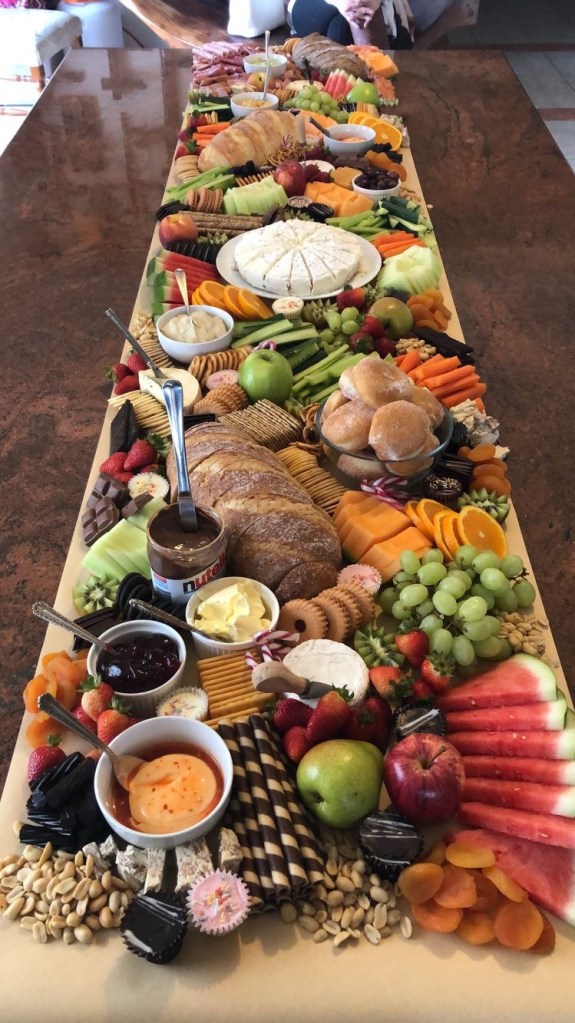
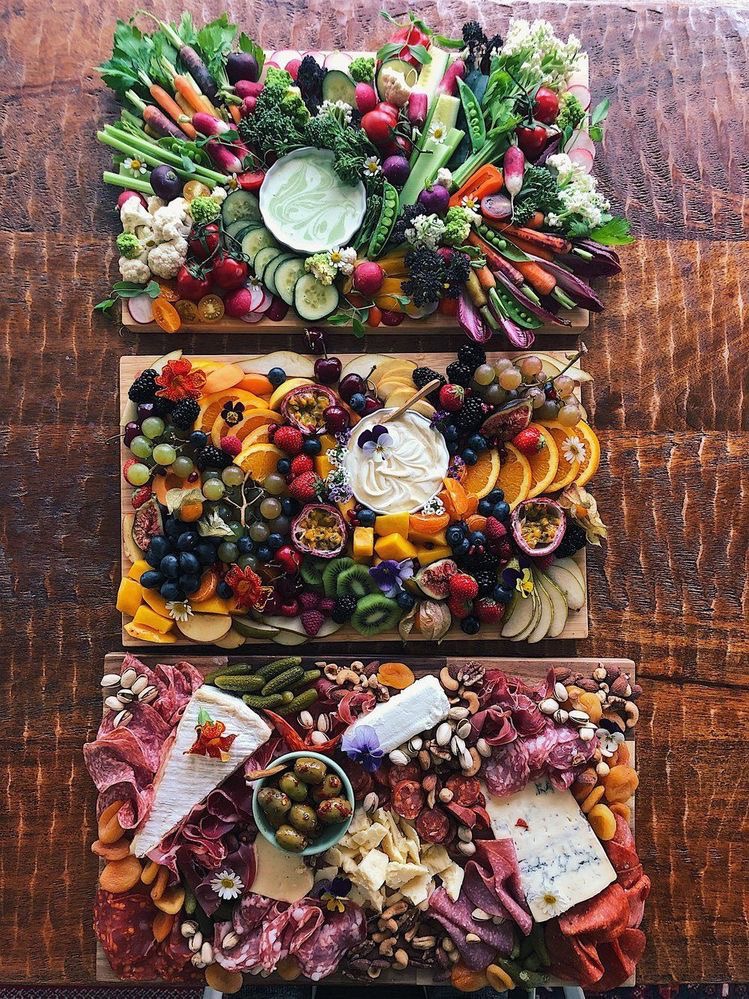
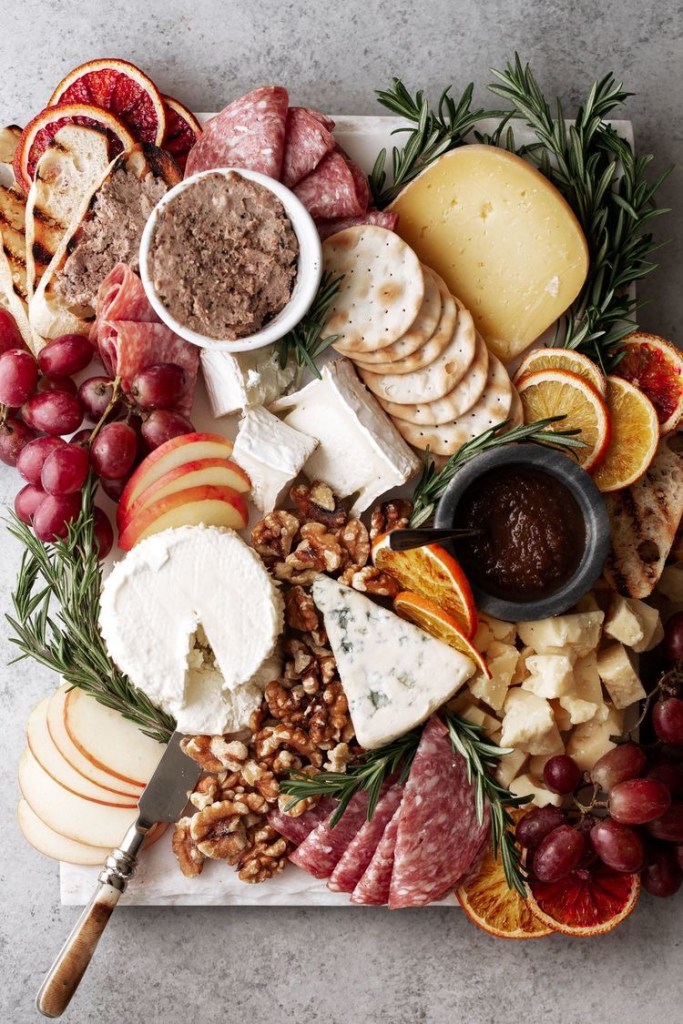
Charcuterie Board Visuals


Charcuterie Board Pairings And Tips

Would love to see your board! Share it with us on instagram!

Click here 🙂


For additional pairings with wine specifically check out this blog!

Fall Wines And The Perfect Pairings That Go With Them

Refreshing Fruit Salad With Honey Lime and Mint

What You Need:

6 cups of fresh mixed melon fruit such as cantaloupe, watermelon, and honeydew.

1 1/2 tablespoons of raw honey

1 tablespoon of lemon juice

2 teaspoons of lime juice

A pinch of salt

2 tablespoons of fresh chopped mint, and extra for garnish

Steps:

1. In a small bowl mix together the lemon, lime, honey and salt. Pour juice mixture over the chopped fruit.

2. Right before serving add the chopped mint and mix well.

*can be made ahead of time and refrigerated for up to 12 hours*S

Enjoy!

Spring Time Lemon Bars

Spring time calls for lemon bars! The perfect tart, sweet treat to enjoy in some beautiful weather! This is also a great recipe to make with your little ones! Especially when pressing the dough!

Let’s get started!

What You Need:

For The Crust:

8 tablespoons of unsalted butter softened

1/2 cup of white sugar

2 cups of flour

A pinch of salt

For The Filling:

6 eggs

3 cups of white sugar

2 grated lemons for lemon zest

1 cup of fresh lemon juice

1 cup of flour

Powdered sugar for dusting

Steps:

  1. Preheat the oven to 350.
  2. For the crust, mix together the butter and sugar with an electric mixer until combined. Then add the flour and salt. Mix well, don’t be afraid to get your hands dirty.
  3. Once all combined flatten the dough into a 9 by 13 glass baking dish.
  4. Bake the crust for 20 to 25 minutes, until lightly browned. While crust is baking prepare your filling.
  5. For the filling, mix together the eggs, sugar, lemon zest, lemon juice, and flour. Pour over hot crust and bake for 35 to 40 minutes, until the filling is set and not wobbly. Let cool to room temperature. Then chill in the fridge for an hour.
  6. Dust with powdered sugar and cut into squares. Enjoy!

Tip: place lemon bars in freezer for 30 mins and once removed will be easier to cut squares!