Puff Pastry Twists With Nutella

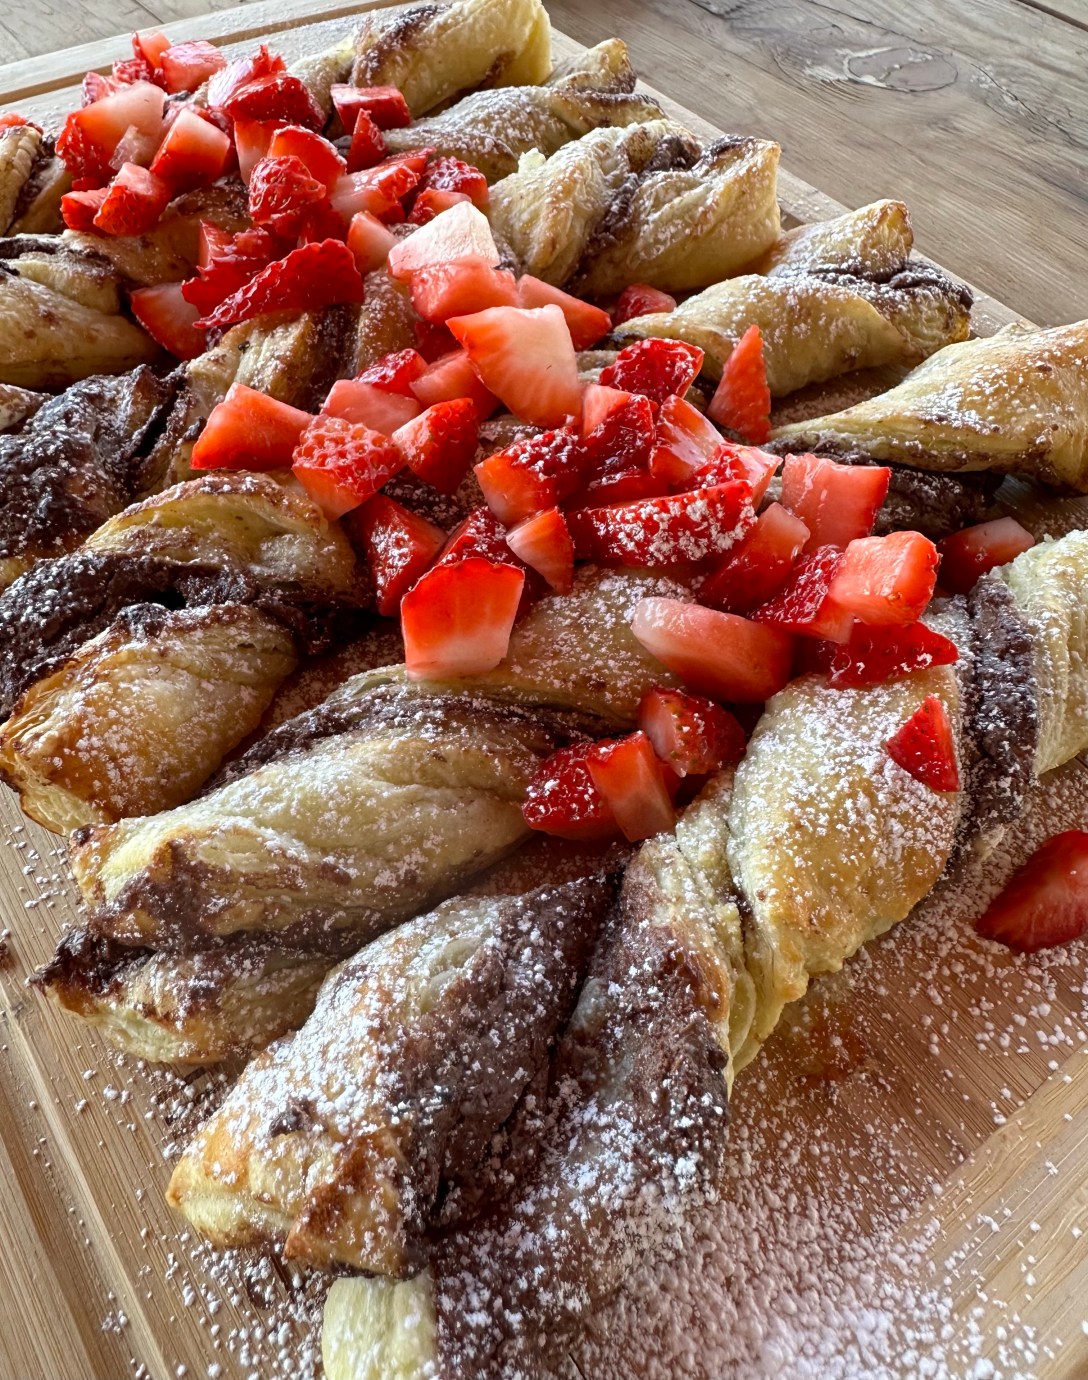
I made these for my girls for breakfast and we indulged! They were so yummy! Especially with freshly chopped strawberries!

I hope you enjoy these as much as we did!

Servings: 6 pastry twists

What You Need:

1 17oz package of Pepperidge Puff Pastry

5 – 6 generous globs of Nutella (measure with your heart)

3 give or take tablespoons of softened unsalted butter

Egg wash (1 egg white and a dash of milk)

Steps :

1. Thaw out your frozen pastry (35-40 mins). Once thawed out preheat oven to 400.

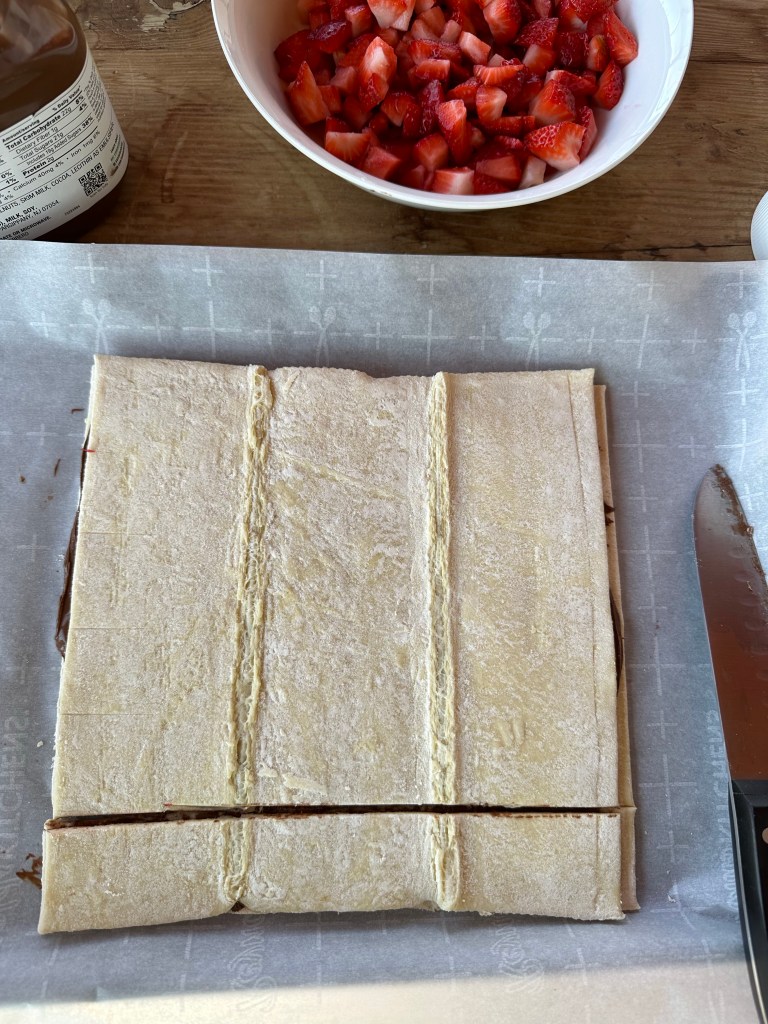
2. Lay your first sheet of puff pastry on parchment paper on a cookie sheet. Spread the Nutella evenly.

3. Lay the second puff pastry directly on top of the puff pastry covered in Nutella. Slice in 6 strips and twist. The twisting doesn’t need to be perfect at all.

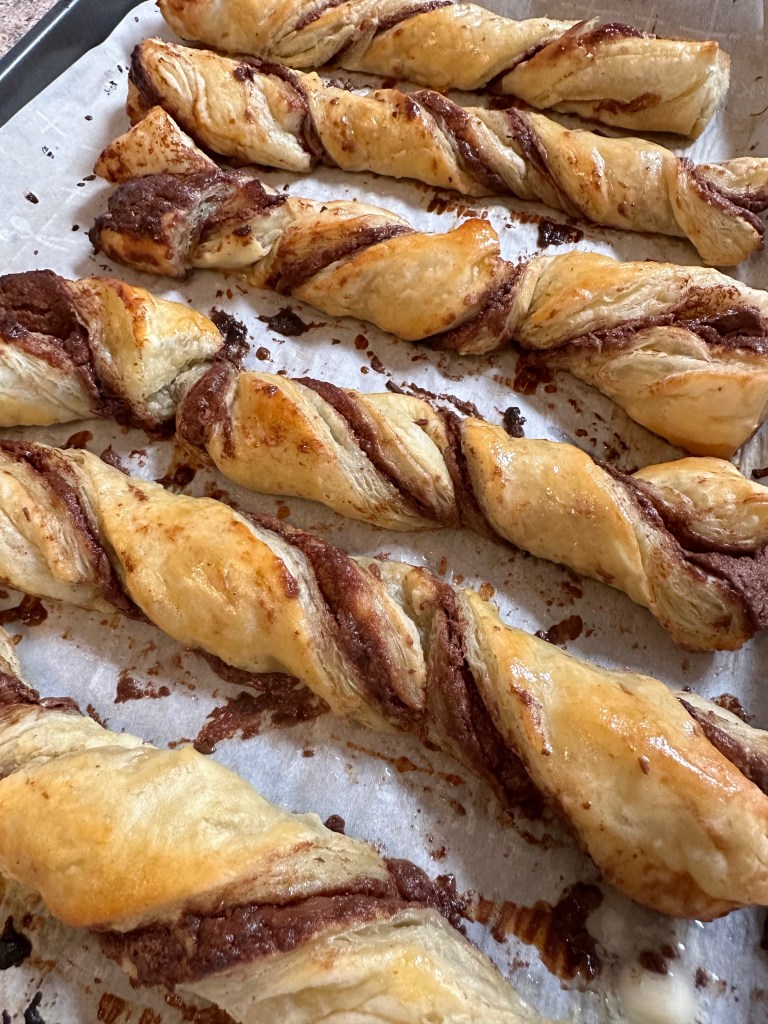
4. Bake at 400 for 13-15 minutes. Bake until golden. Once the pastries are done remove from oven and brush with softened butter and allow it to melt all over the twists. Cool for 5 mins.

5. Serve with freshly chopped strawberries and powdered sugar.

Enjoy!


This is the puff pastry. Amazing!
Slice in 6 strips.

Ree Drummond’s Waffle Recipe Is The BEST EVER

I think I won some mom brownie points with these waffles this past weekend. They are scrumptious! And well, with a stick of butter of in there, of course they are!

Don’t you love when you try a new recipe and you are pleasantly surprised! Of course sometimes you try something new and you experience disappointment. But sometimes the recipe risk is the best thing ever!

I’ll be making these today and actually freezing them so my girls can eat them for the rest of the week. We topped our waffles with fresh strawberries, powdered sugar, and maple syrup. I hope you enjoy these as much as our family did!

For the direct link to the recipe CLICK HERE

Ree Drummond Waffle Recipe

What You Need:


2 cups of all-purpose flour

1/4 cup of sugar

1 tablespoon of baking powder

1/2 teaspoon of salt

1 1/2 cups of milk (preferably whole milk)

1 tablespoon plus 1 teaspoon of vanilla extract

2 eggs plus 2 additional egg whites

1 stick (8 tablespoons) unsalted butter, melted (original calls for salted, I’m just not a fan of salted butter)

Steps:

1. Mix the dry ingredients together (flour, sugar, baking powder, and salt)

2. Mix the wet ingredients (milk, eggs, egg whites, vanilla extract, and melted butter)

3. Combine the wet ingredients with the dry ingredients and mix well.

Enjoy!

25 Cute Breakfast Art Ideas That Will Make Your Children Or A Loved One Smile

Cute breakfast food art doesn’t have to just be for children! As I was searching for ideas for my girls I thought, you know what, my husband would loved these too.

Which is why the title is for ‘A Loved One’ .

I’m so excited to try some of these out.

Which numbers will you make?

Note: Most of these photos don’t have watermarks so I don’t know who should receive credit! If any readers know please let me know!


1.

This would be perfect for Valentine’s Day or maybe an anniversary.

2.

Cute little Owls.

3.

So simple! Bear cubs.

4.

A healthier kind of ice cream.

5.

Spring Pancakes!

6.

Imagine making this as a hint and surprising your kids with a trip to Disneyland!

7.

So cute!

8.

A bear that’s cute and you can eat!

9.

Piggy.

10.

Cheetah.

11.

Love the little strawberry sunflower.

12.

Perfect for our malt o meal breakfast days.

13.

Perfect if you love coconut flakes.

14.

This owl has beautiful eyelashes.

15.

Imagine being served this as a surprise breakfast :).

16.

Too cute!

17.

Ladybug.

18.

Another piggy inspiration.

19.

Bagel and cream cheese and berries. yum.

20.

For the one that loves butterflies.

21.

Spider-Man.

22.

Crabby.

23.

Perfect for The Holidays.

24.

Piggy with strawberries.

25.

Cute flower.

Which on is your favorite?

Valentine Wand Craft For Kids

What You Need:

Paper straws

Red and pink tissue paper

Glue

Glitter

Cardboard cut into heart shapes (I used a heart cookie cutter to trace on the cardboard)

Steps:

1. Start by cutting tissue paper into small squares. Have your kids scrunch them up really good.

2. Next allow them to glue their scrunched up tissue paper to the cardboard hearts. Once glued they resemble little roses

3. Have some fun with glitter. Make a heart shape on the back or whatever! Get creative!

4. Hot glue gun your paper straw to the heart.

Cute and simple! It can be a wand or place then all in a mason jar and now it looks like a small bouquet of hearts.