
Living Life To The Fullest
Feeding a family or cooking for one, food waste is like tossing money in the trash. Here are my favorite tried-and-true food-saving hacks to make your groceries last longer, save money, and simplify mealtime.
1. Store Cut Onions Right
Once you slice an onion, store the rest in an airtight container or Ziploc bag in the fridge, cut-side down. It’ll stay fresh for up to a week—and your fridge won’t smell like a salad bar.
2. Revive Wilted Greens
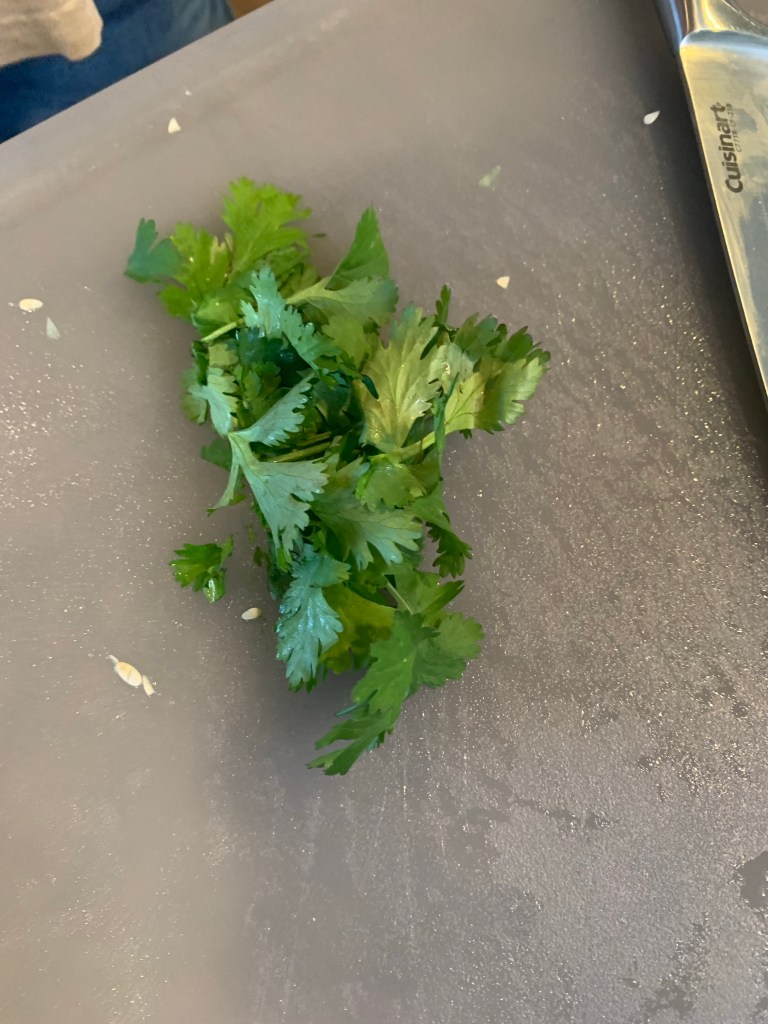
Soak limp lettuce or herbs in a bowl of cold water with a few ice cubes for 15–20 minutes. They’ll perk right up! Bonus: dry them well in a salad spinner and store with a paper towel to keep the crisp going.
3. Freeze Overripe Bananas
Peel and freeze overripe bananas for smoothies, banana bread, or pancakes. Freeze whole or in slices—whatever fits your blender best.
4. Don’t Toss the Stems
Broccoli stalks, kale stems, and even herb stems are edible and flavorful. Use them in stir-fries, soups, or chop and blend them into pesto or smoothies.
5. Make a Freezer Scrap Bag
Keep a big Ziploc bag in the freezer for veggie scraps like onion peels, carrot tops, and garlic skins. Once full, use it to make homemade veggie broth—cheap, delicious, and waste-free.
6. Label and Date Everything
Use masking tape and a Sharpie to label leftovers and freezer items. You’ll always know what’s what and when it’s time to use it.
7. Freeze in Portions
Freeze sauces, soups, or leftover rice in muffin tins or ice cube trays. Once frozen, pop them out into a bag for perfect, quick portions.
8. Save Fresh Herbs
Chop herbs and freeze them in olive oil in an ice cube tray. Drop into hot pans for instant flavor when cooking.
9. Bread Going Stale? Don’t Toss It!
Turn stale bread into croutons, breadcrumbs, or French toast. You can also freeze sliced bread and toast it straight from the freezer.
10. Use the Freezer Like a Pantry
Got too many berries? Extra tomato paste? An open pack of tortillas? Freeze it. Most things freeze well—even shredded cheese, milk, or cooked pasta.
11. Keep Berries Fresh Longer
Wash berries in a solution of 1 part vinegar to 3 parts water, rinse, and dry thoroughly before refrigerating. It kills mold spores and keeps them fresh longer.
12. Store Apples Away from Other Produce
Apples release ethylene gas, which speeds up ripening. Keep them separate unless you want things to ripen fast (like avocados!).
13. Organize Your Fridge for Visibility
Keep older food in front so it gets used first. Label a bin “Eat First” to prevent stuff from hiding and going bad.
14. Make Leftovers New Again
Transform leftovers into new meals: roasted veggies into omelets, chicken into soup, rice into fried rice. A little creativity goes a long way!
15. Don’t Fear the “Ugly” Produce
Bruised apples and soft tomatoes still make great sauces, soups, or smoothies. When in doubt—blend it out!
Final Thought:
Being resourceful in the kitchen isn’t just about saving money—it’s about honoring the food we’re blessed with. A little intention can turn everyday scraps into something nourishing and meaningful.
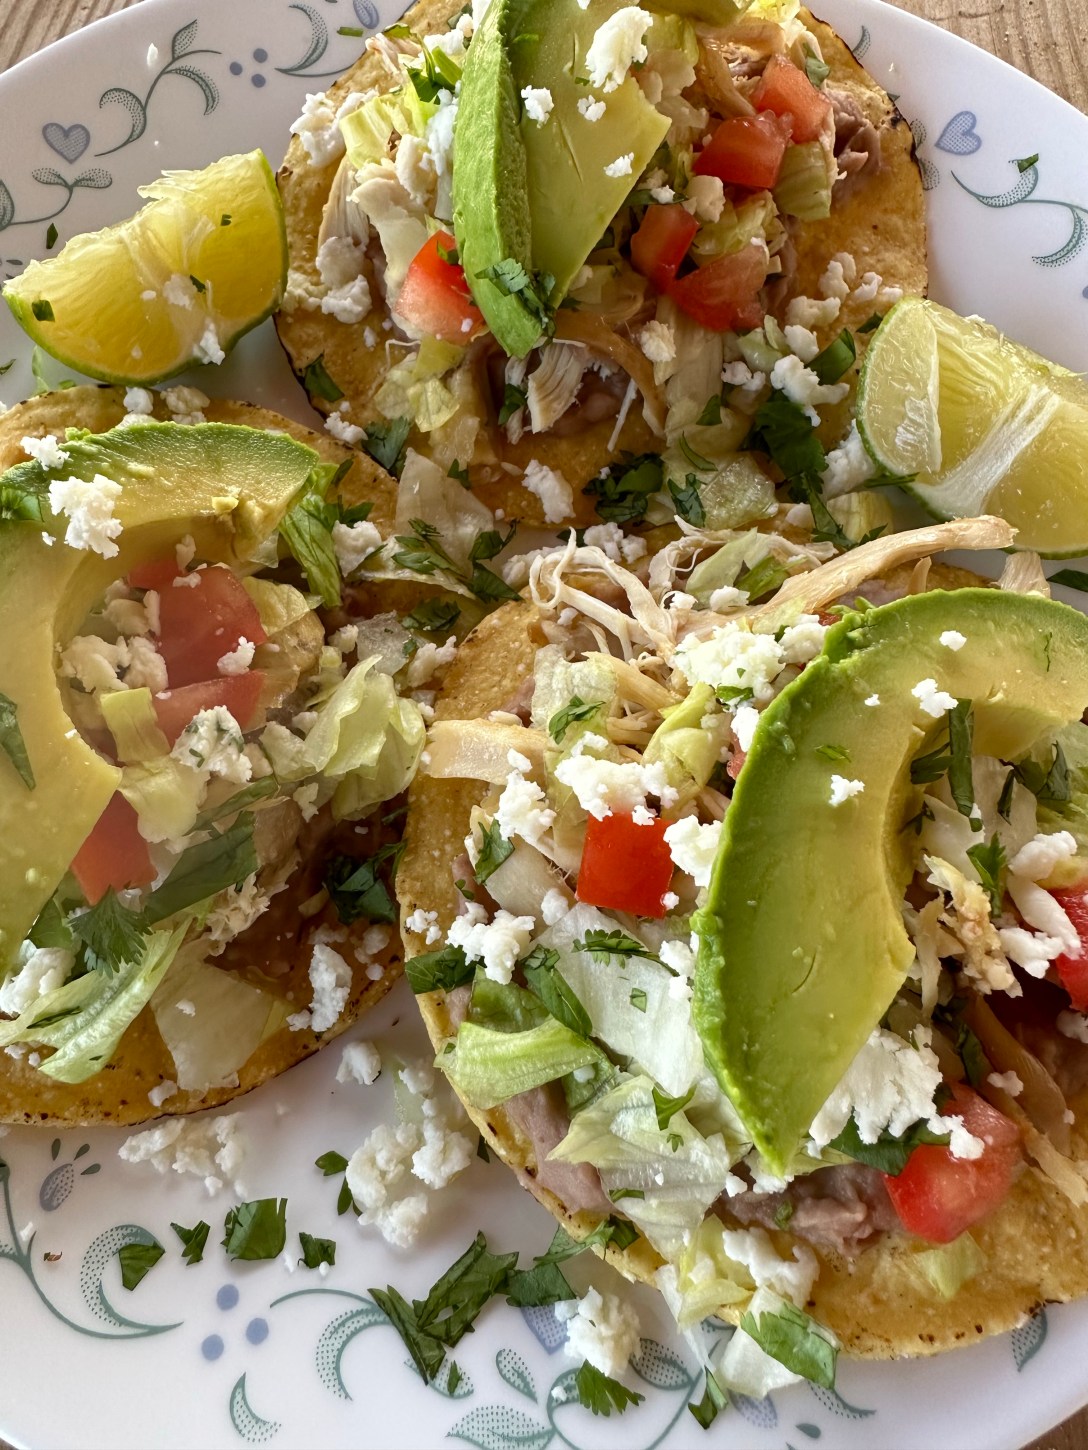
When you need a delicious quick dinner this is a great go-to! Now, I am not going to get specific with measurements of ingredients. Chop as much as you want, use as much as you want, just enjoy it!
What You Need:
Tostadas (Guerrero)
2 premade bags of beans (La Sierra Refried Beans)
Chopped up lettuce
Chopped up fresh cilantro
Chopped up fresh roma tomatoes
Queso fresco crumbled (Ranchero)
A couple of Avocados sliced up
A yummy salsa (your favorite)
Rotisserie chicken shredded
Lime sliced and ready for a good squeeze
How To Layer Your Tostada
1. Start with your tostada, then spread your refried beans. It works like glue.
2. Next add your shredded chicken or beef.
3. Then add your lettuce, tomato, cilantro, and cheese.
4. Top your tostada with an avocado slice and drizzle your favorite salsa. Squeeze lime juice all over and ENJOY!
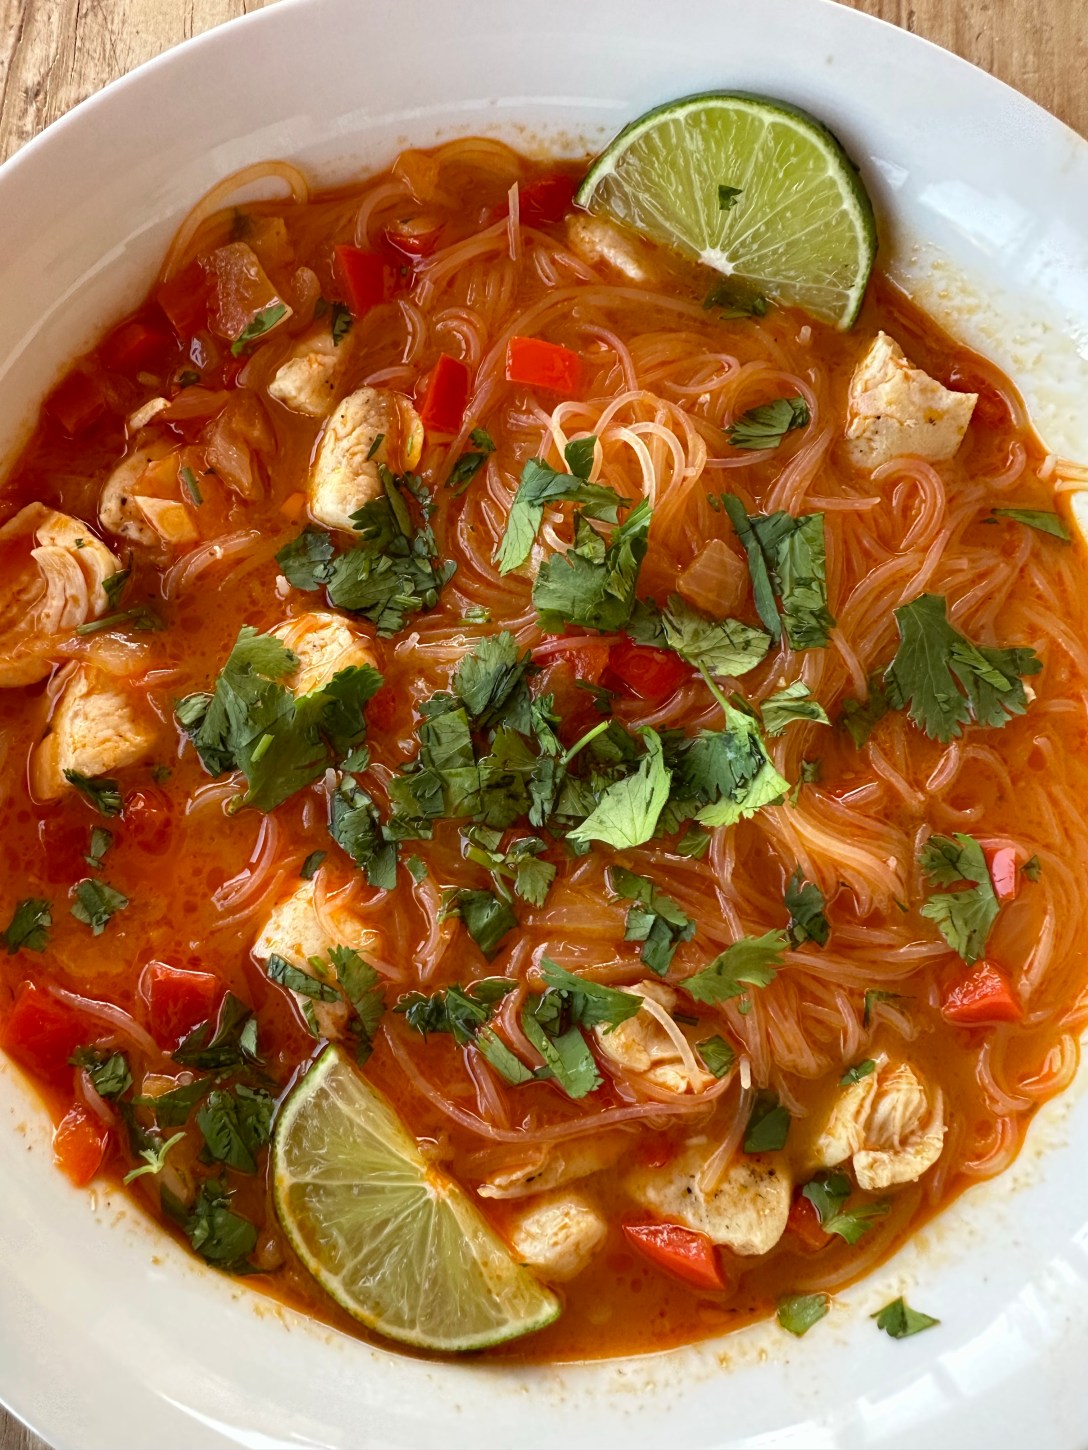
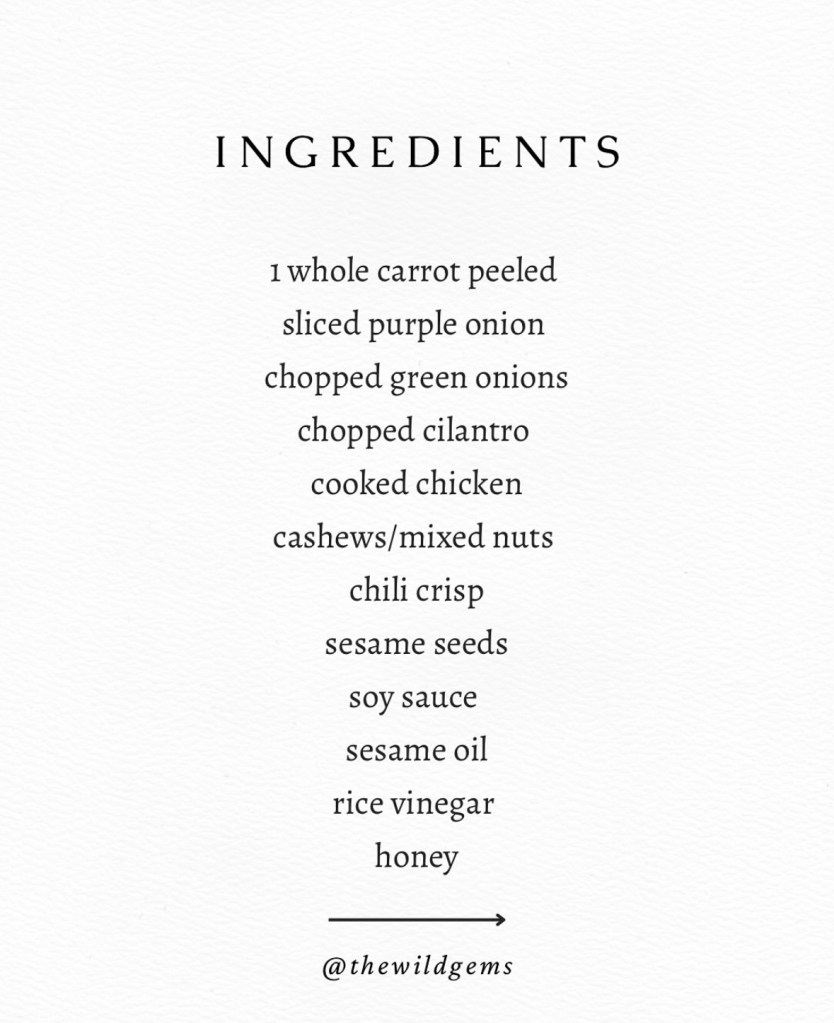
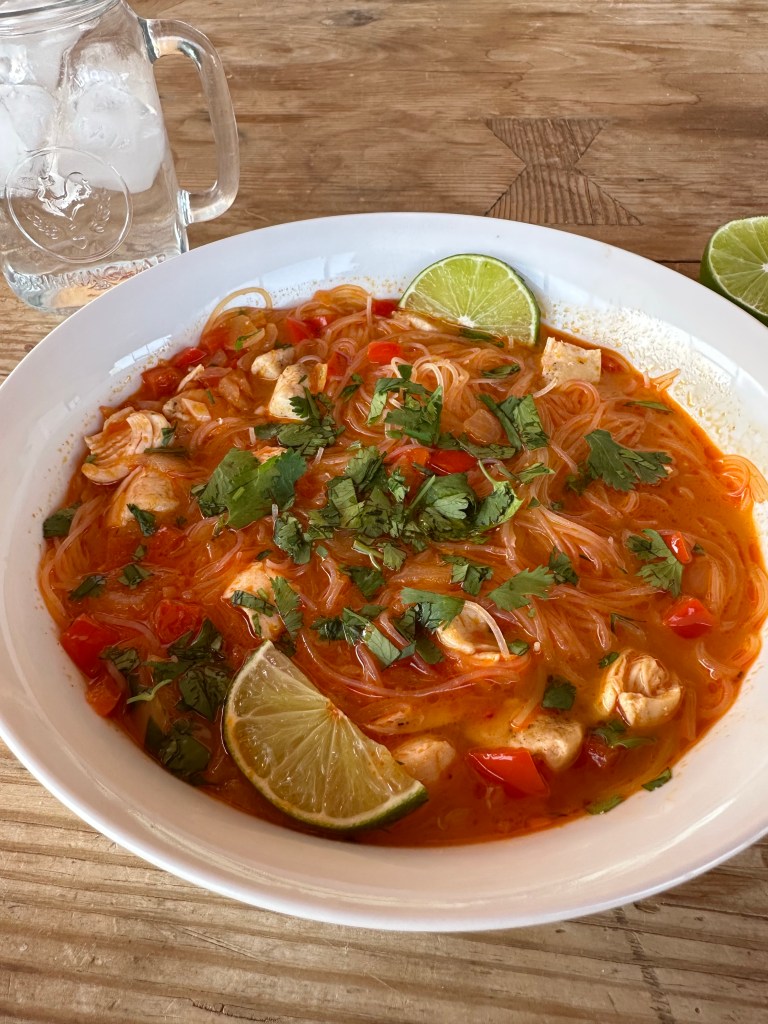
What You Need:
1 lb to 1 1/2 lbs of cooked chopped chicken breast or tenders (shrimp would be delish with this too)
click here for my cheat sheet on not overcooking your chicken
1 pack of rice noodles (usually a pack is 6.75 oz, but I only add 3/4 of the pack of rice noodles)
6 cups of chicken broth
3 tablespoons of red curry paste or green curry paste (I’ve tried this recipe with both)
1 red bell pepper chopped up
1 tablespoon of grated ginger (optional)
1/2 to 3/4 sweet onion chopped
4 cloves of garlic minced
1 can coconut milk unsweetened (not the fat free either)
3 teaspoons of light brown sugar give or take
1 tablespoon of fish sauce
Salt and pepper for taste
1 tablespoon of chopped cilantro plus more for garnish
A handful of freshly chopped basil (optional but recommend)
Thinly sliced green onion for garnish (optional)
Steps:
1. Cook your chopped chicken on a nonstick skillet on low medium heat for 6 minutes, seasoning with salt and pepper. Set aside.
2. In a large pot drizzle 3 to 4 tablespoons of olive oil. Sauté the onion, bell pepper, and garlic until soft. Stir in the red curry paste and ginger if using for about 1 minute.
3. Add your chicken broth and coconut milk. Add the brown sugar and fish sauce. Seasoning with salt and pepper. Bring to boil, then to a low simmer for 10 minutes to allow the flavors to mix together.
4. Add 3/4 of your packed rice noodles to the pot and 1 tablespoon of chopped cilantro. Allow to cook for 5 minutes. Remove from heat and add your chicken. Mix well.
5. Serve immediately in bowls with fresh lime juice, chopped basil, sliced green onion, cilantro, and ENJOY!
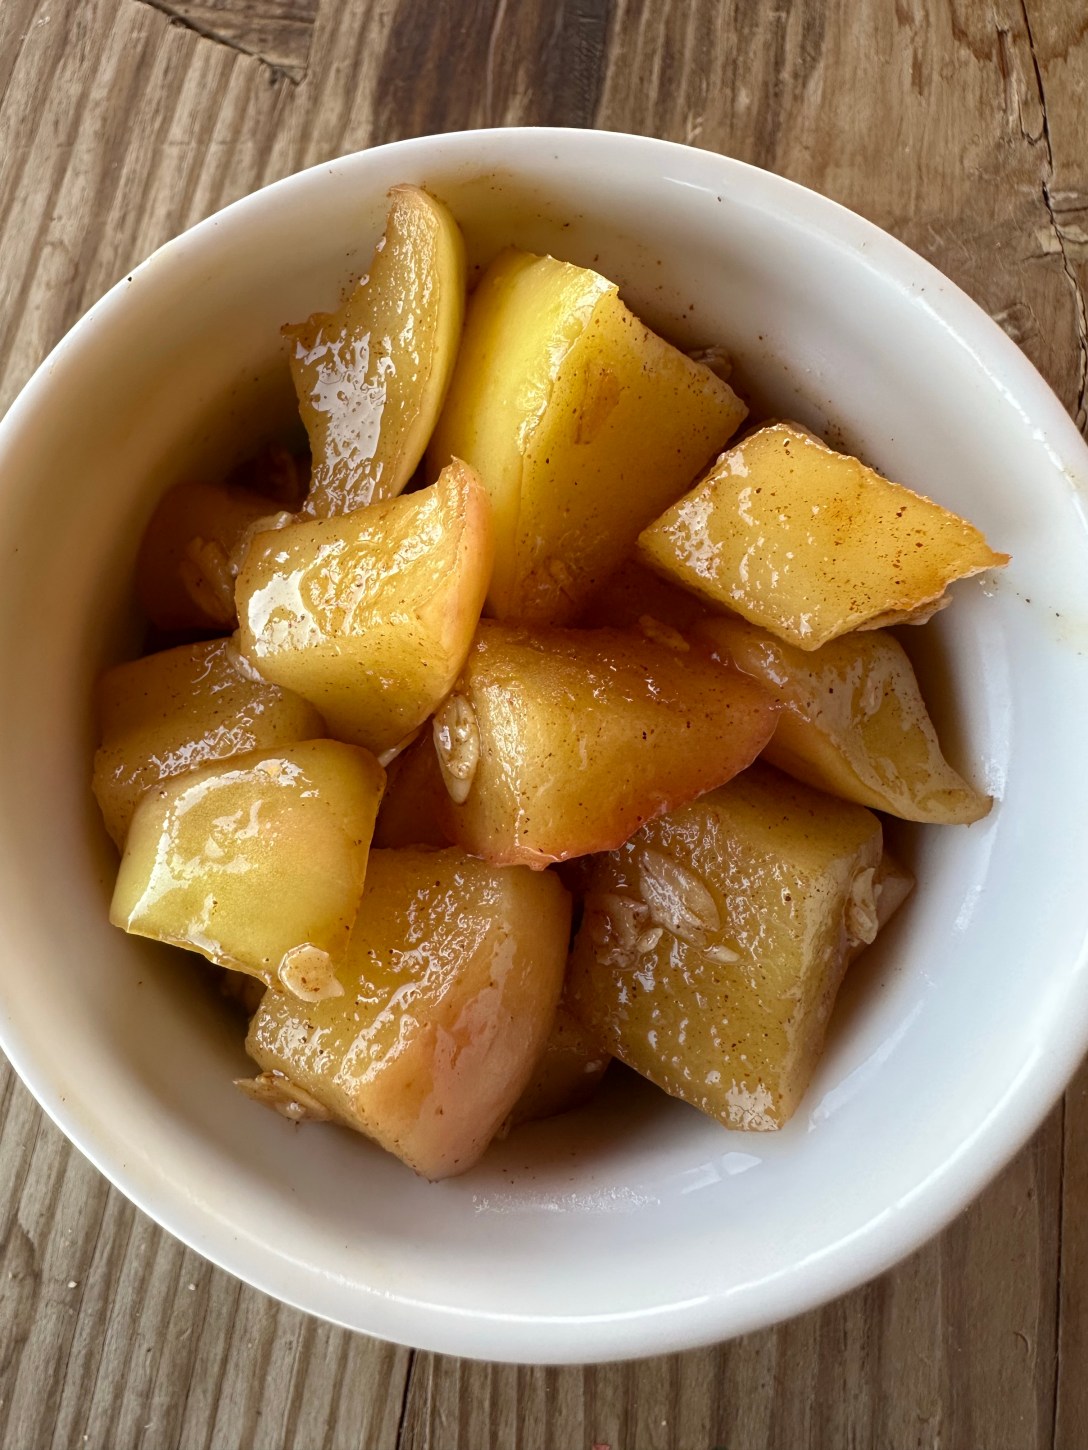
What You Need:
2-3 apples chopped (skin left on)
2 tablespoons of water
A few dashes of cinnamon
1-2 tablespoons of maple syrup
1 tablespoon of granola (optional)
Steps:
1. Chop your apples and place in skillet with the 2 tablespoons of water. Place lid and allow to simmer on a medium low for 5 mins.
2. Add the butter, cinnamon, and maple syrup to the skillet and place the lid on the skillet and allow to simmer for an additional 5 minutes or until soft. Throw in some granola while hot and toss around (optional)
Top with ice cream or whip cream! Enjoy!
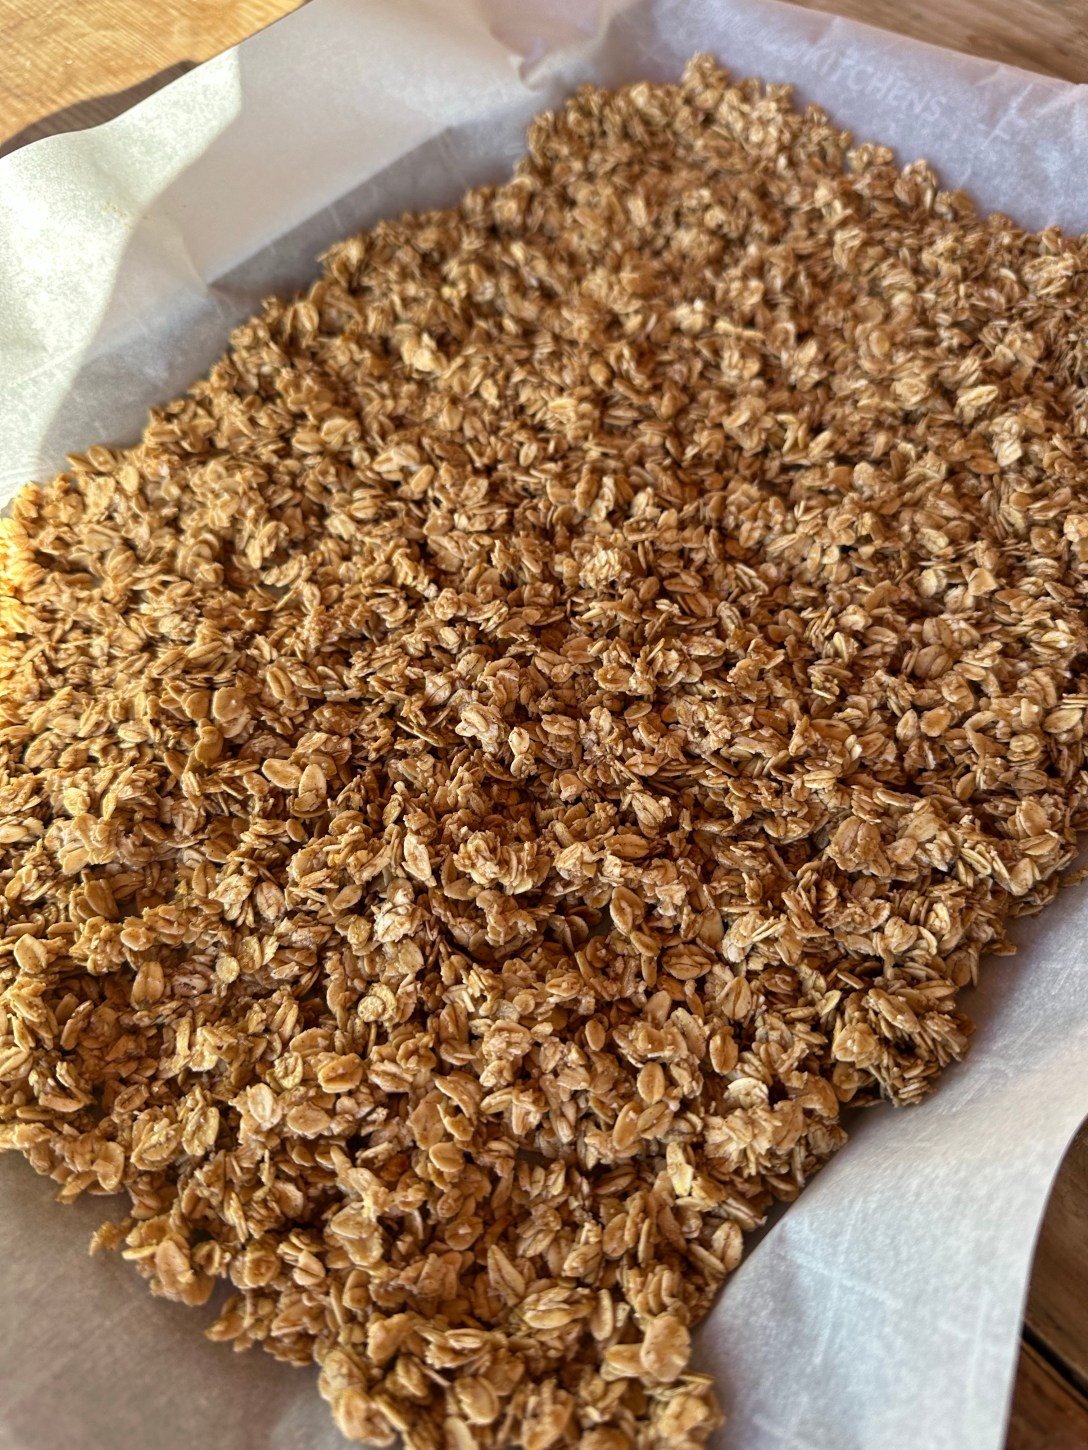
What You Need:
4 cups of oats
1 teaspoon of cinnamon
1 tablespoon of vanilla extract
A pinch of salt
1/3 cup of real maple syrup
1/4 cup of unsalted butter melted
Steps:
1. Line a cookie sheet with parchment paper. Add all the ingredients in a medium mixing bowl and mix well with hands.
2. Scatter uncooked granola on sheet and bake at 300 for 45 mins, mixing one or two times in between. Allow to cool for 15 to 20 minutes.
Sprinkle on ice cream, top with yogurt, or eat as is! Enjoy!
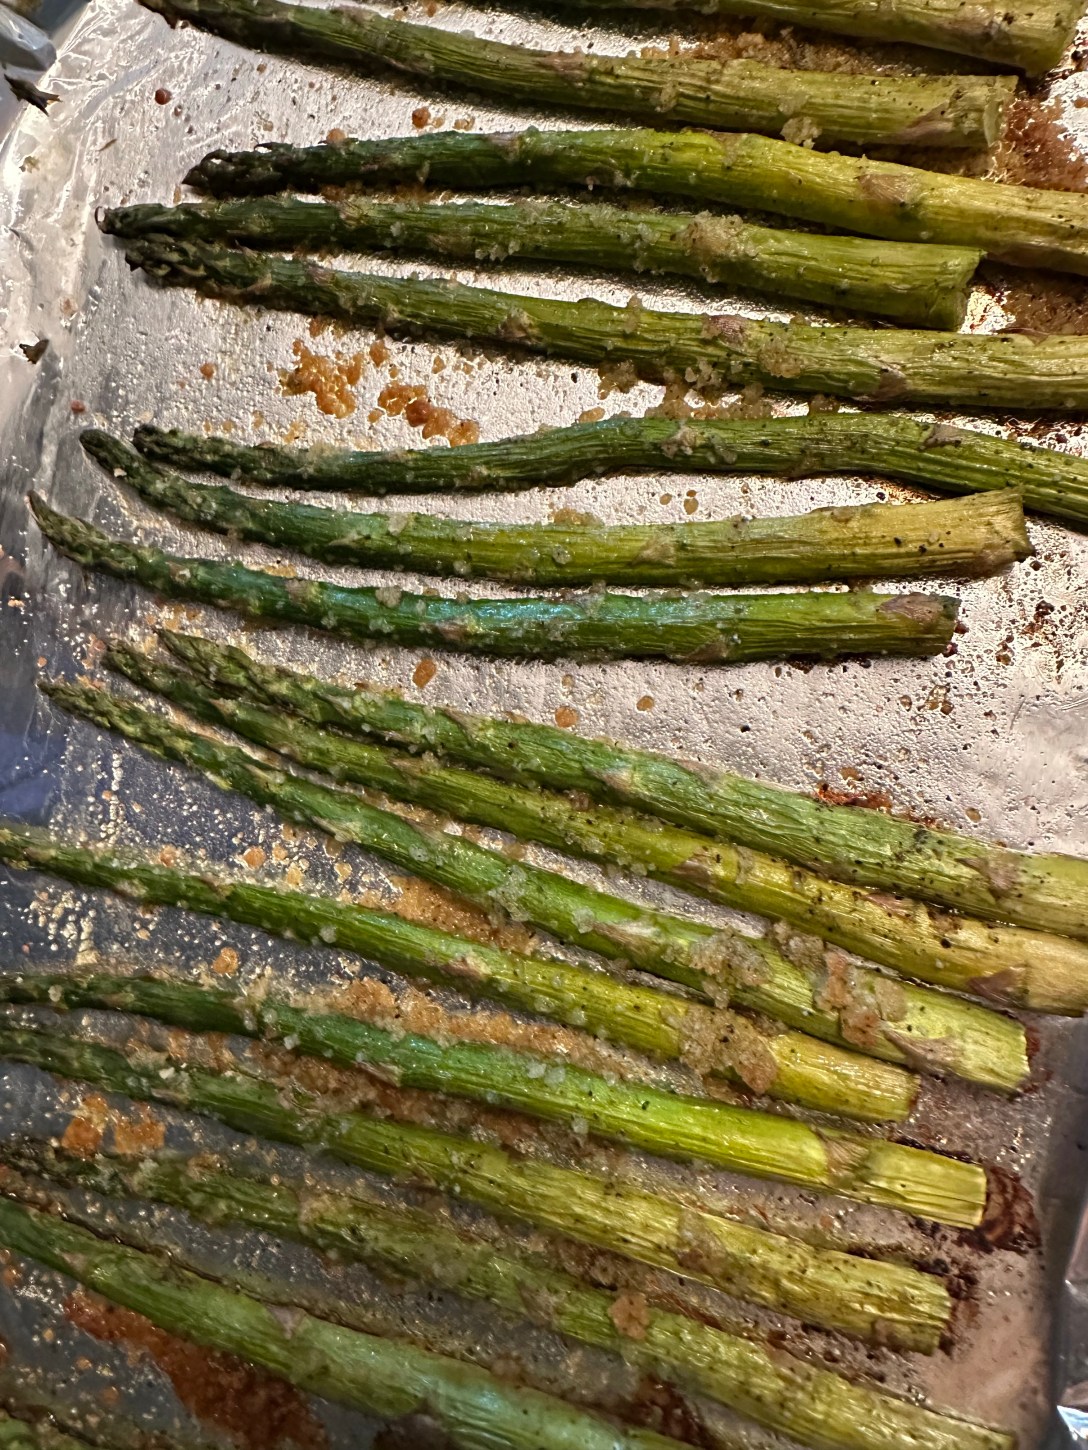
Servings: 2-4 people
What You Need:
1 bundle of asparagus
3-4 tablespoons of olive oil
Salt and pepper (measure with your heart)
Italian breadcrumbs (measure with your heart)
Steps:
1. Preheat oven to 400 and line a cooking sheet with foil.
2 Place asparagus on the pan, drizzle with olive oil, dash with salt and pepper, then sprinkle with bread crumbs.
3. Get your hand in there and mix it up! Place in the oven and bake for 25 mins.
Enjoy!
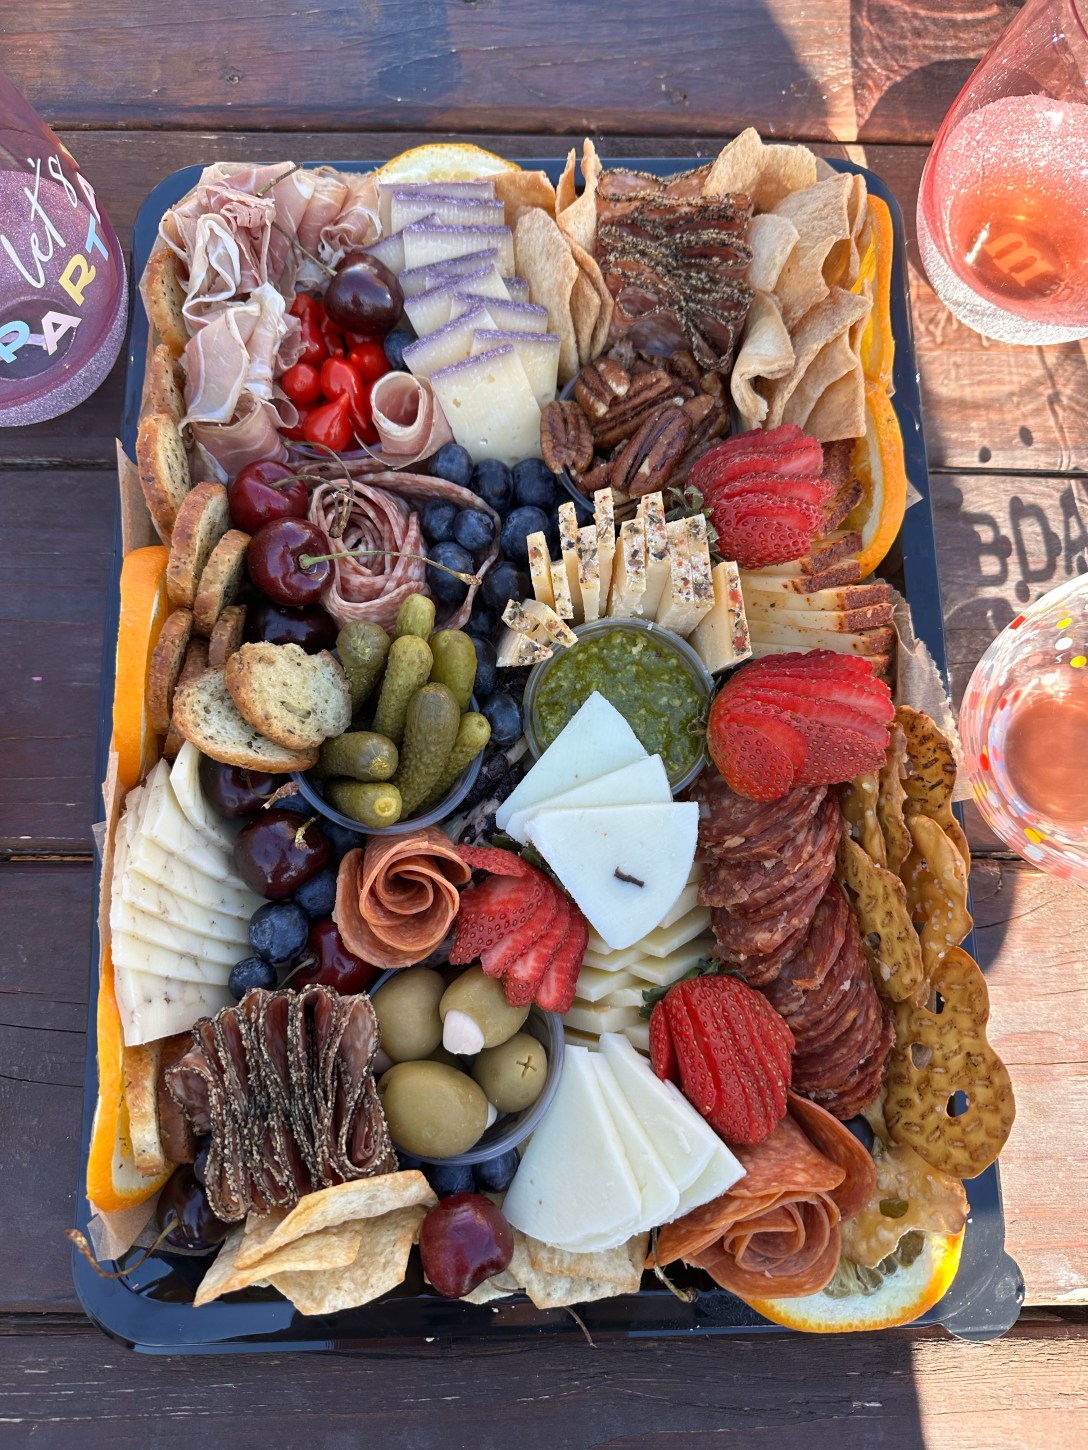
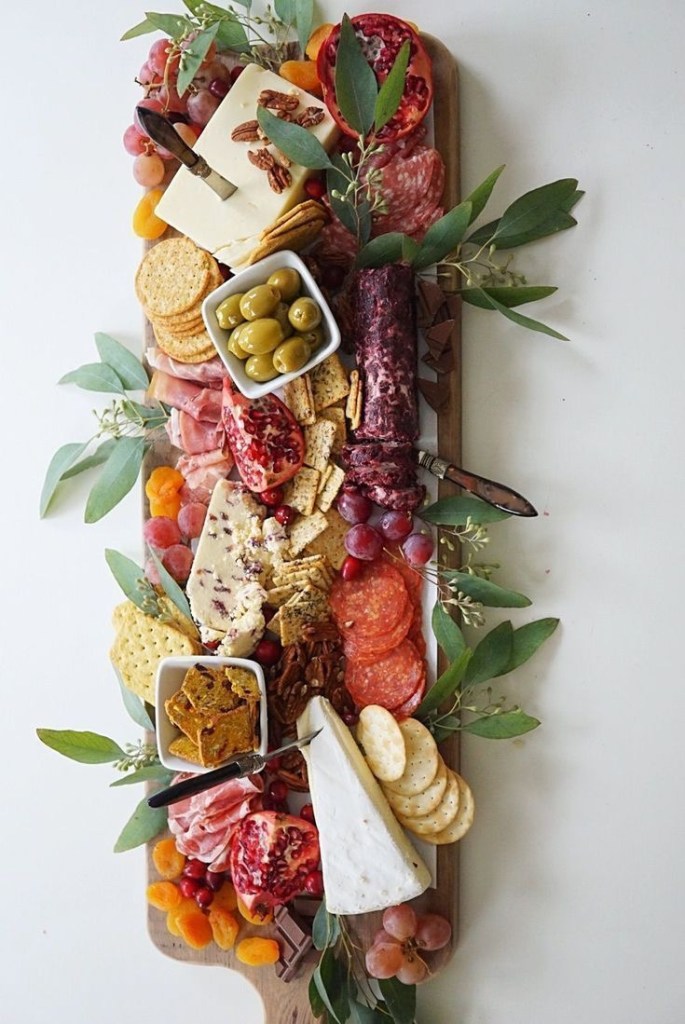
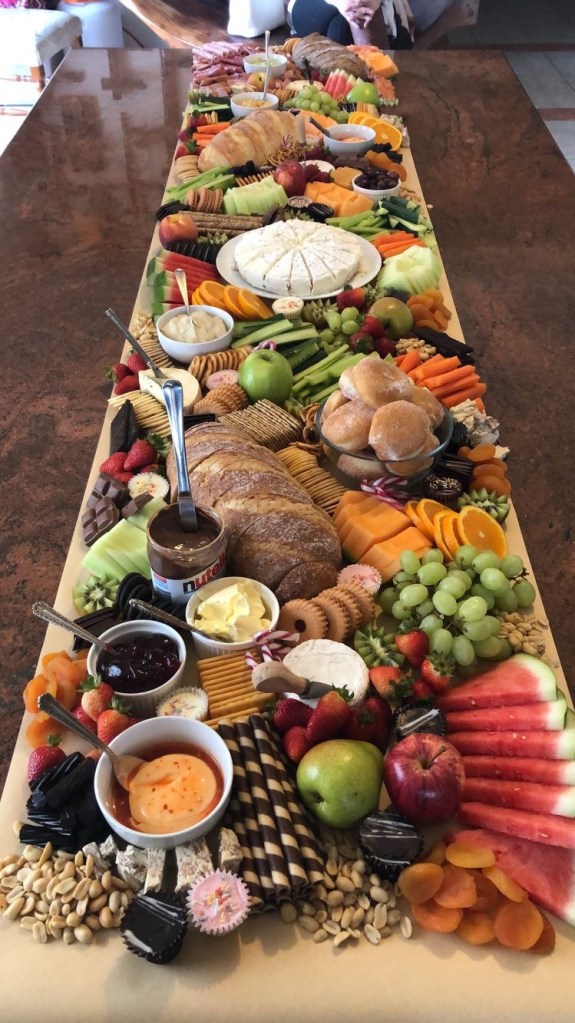
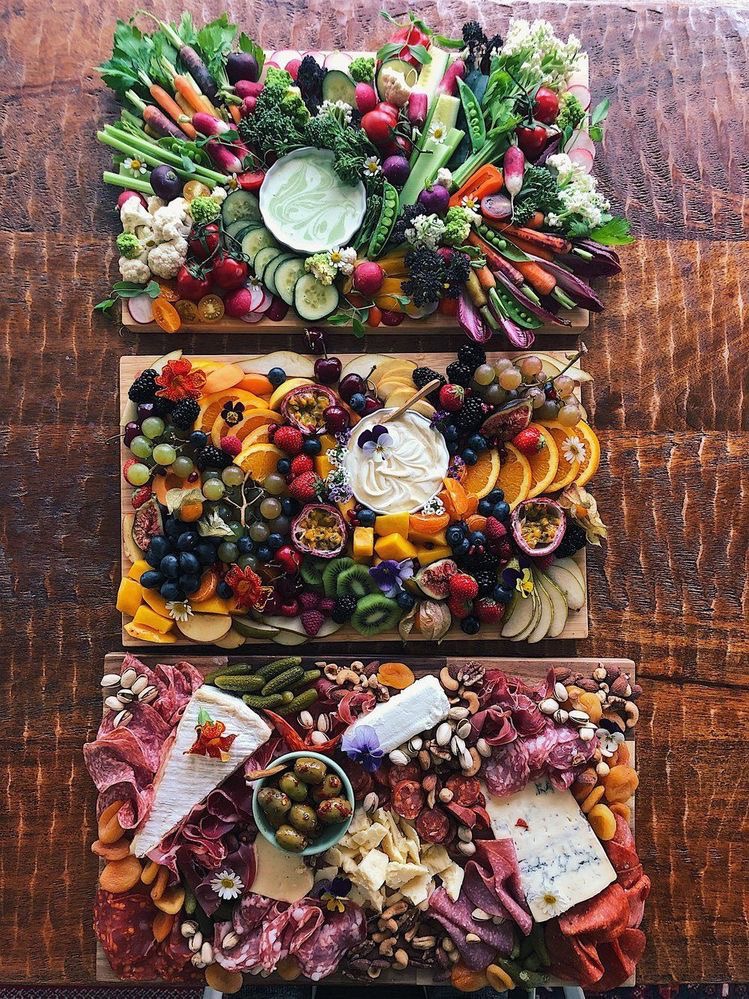
Get started! Charcuterie Boards short cut!
#ad as an Amazon associate I earn from qualifying purchases
Charcuterie boards are so much fun! They are kind of like snowflakes, they are each unique in their own way. And what a way to display your creativity! I love it! This blog is specifically meat and cheese but I see myself sharing a sweets charcuterie board blog too in the future. So many possibilities!
I went to a wine tasting last weekend to celebrate a friends 35th birthday. There was a total of 5 of us and we all met because of our daughters. Our girls all met last year in kindergarten and now our little beauties are in first grade. It’s been so much fun developing these types of friendships and I’m so grateful.
Back to the wine tasting, one of the girls brought a prepared charcuterie board that we all got to enjoy and indulge in. A friends of hers actually creates them as a business!
Just sitting with the girls drinking some wine in the vineyards while snacking was pure bliss. If you’re a mom you know how badly you have to take some time for yourself to recharge your batteries.

We all get excited about having a charcuterie board party. Maybe the wine was kicking in or we were just really hungry which resulted in this charcuterie board being the best thing ever. But this charcuterie board inspired this blog.
I share some layouts to help you with your charcuterie board party that you may be planning and some common pairings. You don’t have to follow it exactly but use this more as a guide and have some fun with it!
Thank you for reading and have fun charcutering! (I just made that up)


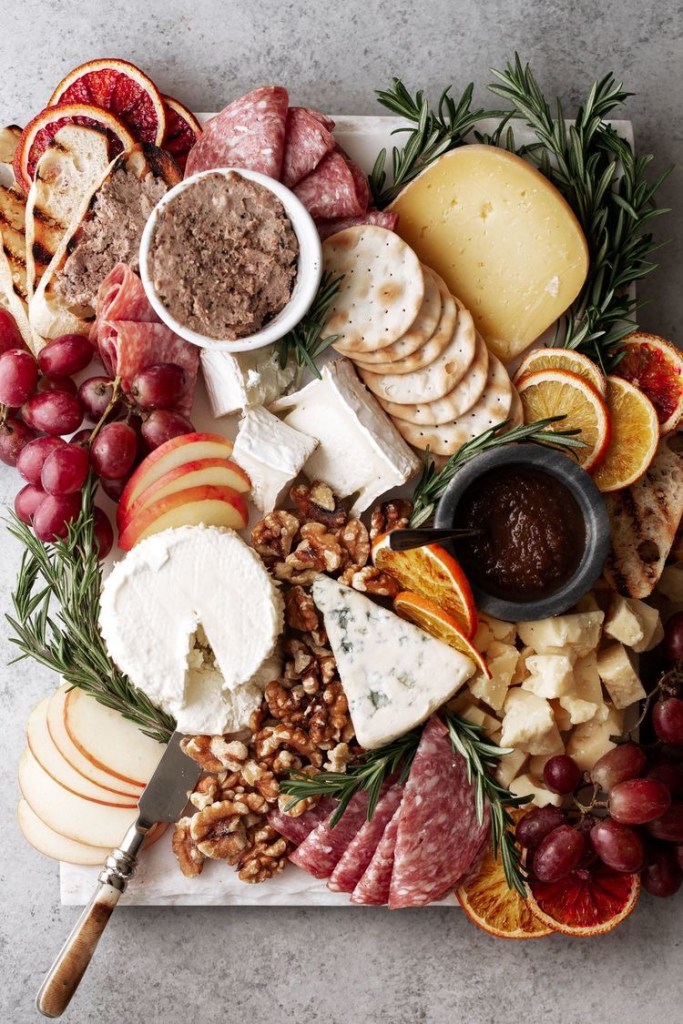


Would love to see your board! Share it with us on instagram!
For additional pairings with wine specifically check out this blog!
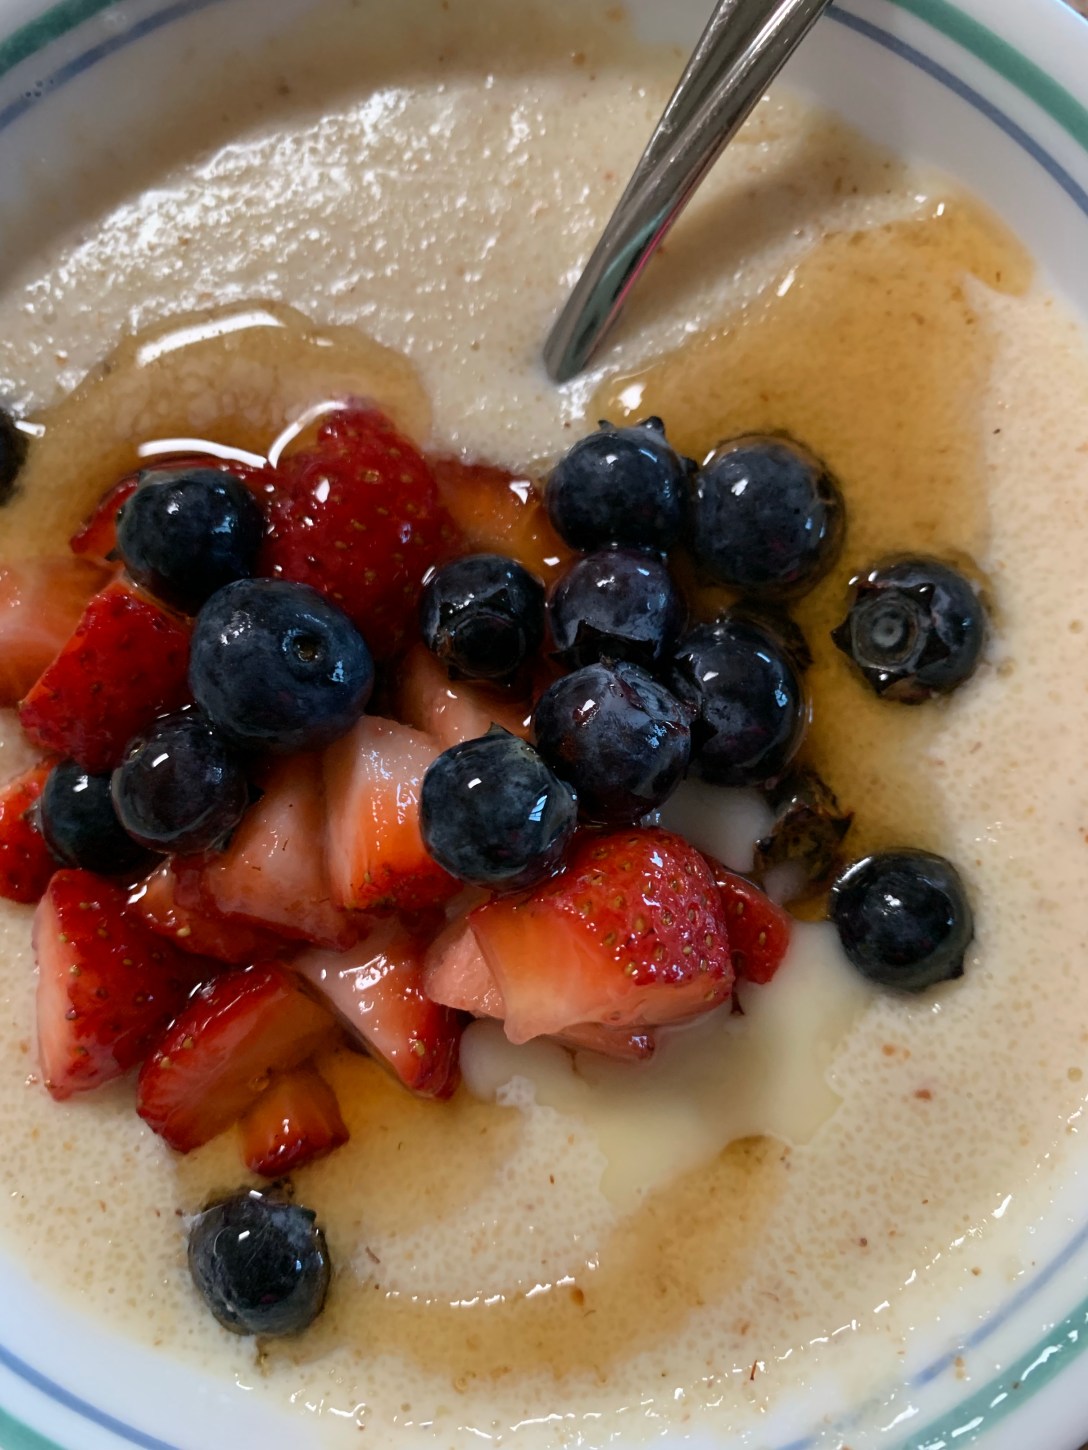
What You Need:
1 cup of milk
A pinch of salt
3 tablespoons of malt o meal
1 tablespoon of unsalted butter
2-3 tablespoons of maple syrup
Fresh strawberries
Chia seeds (optional)
Steps:
1. In a small pot bring together the milk, malt o meal and salt. Bring to a low medium heat, it will begin to bubble. Continuously stir for 3 to 5 mins.
2. Add the butter, maple syrup, and fresh berries. Enjoy!
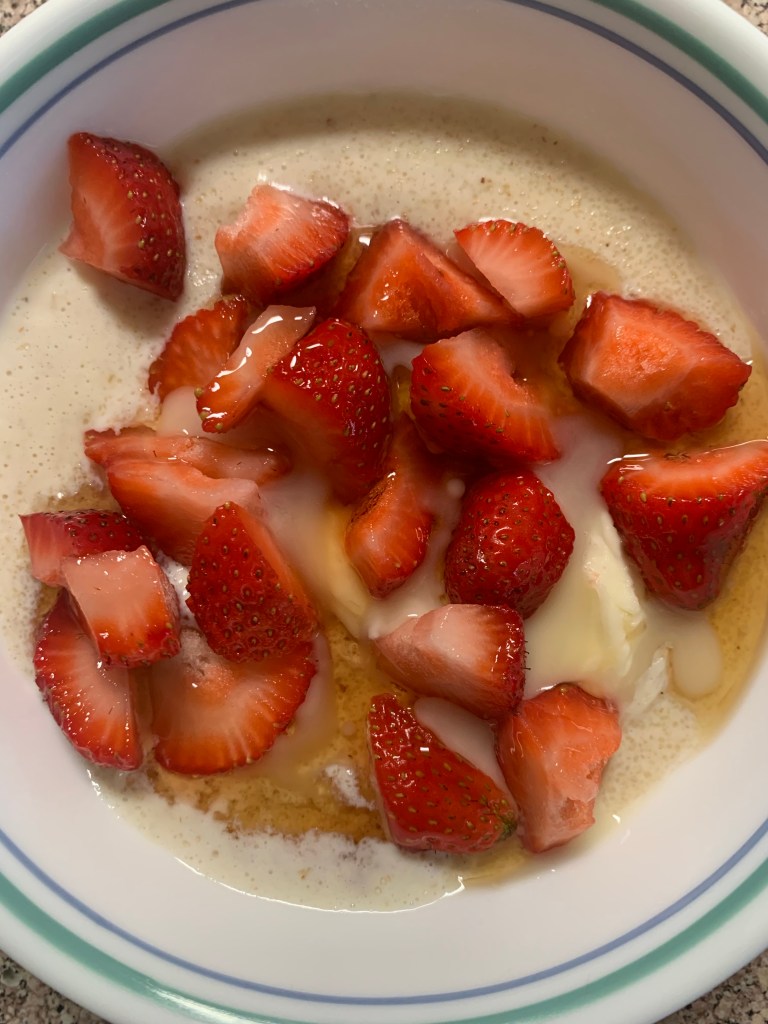

Servings 10 to 12
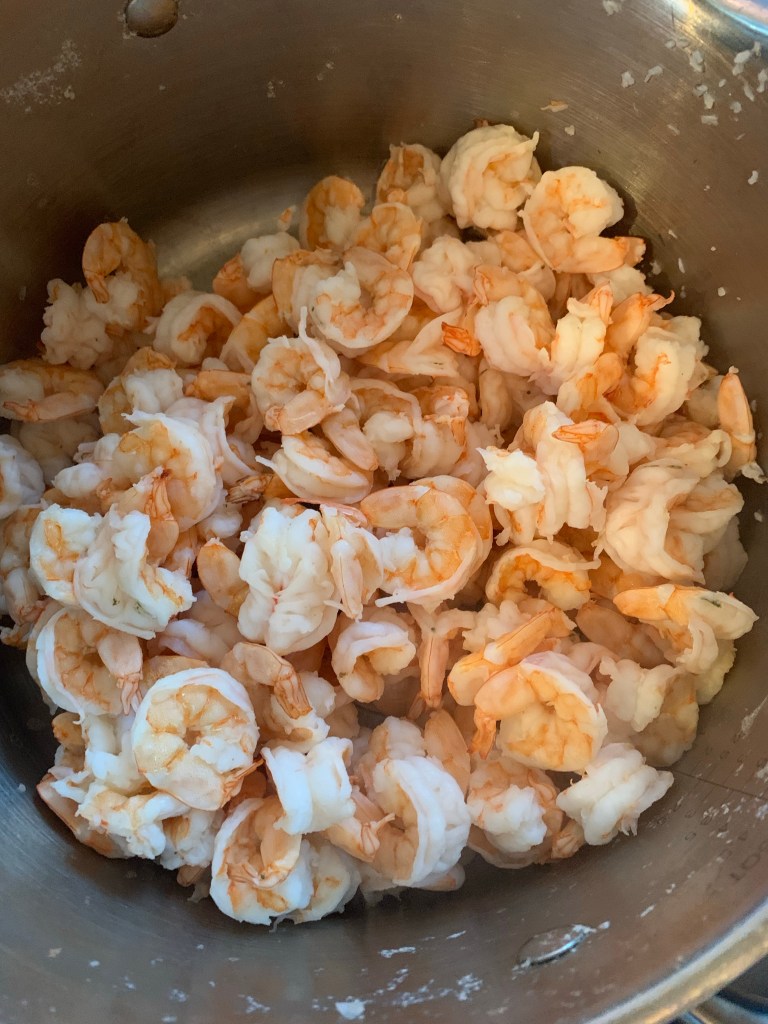
What You Need:
4 lbs of shrimp peeled and deveined
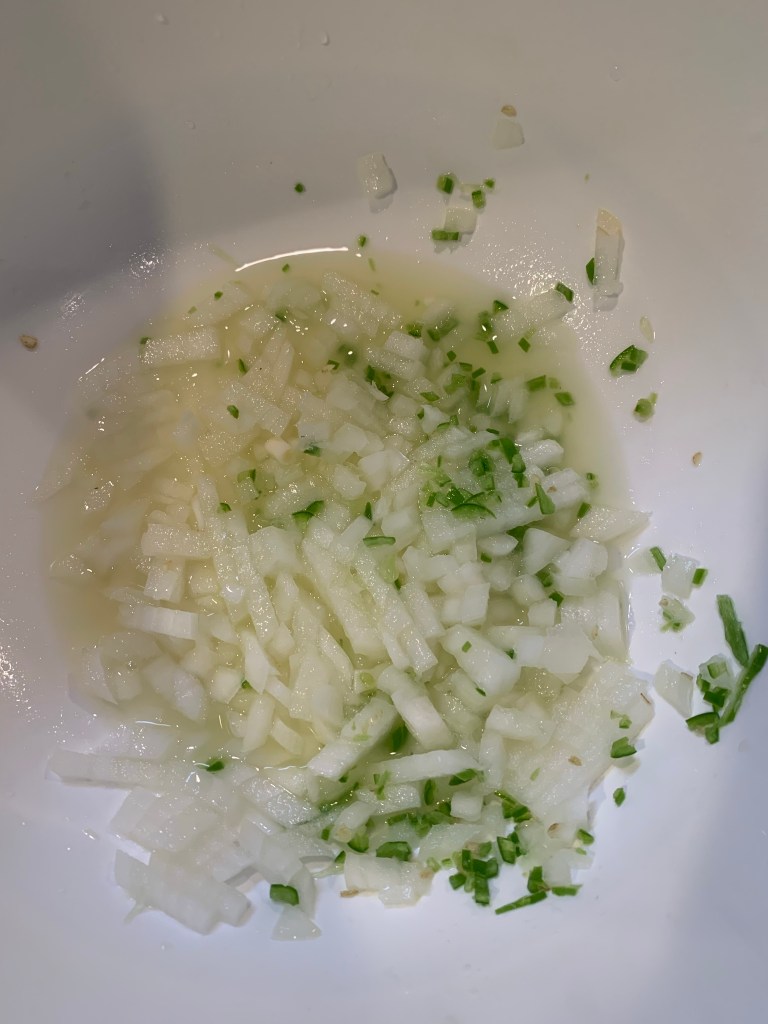
2 cucumbers chopped
1 Serrano pepper finely chopped
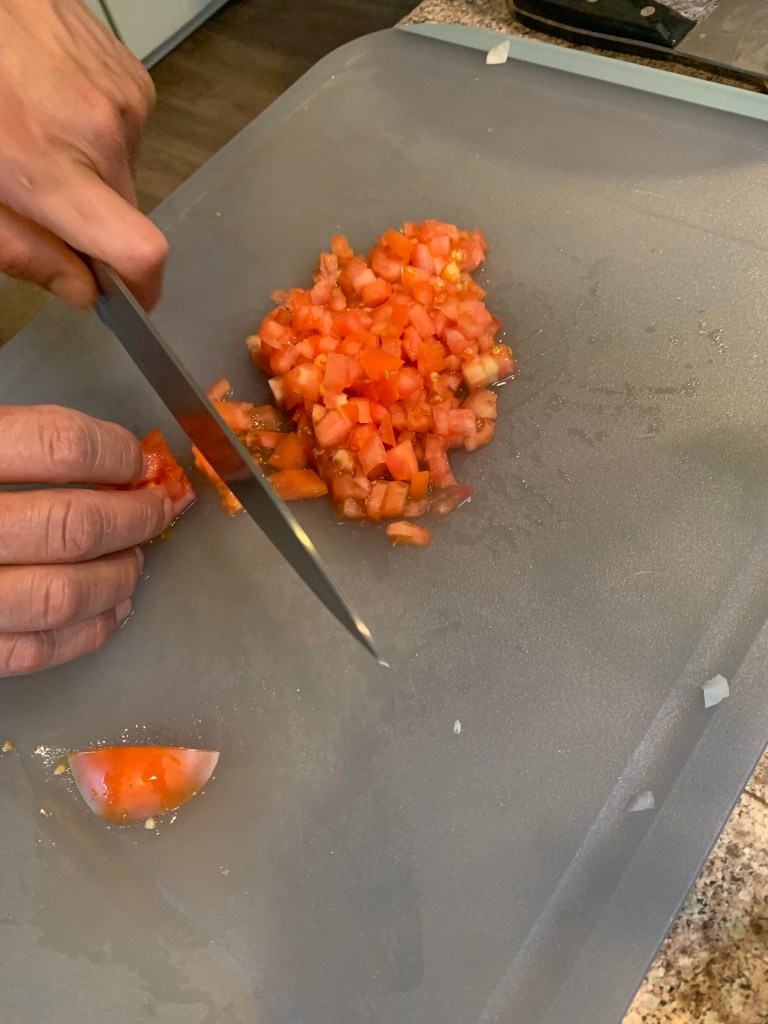
3 large tomatoes chopped
2 celery sticks (1 chopped)
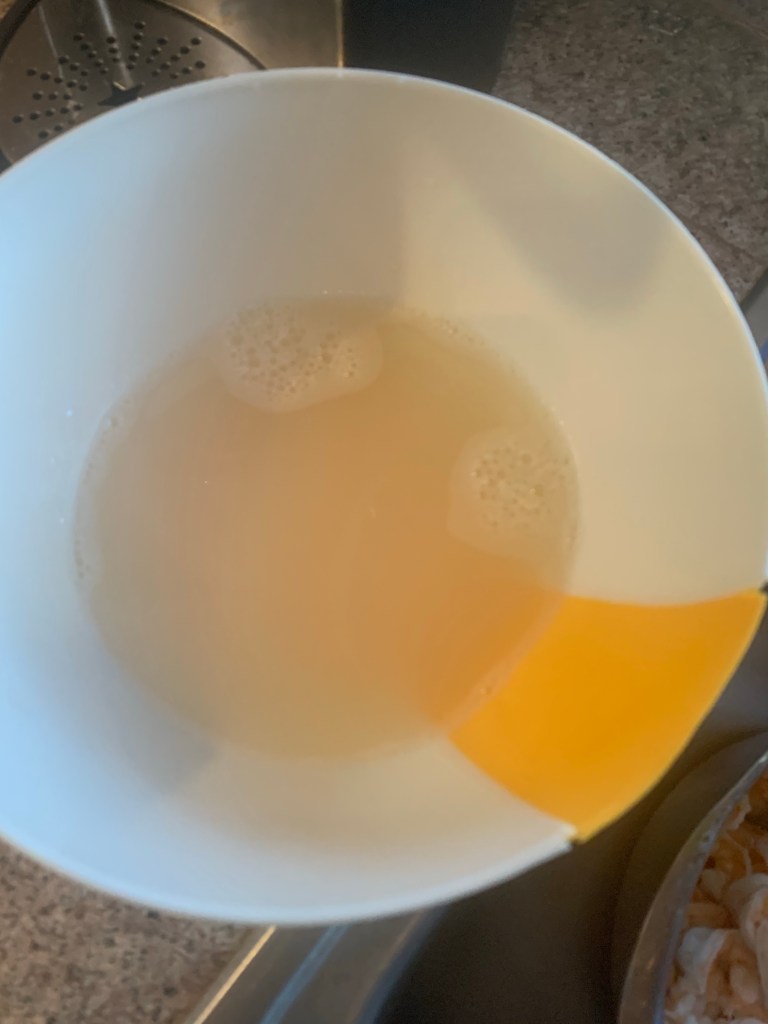
6-7 limes juiced
1 qt of calamato juice or half of a 2qt bottle
1/2 white onion finely chopped
1/4 of white onion un-chopped
1 teaspoon of pepper
3-4 teaspoons of salt
1 tablespoon of cilantro chopped
Steps:
1. First prep your veggies. Add your chopped pepper, onion, tomato, cucumber, cilantro, and celery in an extra sized large bowl. Cover and set aside in the fridge.
2. Prep your shrimp, removing the skin and devein (optional). Once the shrimp are done (can be like forever. Have someone help you!) place in a kitchen pot. Cover with water, add the 1 celery stick, 1/4 of an onion and bring to a boil, removing the foam. Boil for 1 minute. Reserve a cup of the shrimp water.
3. Remove the veggies from the fridge and add the shrimp once cooled. Then add the lime juice, Clamato, shrimp juice, salt, and mix well. Add additional salt, pepper, extra cilantro and lime juice if needed or until desired taste.
Enjoy!
Serve with tostadas or Tortillas chips. Add in hot sauce and freshly diced avocados!