1 loaf of French bread (Vienna bread is tasty with this recipe as well) cut in 1/2 inch slices
1 cup whole milk
2 tablespoons of sugar
2 teaspoons of vanilla extract
2 tablespoons of unsalted butter
4 beaten eggs
Cinnamon sugar spice, fresh fruit, and pure maple syrup for finishing – OPTIONAL (but truthfully, makes a huge difference!)
Steps:
1. Heat skillet to medium-high heat.
2. In a shallow bowl combine beaten eggs, whole milk, vanilla extract and sugar. Dip bread slices into egg mixture and allow a few moments to absorb the mixture on both sides of each slice.
3. Melt 1 tablespoon of butter on a hot skillet and begin your first batch of bread slices. 2-3 minutes on each slice of bread until golden.
4. Repeat step 3 with remaining butter and bread slices.
While warm spread softened butter on French toast. Sprinkle cinnamon sugar and serve with pure maple syrup and fresh fruit.
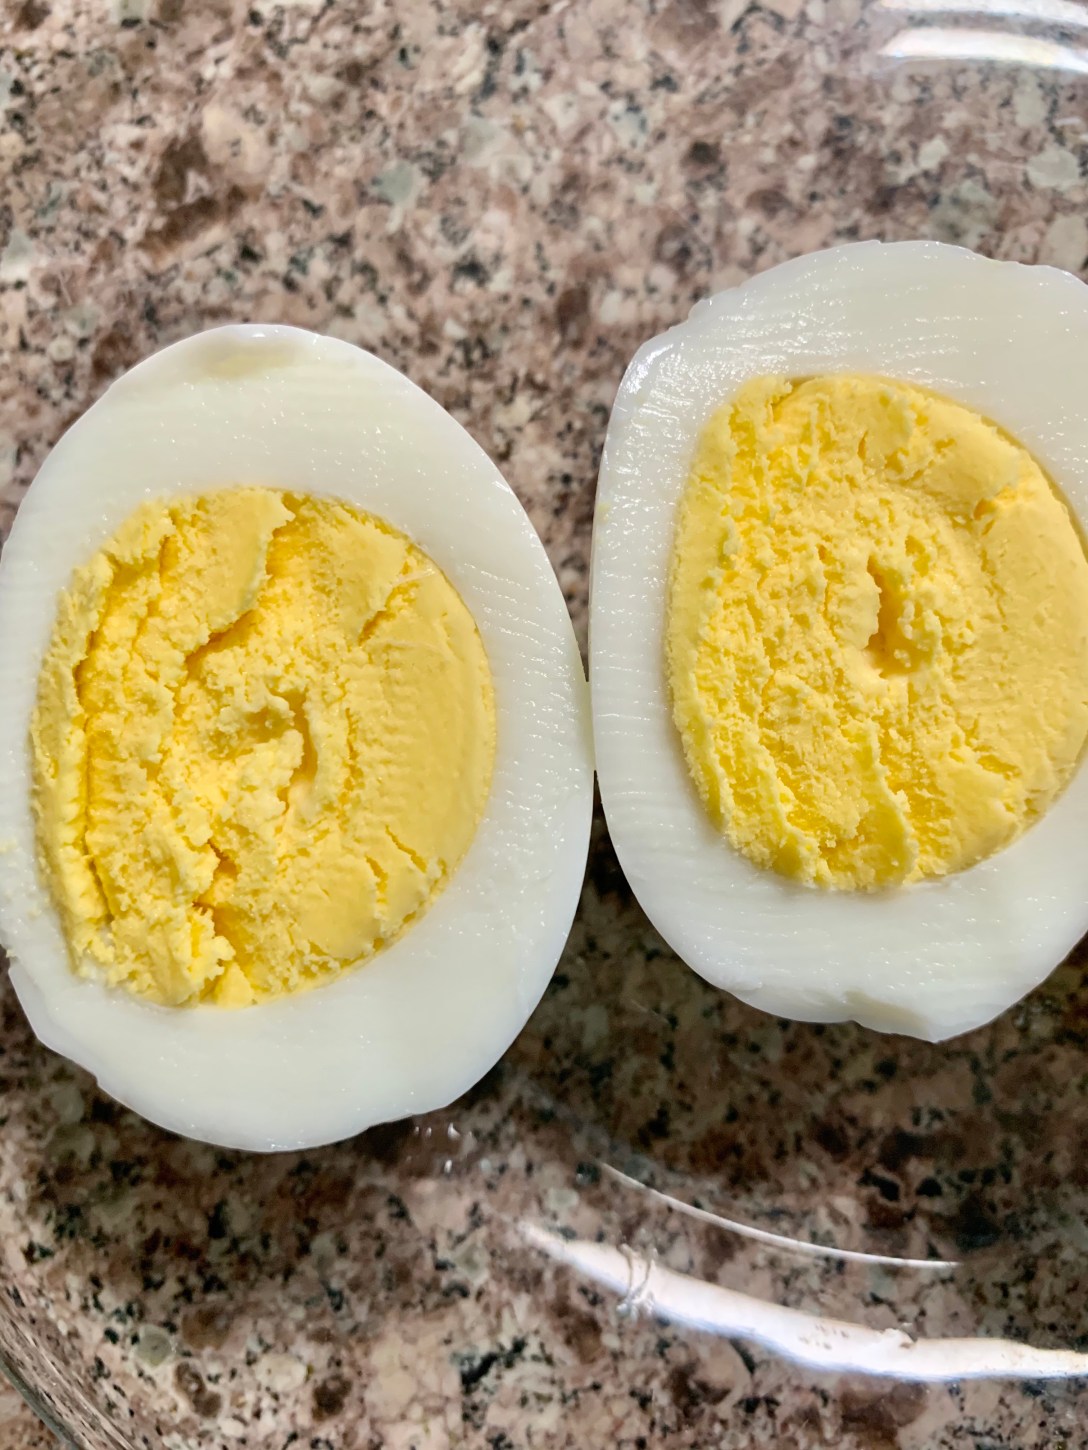
Step 1: Fill a small to medium size pot of water, then, place desired amount of eggs into water. Turn stove top to medium high (to about a 7 or 8 on stove)
Step 2: When water comes to a rolling boil, turn heat down to medium (About a 5 or 4). You want to keep the rolling boil going but you don’t want it to be an aggressive boil. Set timer for 18 minutes.
Step 3: Once the timer goes off remove pot from stove immediately and place eggs into an ice bath (a bowl of water with ice). Let sit for about 5 to 10 minutes.
After removing from ice bath, cut in half, and your eggs should look like this.
PERFECTAND DELICIOUS.
That’s it!! Place in fridge to enjoy later or eat right away.
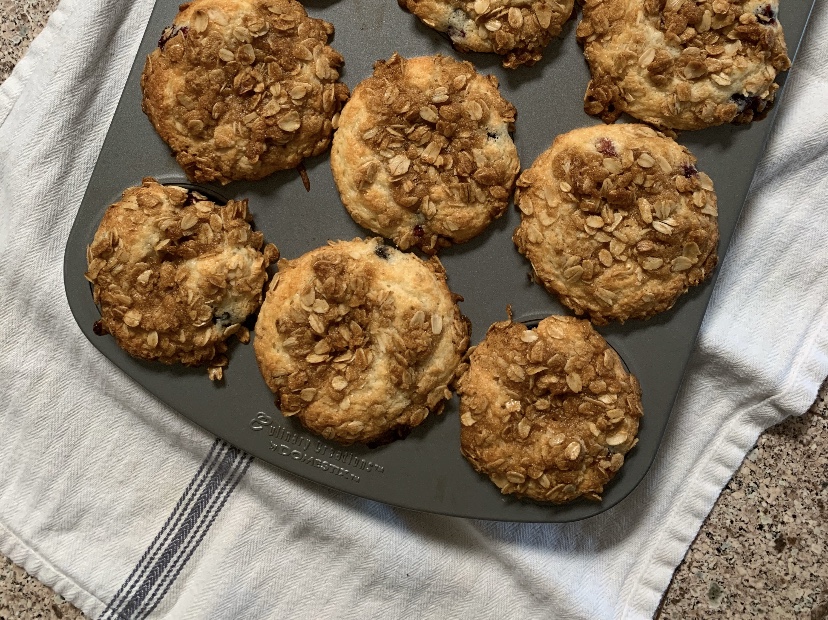
Pair this muffin with a cup of coffee or make some for your friends & family!
Blueberry Muffins With Oatmeal Streusel Topping
Oven: 400 Makes: 12 muffins Bake: 15-18 mins oven time varies
Insert toothpick and when it comes out clean then it’s complete
What You Need For Muffins:
1 3/4 cups of flour
1 1/4 cup of sugar
2 teaspoons baking powder
1 beaten egg
1/4 teaspoon salt
3/4 cup of milk
1/4 cup of vegetable oil
3/4 cup fresh blueberries
What You Need For Oatmeal Streusel Topping:
3 tablespoons of brown sugar
1/4 teaspoon of cinnamon
A dash of nutmeg (optional)
2 tablespoons of butter
3-5 tablespoons of rolled oats (if you don’t want to use oats you can use flour)
Steps For Muffins:
1. Combine flour, sugar, salt, and baking powder in large mixing bowl. In another small mixing bowl combine beaten egg, milk, and oil.
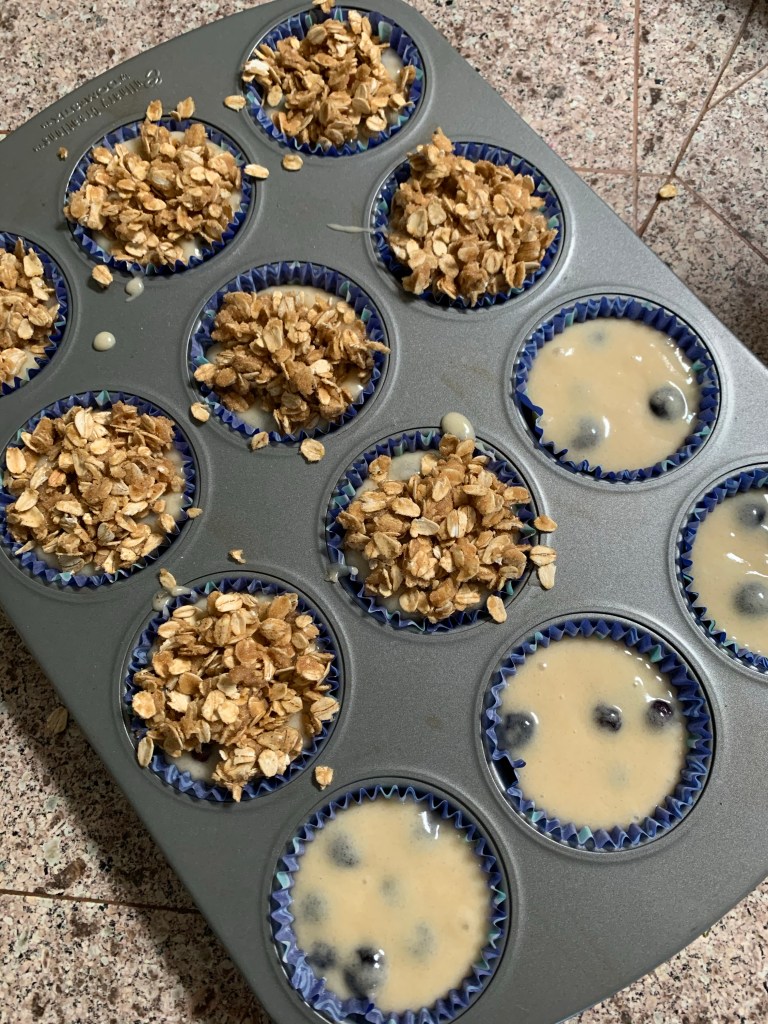
2. Make a well in the middle of the flour mixture and then add egg mixture. Mix until completely combined. Then add fresh blueberries to mixture.
3. Spoon batter into muffin tins, then sprinkle streusel topping on muffins. Bake at 400 for 15 to 18 mins.
Serve with softened butter. Absolutely delish.
Steps For Oatmeal Streusel Topping:
Combine the oatmeal, brown sugar, cinnamon and nutmeg in a small bowl. Add butter until the mixture becomes crumbly. Sprinkle onto muffins before baking.
Once you figure out how easy this is the possibilities are endless!
I’m so excited to try more flavors and to really get creative!
Let’s just get to it shall we.
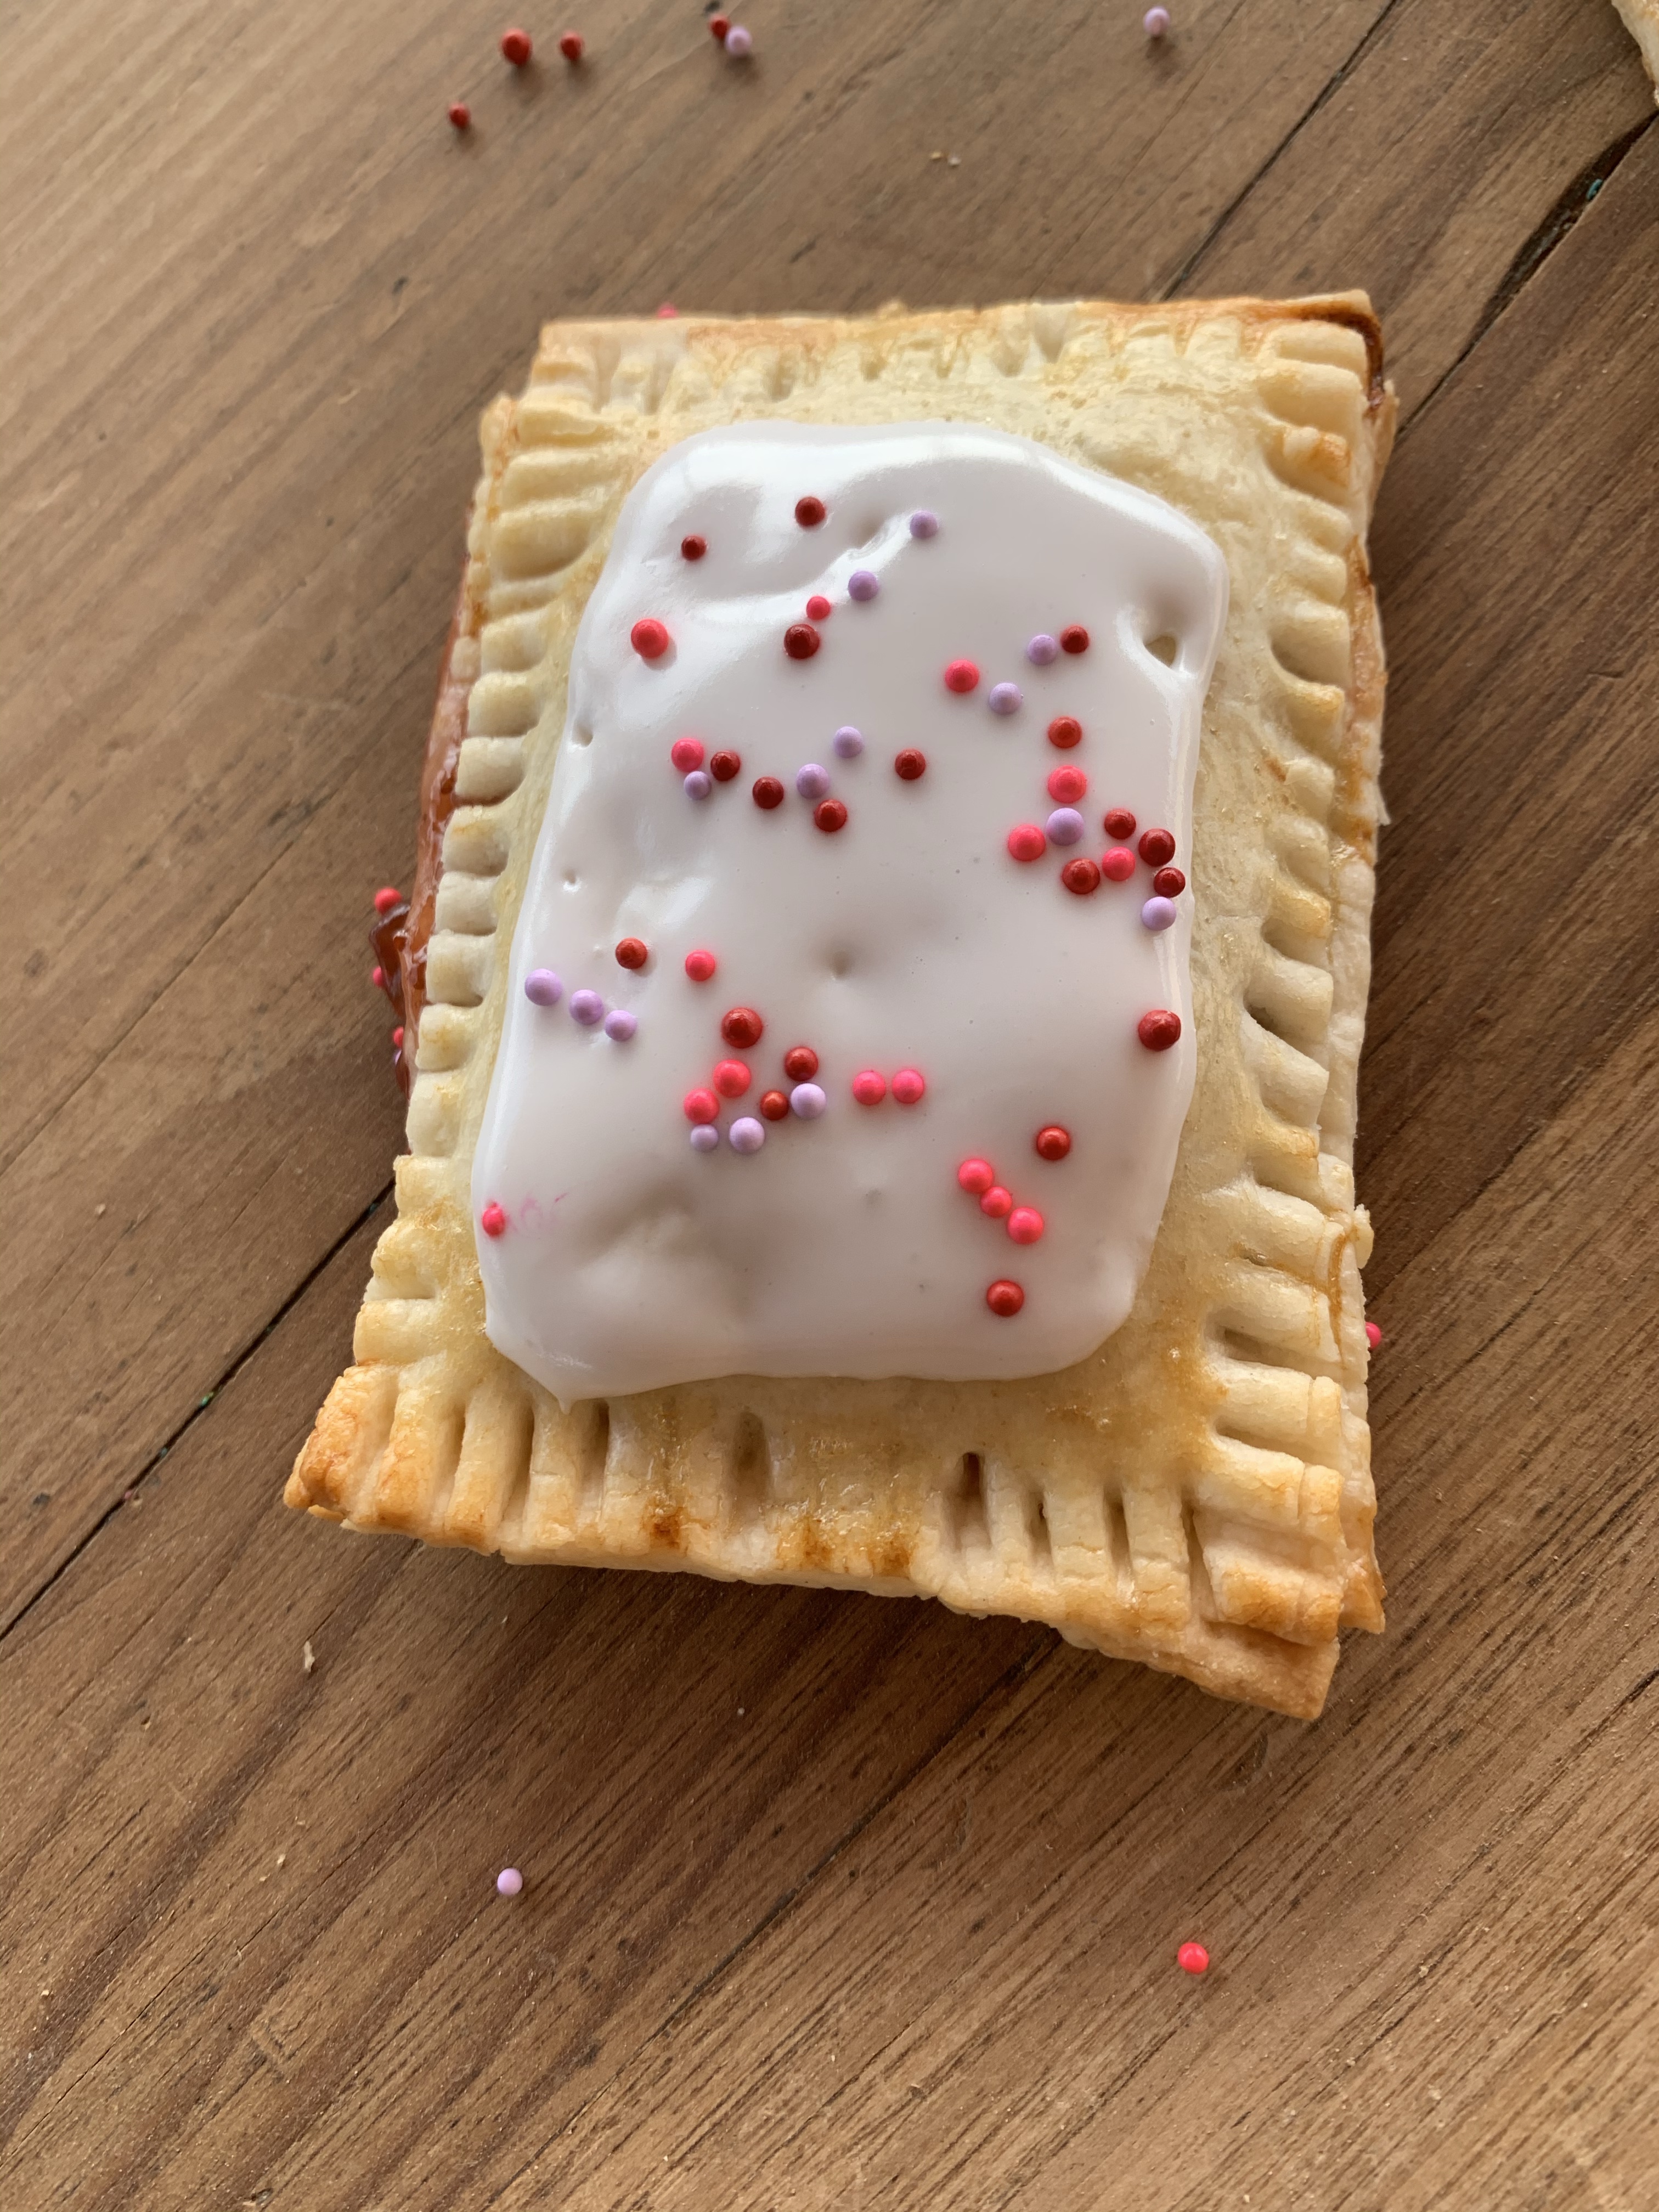
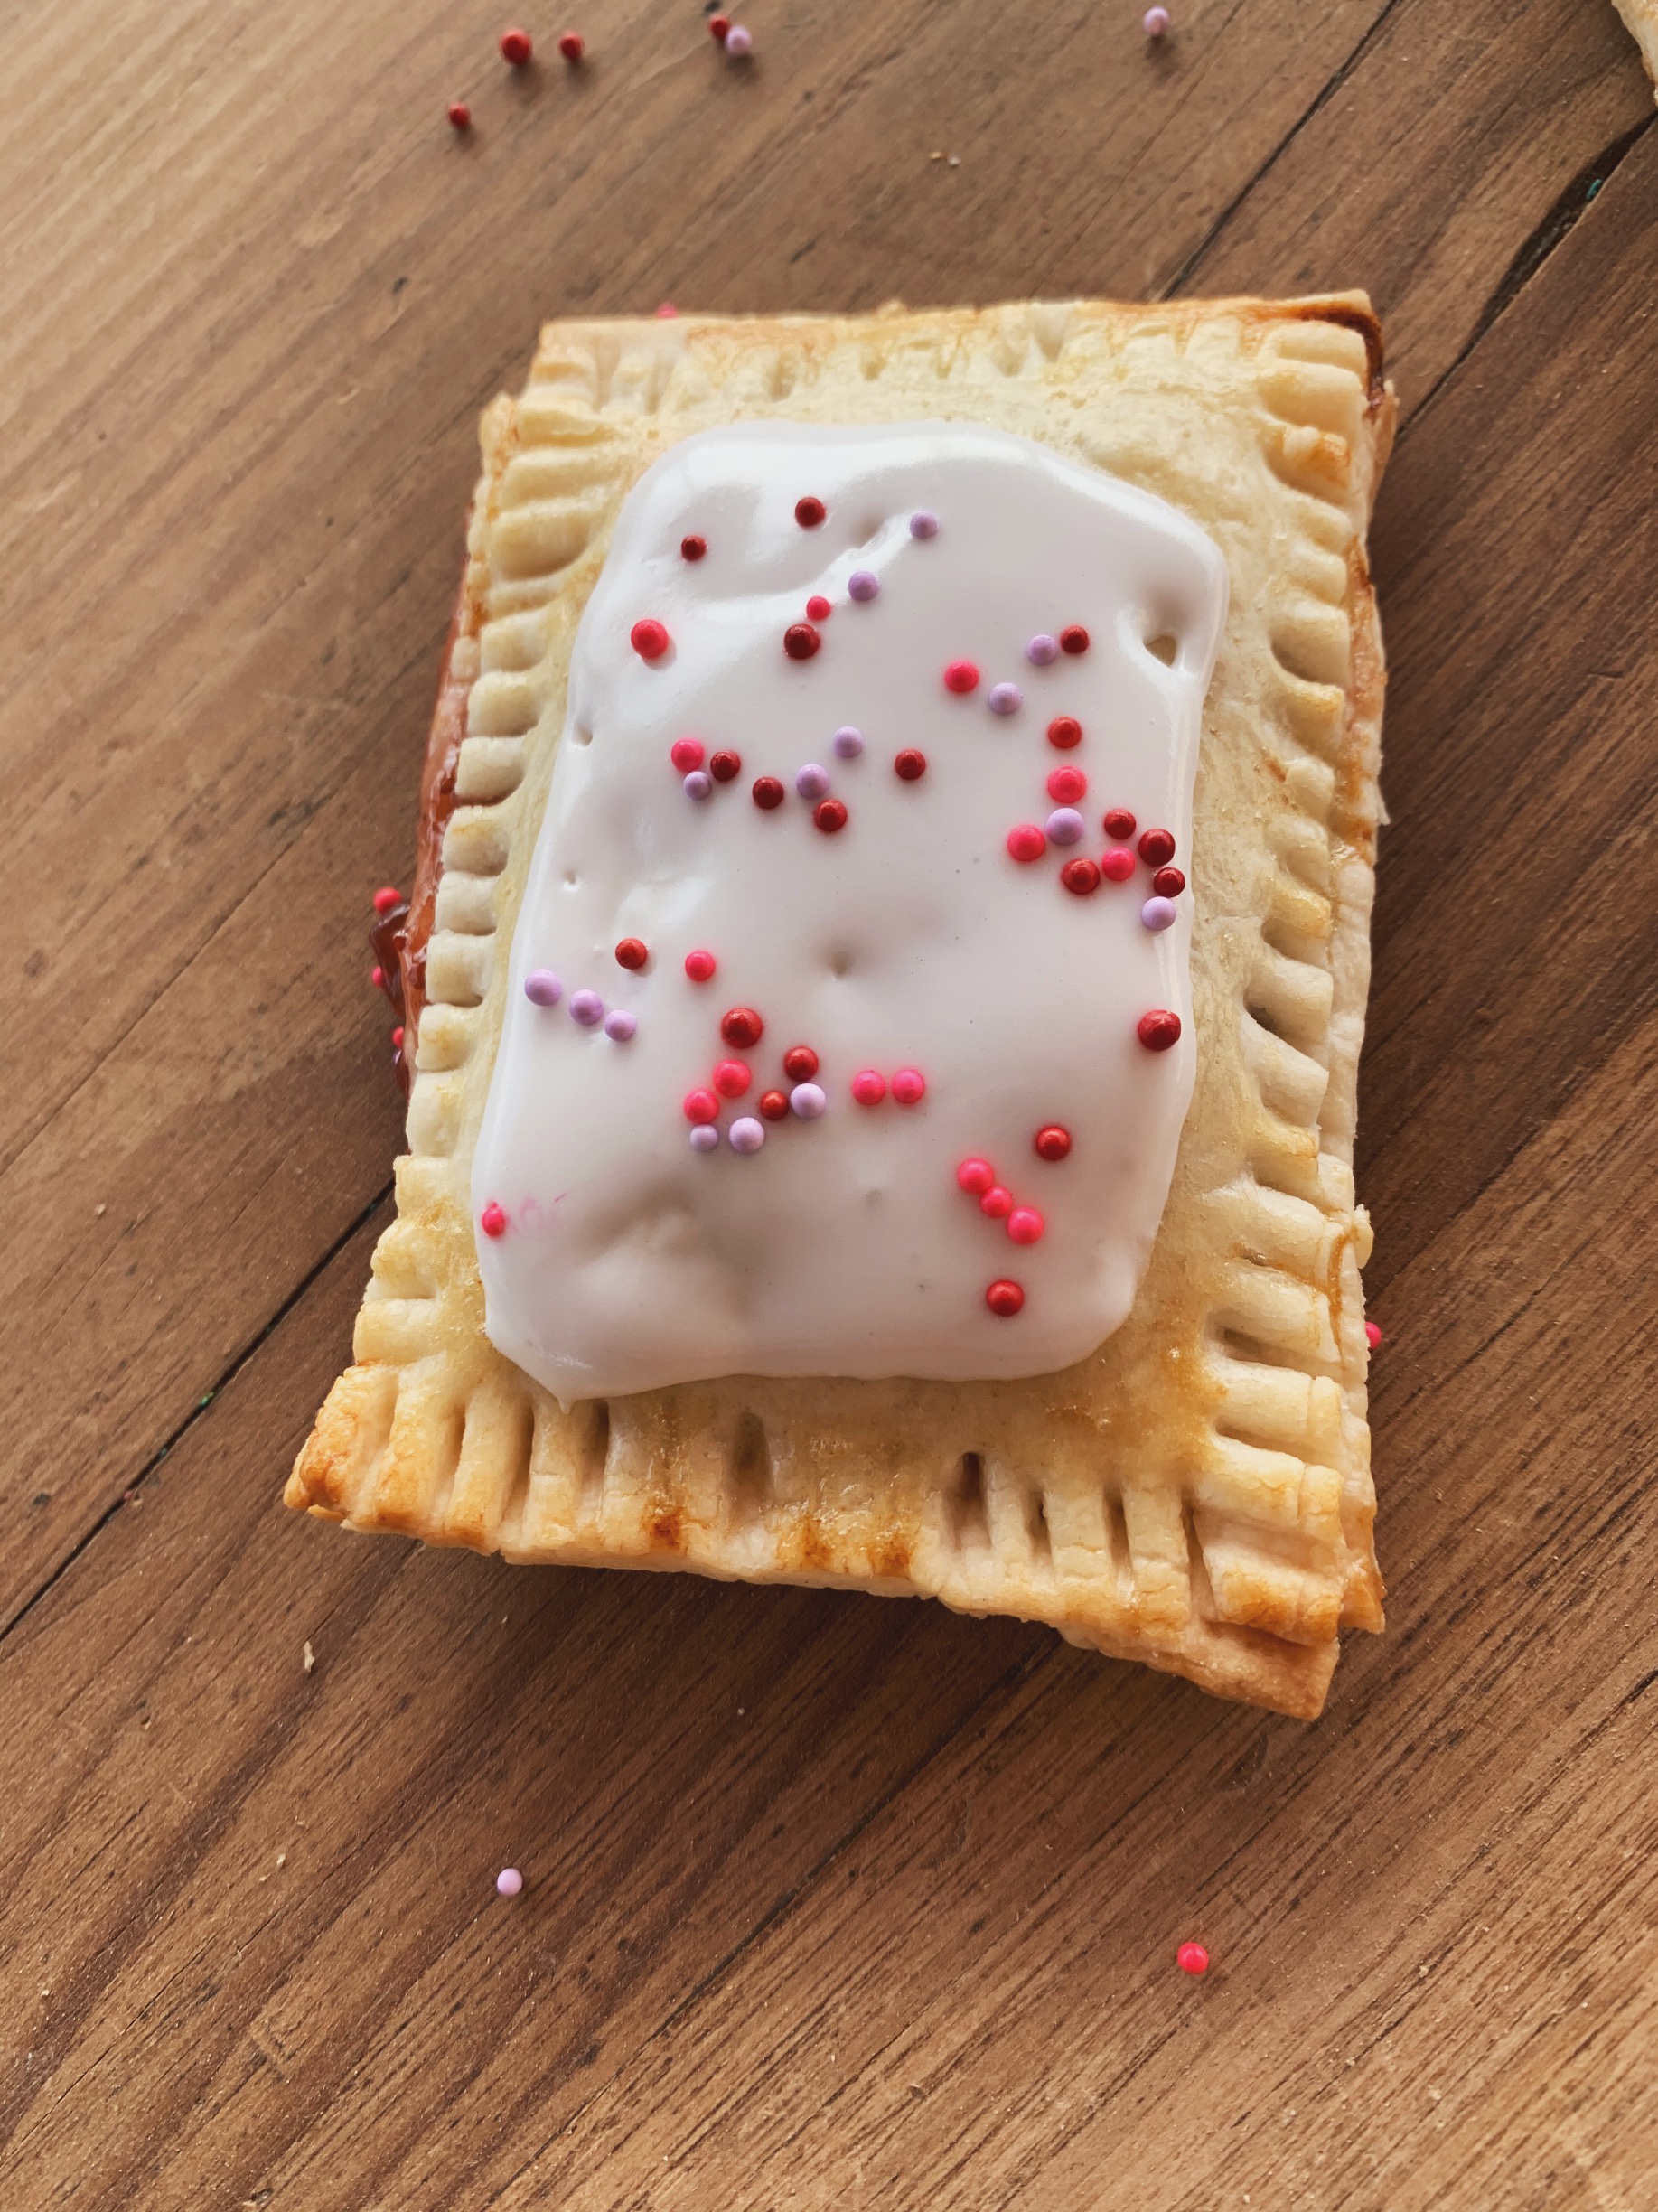
All You Need Is (for this specific pop-tart)
• premade pie crust
• smuckers natural strawberry fruit spread
• The egg white of ONE egg (all you do is brush this over the pastry before popping into the oven)
• Cookie Icing
(Sprinkles optional)
Maybe one of these days I’ll try making these with homemade dough and icing but I don’t have time! Do you!? This method of using store bought and pre-made makes this super easy, especially with your kids!
This is something fun then can make by themselves too! With adult supervision with the oven of course.
4IngredientBaked Pop-Tarts with pictures
Steps:
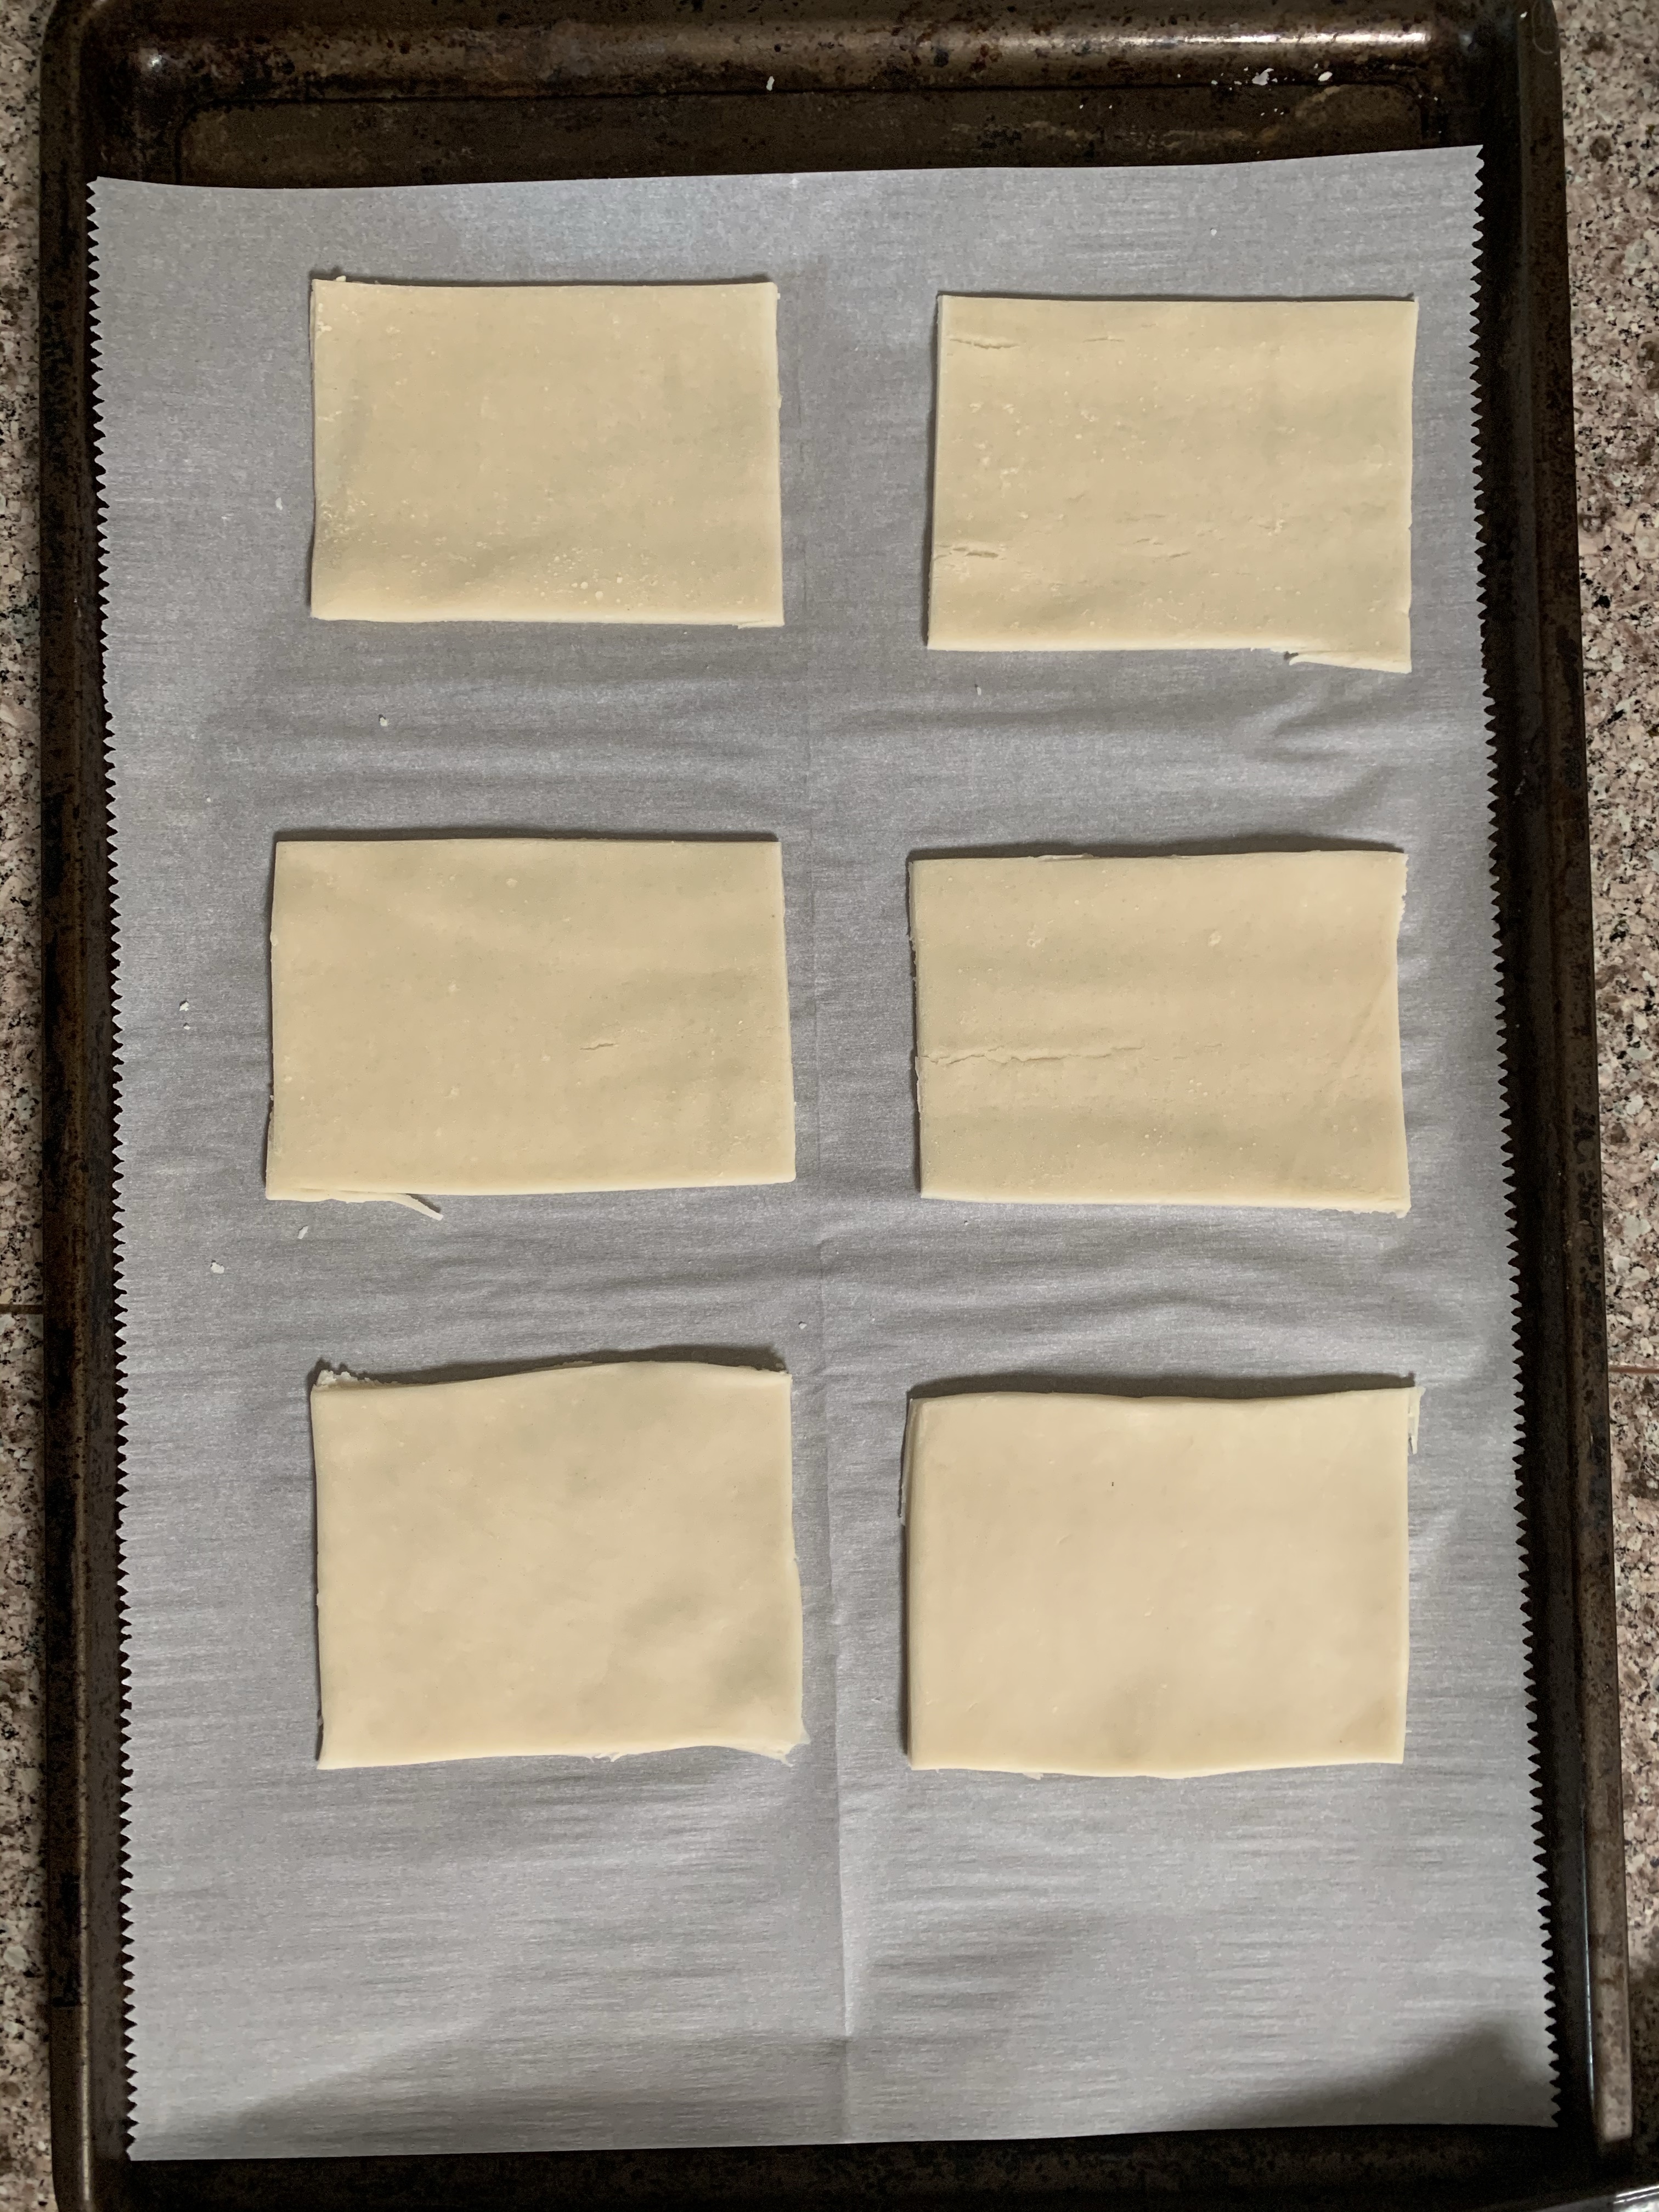
Step 1. Follow steps on the pre-made dough, on the box of dough I bought it said to roll out and let rise for 20 mins.)
– once dough is ready, cut out the size of rectangles you wantand as many as you want (doesn’t need to be perfect).
– in this picture there are 6 rectangles which will make 3 pop -tarts.
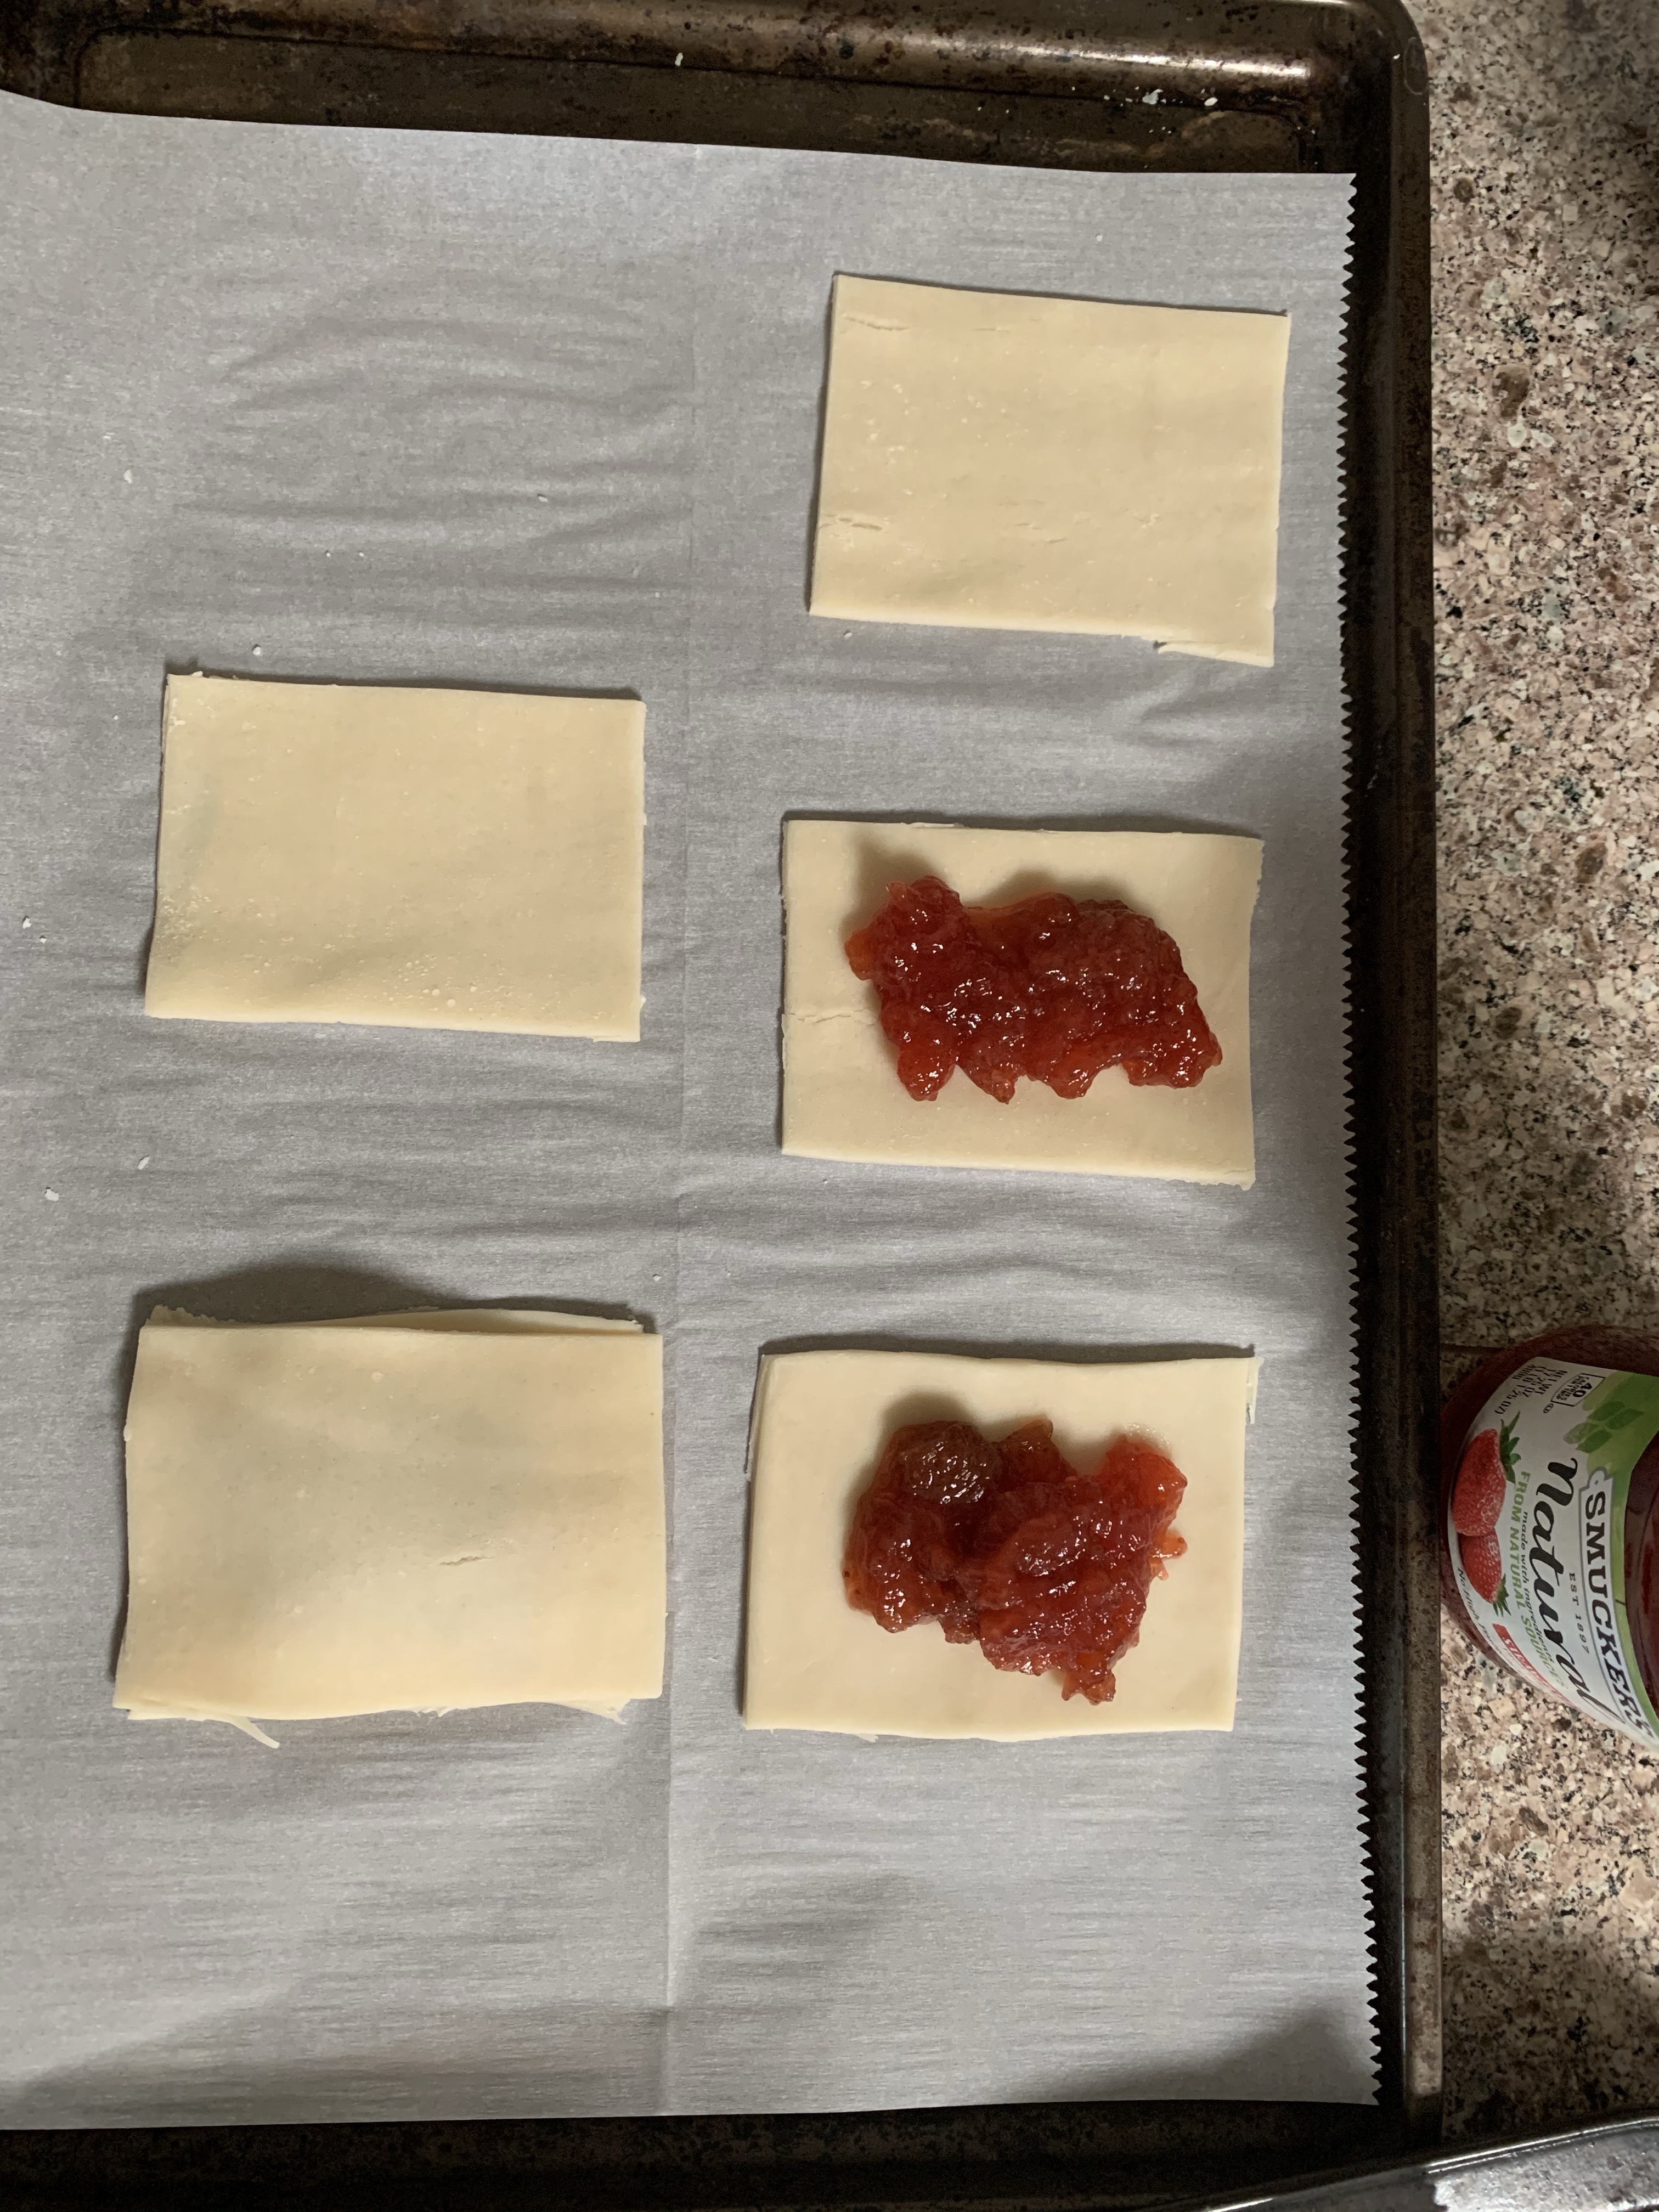
Step 2:
Put a dollop amount of strawberry spread onto the rectangles. However many you are making you want to make sure each rectangle has a plain one to go on top.
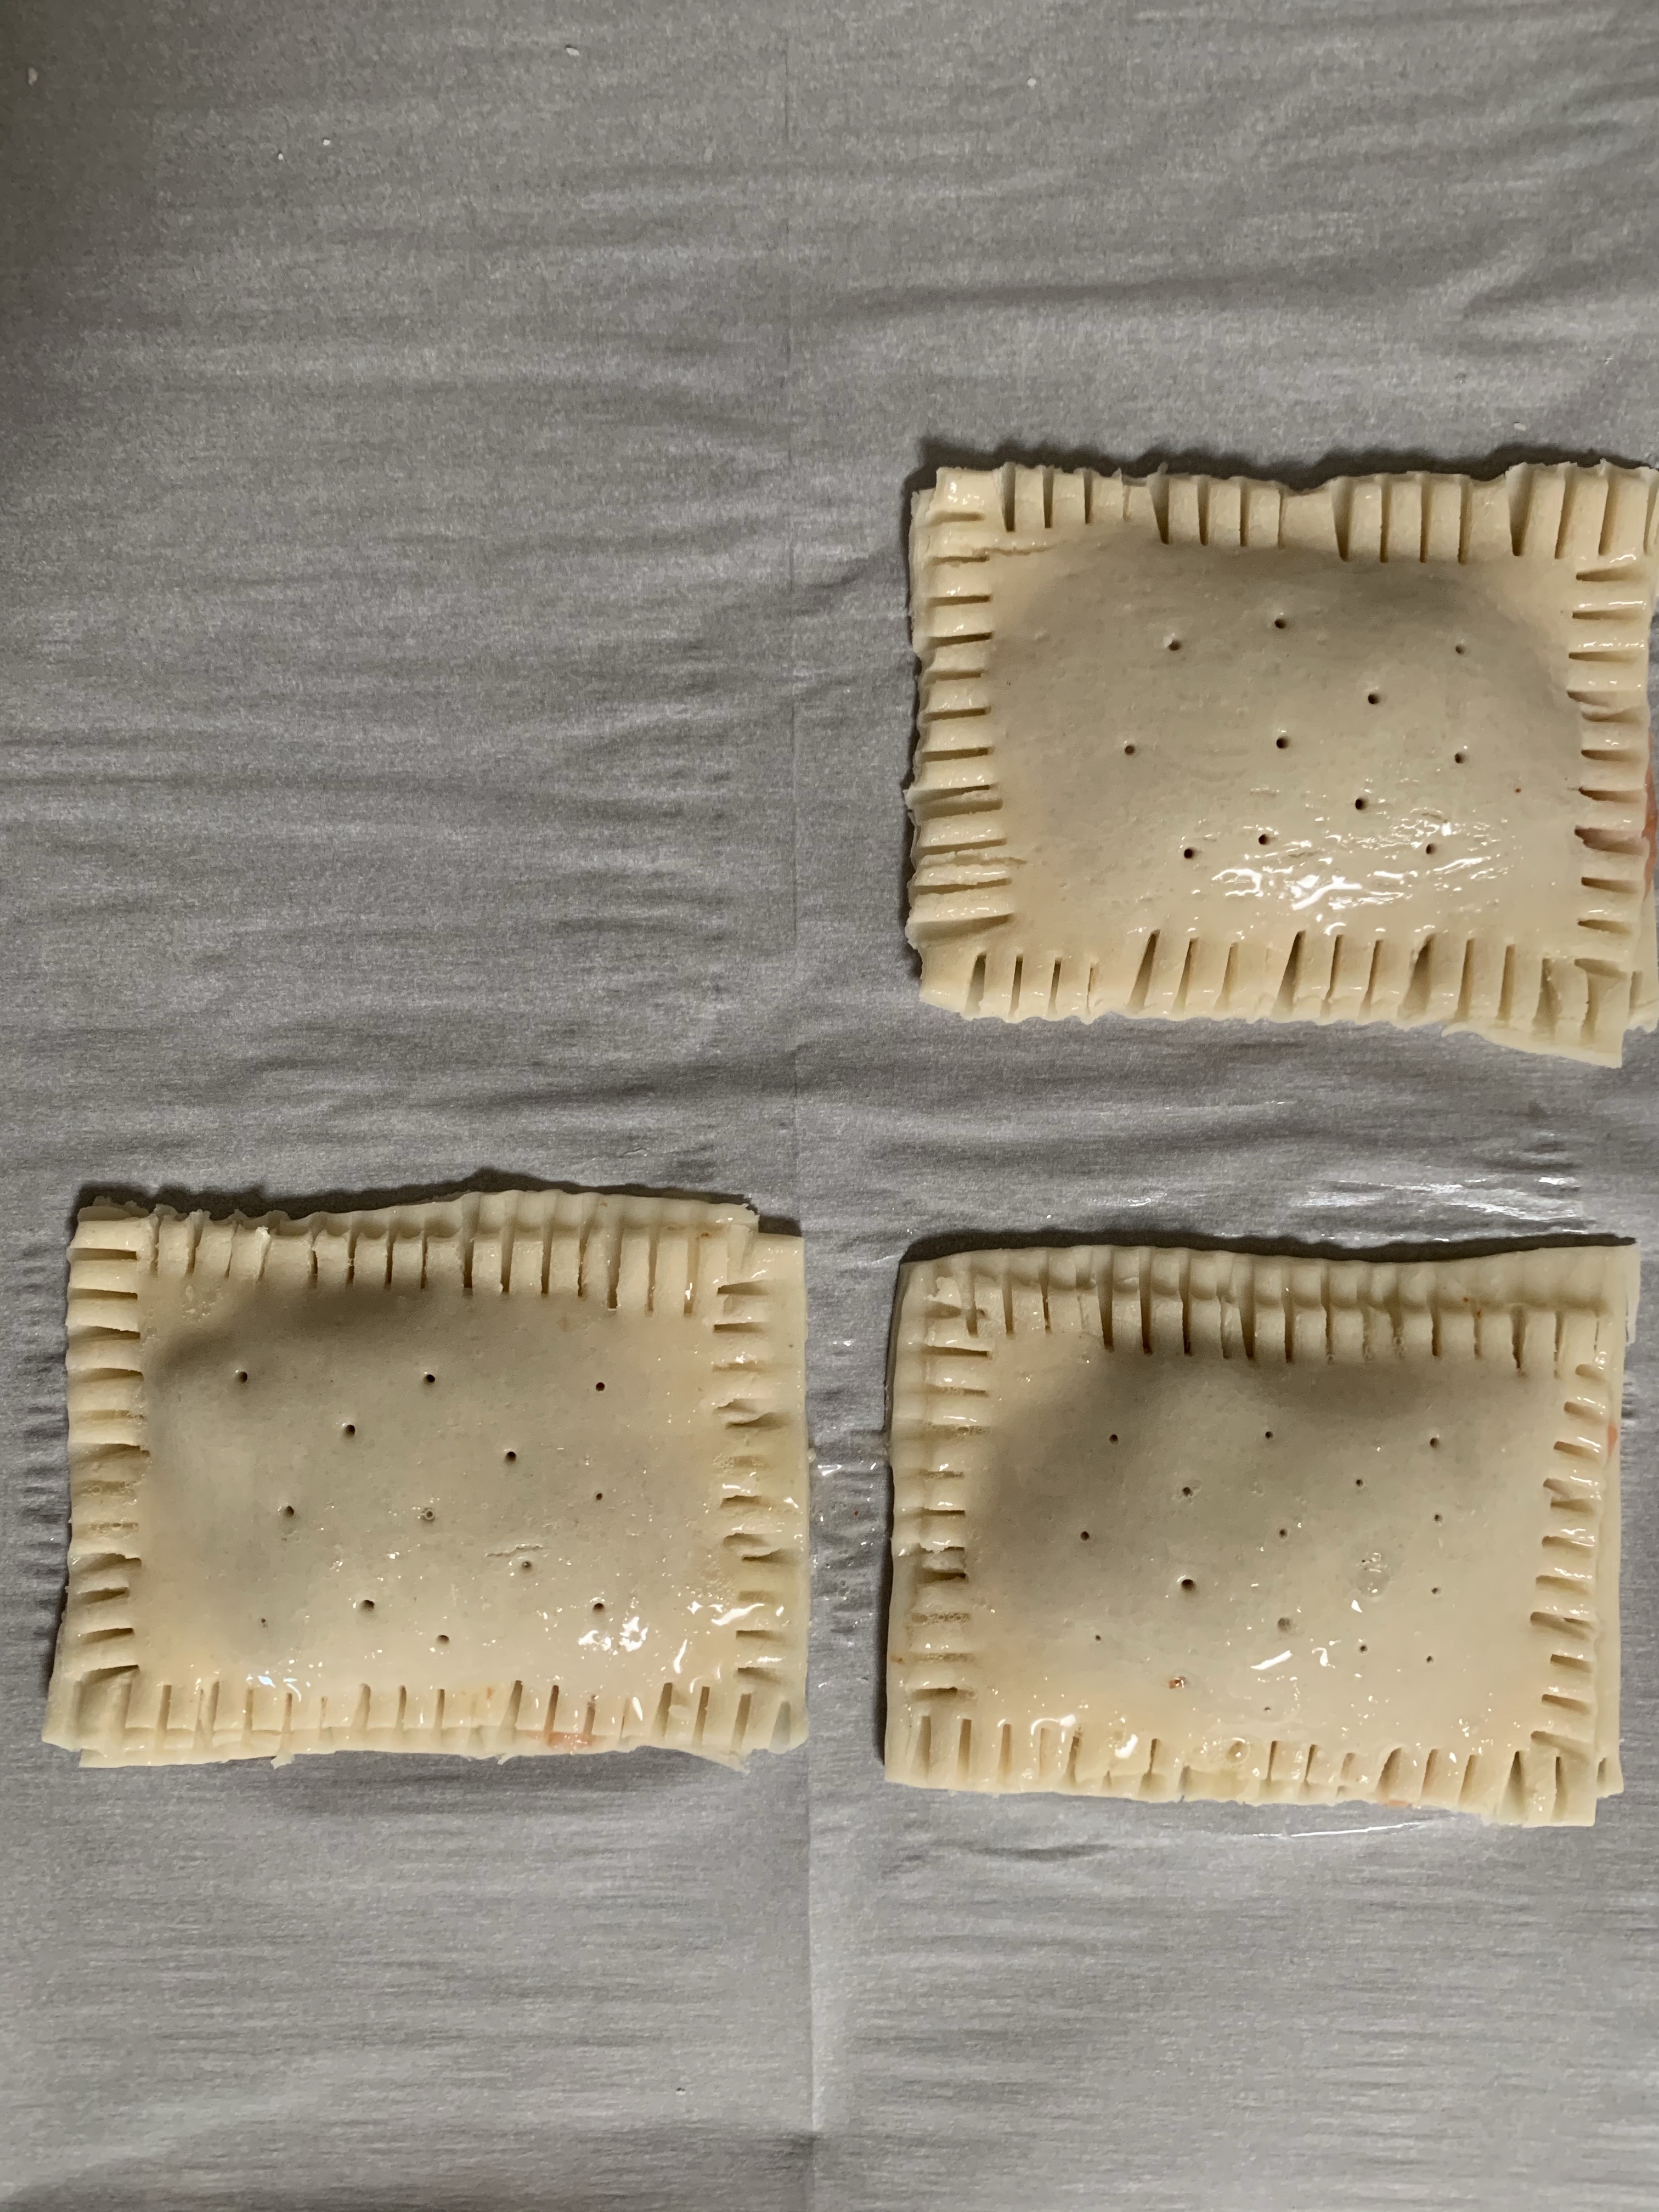
Step 3.
Place a plain rectangle of dough onto each rectangle with strawberry spread. And seal each pastry with a fork. Poke some holes on top with a toothpick.
Brush egg white wash all over the pastries. (whisk egg white a little before brushing)
(I made these with my girls so they aren’t the prettiest but I’m sure if you have time you can do a nicer job!)
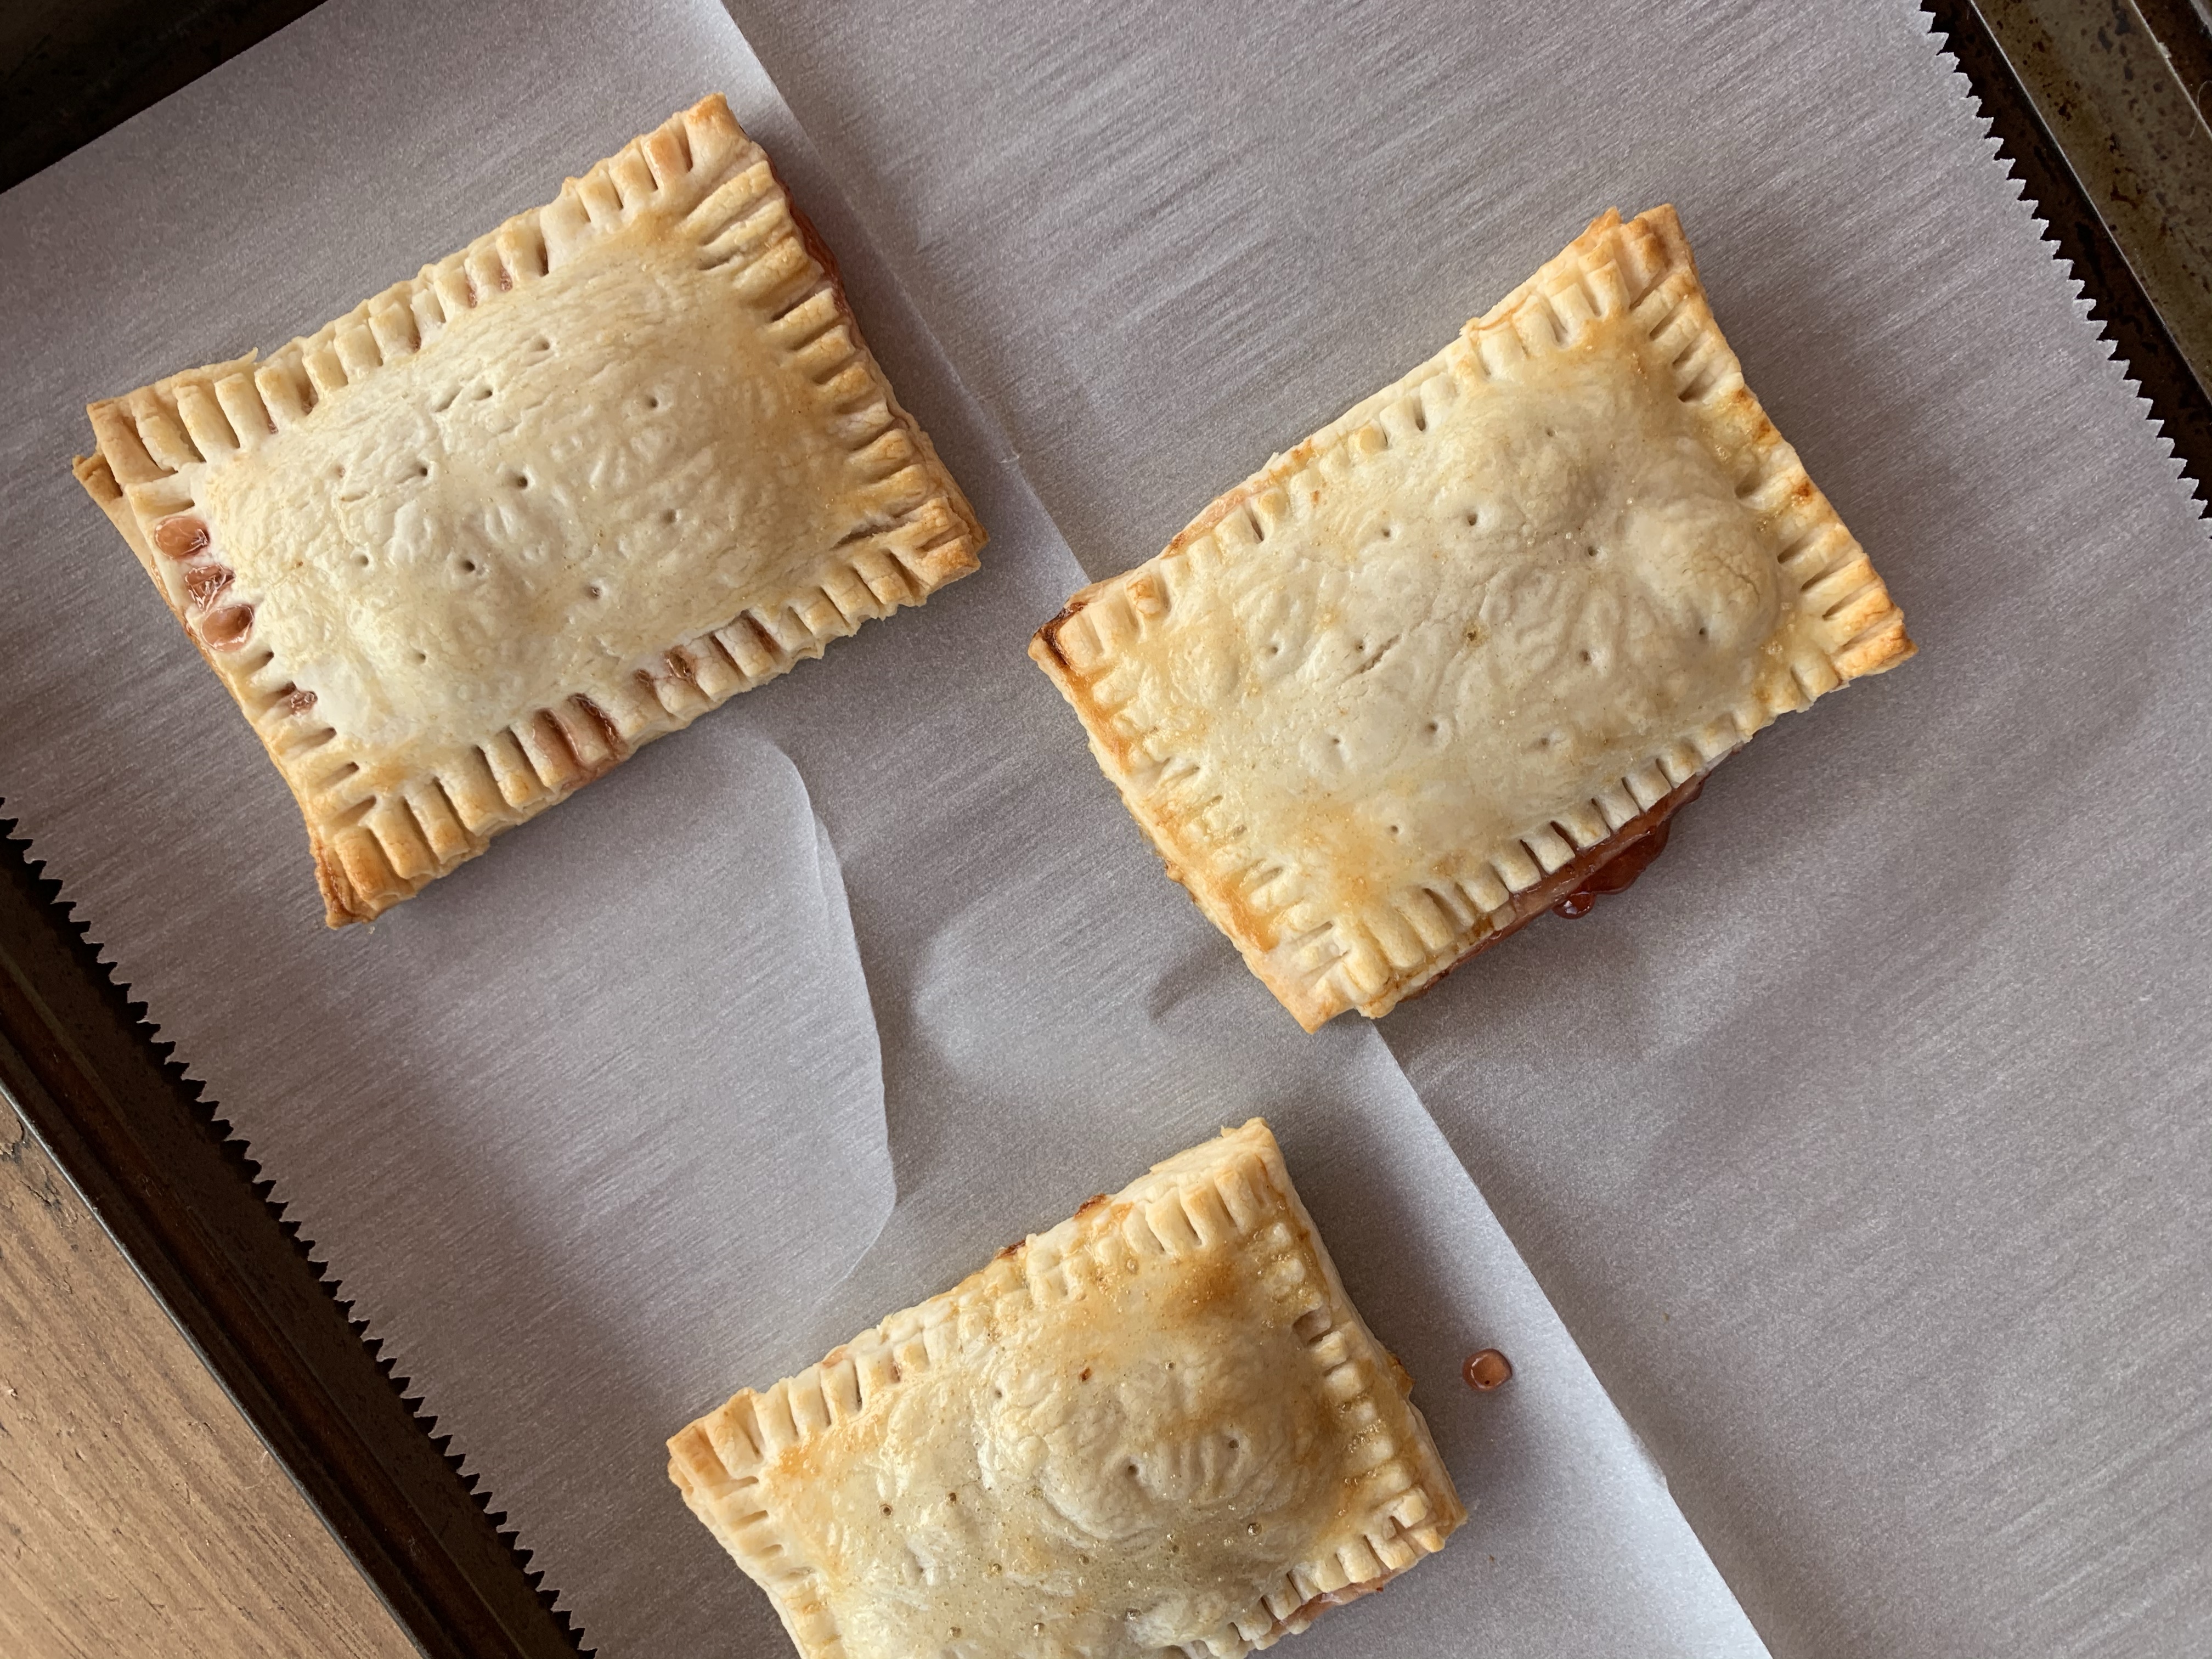
Step 5.
Bake at 400 degrees for 10 to 12 minutes (oven time may vary) allow to cool
Whatever you want in this life, I hope what I have to say can motivate or encourage you in some way.
Don’t ever stop being a dreamer.
“Set impossible goals”. I actually heard that quote on The Ellen DeGeneres Show. It was one of her greatest holiday giveaway ones.
A man had been swimming in the ocean, he did a flip, and broke his neck. Just like that, his life changed in an instant.
Life as we know is full of those kind of moments.
He was told that he may never walk again. A nurse told him something that gave him strength and determination. “Set impossible goals.”
Over time, he did learn how to walk again, he is one of the lucky few. He didn’t allow being told that he wouldn’t be able to walk again stop him or hold him back. He dreamed that impossible dream. The beautiful part of this story is he walked his wife down the aisle. And I’m willing to bet they danced too. All because he didn’t give up. All the frustration, the tears, the try after try were absolutely worth it.
(This isn’t them btw, I’m just providing a visual so you can truly try to empathize with this couple and to gain perspective. Hope it works.)
Now……
Everyone has something that they desire.What is your dream? I know you have one.
I’m willing to bet some of you reading this have never really been asked that question. Or you haven’t shared it with anyone.
I want this post to get you thinking about what you want in your life. To take a moment to identify what you seek.
When I was younger the only dream I truly desired so much was to become a mom. I’m not even kidding, that was my dream. It was a dream and it felt like a calling, I can’t really explain it. I wanted to be a mom so bad and my greatest fear was that I wouldn’t be able to have children.
When I became a mother my dream literally came true. Words cannot describe how much joy motherhood gives me. However, what’s crazy though, when I became a mom I also lost myself a bit.
Losing a bit of myself was very bizarre to me. I became something that I wanted so badly, yet, here was I not feeling completely fulfilled.
I went on a serious soul searching journey. And 3 kids later I feel the most confident, courageous, that I have ever been. And I have grown so much.
Motherhood has been the best thing to ever happen to me, because I found a different part of myself. New dreams are being born and new goals are being formed because of my first dream. My daughters inspire me. I have started dreaming ‘impossible dreams’ because of them.
I share this because I don’tever want you to feel discouraged. The feeling of reaching something but not quite feeling the way you thought you would will happen sometimes.
I saw an interview with Tom Hanks on The Today Show and he said something along the lines of, “The good things you feel from an accomplishment don’t last, and the same goes for the things that bring you down.”
I’m grateful for my dream of motherhood coming true. Greatest, hardest thing ever! This blog exist because of my girls! I have no idea where this blog will take me, but so far it’s probably helped me more then it’s helped any of you.
Trust the Timing of things. And trust your path. Each path provides some type of lesson to get you where you need to go next.
It can take time trying to figure out what you really want.
The point is, don’t give up. Keep trying, keep experiencing, keep doing! And stop being so concerned with what others think. Otherwise you’ll just become stuck and you will settle. If you only knew that just a few feet more you’d see that something greater was waiting for you.
If you’re afraid to fail in front of others, you’re going to have to suck it up. I say that in the nicest way possible.
I personally would rather keep trying new things and experiencing failure to find what really lights my spirit up, then to just settle because I’m in a content position.
You can’t be afraid of dead ends, u-turns, or any paths that lead you into a roundabout.
The pitfalls, the mistakes, the redos are going to happen and they have to happen in order for you to learn and grow and to get where you want to be.
4 THINGS TO CLOSE THIS UP
(Thanks if you read this whole thing!)
Be patient.
Don‘t forget the reasonwhy you’re doing what you are doing.
Write your goals down and work towards it everyday.
Stop limiting yourself, set yourself to be free and to express who you really are and who you want to become.
First, I just want to say this is a super easy DIY. And I don’t know why but I felt it to be kind of soothing pulling out the jean threads.
I’m weird.
Anyways, I had a pair of black jeans with a little bit of white paint on them and because of that white paint they just became dormant in my drawer.
I have no idea what prompted me to pull them out and to decide to do something with them but here we are.
(I can be very impulsive. Sometimes I’ll decide I want bangs so I grab scissors and cut.)
I cut a big hole in the blacks jeans and thought, well, this looks stupid. I better YouTube this.
And I learned how to make your own ripped jeans! Honestly, it makes sense why they charge an arm and leg for ripped jeans when you buy them. It’s really easy but it’s a bit tedious.
Let this be your craft for the month!
DIY RIPPED JEANS – All YOU NEED IS SCISSORS, A STEAK KNIFE, AND TWEEZERS
Step 1: Identify where on your jeans you want to place holes or distressed marks.
(Tip: Try on yours pants, and mark with chalk if needed.)
Step 2: (for just a distressed look) Take your steak knife and run the steak knife side to side on parts of the waste, tops of the pockets, and a few random spots on your jeans.
Step 3: To achieve the “ripped look” take your scissors and cut horizontal lines where you want the holes to be. One horizontal line on top of another.
Step 4: (this is the soothing yet tedious part. Turn on some Netflix) take your tweezers and begin pulling the vertical jean threads out, so eventually all that will be left are the white threads in the middle.
THERE IS NO WRONG WAY TO DO THIS, GET CREATIVE AND HAVE FUN WITH IT.
This simple simmer pot recipe will give you all the feels! It’s absolutely heavenly!
This scent is great for the holidays and for your soul. It’s super easy and once you try it I bet you’ll be anxious to get creative with other simmer pot scents!
Get to it! It’s so easy!
Simmer Pot Scents – Orange Peel, Spice, And Peppermint
What You Need:
2 1/2 cups of water
1/2 tsp cinnamon
1/2 tsp nutmeg
2-3 drops of peppermint oil (optional)
Steps:
1. Pour water into a pot, bring to a boil, add ingredients.
2. Next, allow the aroma of this sweet scent to fill your home!
(May need to add water depending on how long you let this yummy smelling combination simmer)
I truly enjoy having a clean and tidy home. Who doesn’t right? It feels good when you’re home is nice and clean.
Now, is my house spotless? Absolutely not! I have kids for crying out loud. I have one child that can make a mess with a single almond, I’m not even kidding. How she does it, I have no idea.
But for the most part I would say our house is pretty tidy most days, considering. I take pride in that most days my house is pretty nice and tidy. Especially with having toddlers running around….. that don’t listen….. and touch everything with their dirty little hands. And I’m sorry but I know you hear little toddler boys are dirty but so are little girls. Believe me.
Let’s just say I wouldn’t be scrambling if an unexpected guest were to arrive and that makes me happy.
Mess causes stress. It really truly does. Your living environment plays a huge role in your life and mood whether you choose to believe it or not.
When I was pregnant with my third child I knew I was going to need to get more organized and become more structured with our home life. And I did, and I’m so happy I did! I don’t worry about spending anymore time asking myself how did it get like this and I am going to share my practices with you all!
I’ve learned that if I can just get into some good habits and maintain what I know needs to be done then I won’t spend so much time playing catch up. Only took 3 kids, but hey, you live and learn.
Keep Your Home Always Tidy By Developing These 9 Practices
Practice Number 1. Downsize And Sort Through Your Belongings Monthly
If in general you spend a lot of time organizing, sorting, or even looking for things, then, that’s a sign you might want to downsize and possibly get rid of some stuff. As Marie Kondo would suggest, if it doesn’t give you joy, get rid of it. Many of us possess so much and so much of that stuff we don’t absolutely need. Many of us also hold on to things for just in case. All it really does is add clutter and eventually other things get mixed in with it and before you know it your closet or garage or whatever is full of STUFF.
Downsize and ret rid of stuff! Have a garage sale or donate.
Practice Number 2: Create A Cleaning Schedule
Create a cleaning schedule and just do your best to stick to it. Some days may be missed, or you may have to push back one thing or another, and that’s ok. The idea is having a schedule, writing it down, and then doing your best to hold you and whoever else accountable.
Write down everything, and I mean everything that needs to be done around the house. Daily, weekly, monthly….start with that.
Practice Number 3: Train Your Kids To Clean After Themselves
Kids are capable of cleaning up after themselves. It may not be to your standards but that’s ok! If you’re constantly cleaning up after your kids they will always expect that. Have them put toys away when they are done playing, tell them their cups or bowls go in the sink when done, encourage them or invite them to help with chores such as putting the dishes away or doing laundry.
Make it a fun game or create incentives for them! However l wouldn’t always give them a reward for cleaning up. Then they will always expect a reward. Teaching them to clean up after themselves will develop good habits for the long run. At least I hope so!
Practice Number 4: Create A Chores List
Having a schedule is one thing but then it’s time to figure out who does what. It’s not fair to have one person doing everything around the house. Figure out who’s doing what so everyone can be held accountable for their tasks. When people know what duties they have there’s no guessing on what they need to do.
Practice Number 5: Do Dishes After Every Meal
Once you’re done with the dishes try to avoid putting them in the sink and saving them for later. Just load it in the dishwasher right away or wash it right then and there. You will be so happy if you can get in this habit. Encourage the rest of the family too to put their dishes in the dish washer. It saves time and avoids a sink and counter full of dirty dishes that you are dreading to do.
Practice Number 6: Fold The Laundry Right After It’s Done
If you can’t fold the clothes immediately after they are washed then do your best to fold them the same day you washed them. Throwing them on the bed or couch and letting the pile build up puts you in a bad mood and then now you’re spending what feels like wasted time folding all these clothes you’ve been avoiding.
Practice Number 7: Tidy Up Wherever You Go
If you’re in a room and see things out of place just tidy up real fast. It’s that easy! When we start telling ourselves we’ll get to it later before you know the whole house is upside down and you’re wondering what happen. Give yourself ten minutes multiple times during the day to do a quick tidy up. You’ll be surprised how much you can get done in ten minutes when comes to a quick clean up.
Practice Number 8: When You See Something That Needs To Be Done Around The House, Write it down
On your cleaning schedule include a time for “House To-Do List”. Whenever you notice something write it down on a to do list. I make a note in my notes app on my phone. These are things that you notice while doing something. Examples would be like cleaning the micro wave, noticing some spots on the walls that need to be wiped, looking up and seeing dust on the fans, wiping the baseboards, sweeping the porch, cleaning the front door, you get the idea. Then, on your cleaning schedule include time for “House To-Do List” (pick 2 or 3 things from the list to take on) and continue this daily or weekly on your schedule.
Practice Number 9: Put It Away Once You’re Done With It
Whatever you’re working on, doing, making, etc, put it away when you’re done with it. Way easier said then done, I KNOW. But do your best to not just place it on the counter, throw it on the floor, lay it on the bed, or better yet, leave it there. Put whatever it is in it’s place and just be done with it. This habit is one of the best ones to establish and to encourage amongst other family members!
There are my 9 practices for maintaining a nice and tidy home!
I know it can be very stressful and overwhelming with toys all over the house, the sink full of dishes, a couch full of clean clothes that need to be folded, dog poop that needs to be picked up, floors that need to be cleaned…..ETC. It’s a lot! I really hope these tips can help you and you will start implementing into your life and daily routine! I know it will be worth it!
Life does get busy. However taking the time to create a game-plan will benefit you and the rest of your family. Plus these tips I have shared will give you back more time with your family and isn’t that what you really want?


 Easy, yummy, and quick!